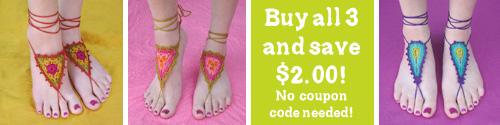
Sand Dollar Bikini Top Free Crochet Pattern
I’ve been teasing you guys with this pattern for months! It’s about time I finally post it, right?! :) I made several of these while I experimented and tried to make them fit well and I’m so happy with the result and so happy to finally be sharing this pattern with you! I really hope you have fun with it and I look forward to seeing what everyone does with it!
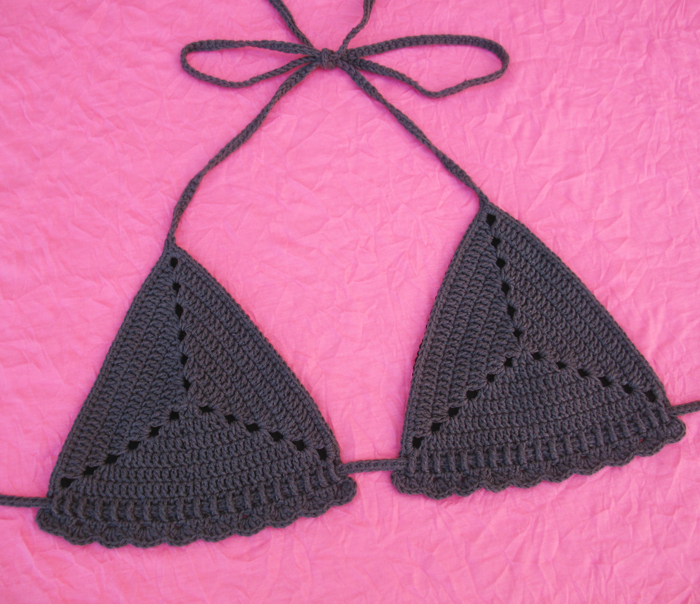
This pattern includes sizes extra small through extra large and is intended for DK weight yarn. Choose from a fringe bottom option or a ruffle bottom option. The top will need to be lined so some basic hand sewing skills are necessary.
You can easily modify the pattern to use any weight of yarn if you don’t want to use DK. See the help section at the end of the pattern for advice on using other yarns.
Finished Sizes
*Measurements below do not include fringe or ruffle bottom. Straps can be made any length.
Extra Small: Each cup is 5 inches wide & tall.
Small: Each cup is 6 inches wide & tall.
Medium: Each cup is 7 inches wide & tall.
Large: Each cup is 8 inches wide & tall.
Extra Large: Each cup is 9 inches wide & tall.
Difficulty Level: Advanced Beginner

You are welcome and encouraged to sell any items you make using this pattern! All I ask in return is that when selling online, please credit Julie King / Gleeful Things & provide a link to www.gleefulthings.com.
You may NOT sell the pattern, distribute it in any form, repost it online, or alter it to claim it as your own (this includes charts & translations to other languages). Copyright © 2014 Julie King / Gleeful Things. All Rights Reserved.

● Size D (3mm) crochet hook or size needed to obtain gauge.
● Yarn needle for finishing
● DK weight yarn. Yardage depends on size.
● Small amount of fabric for lining. Spandex swim fabric recommended. Anything stretchy will work though.
● Basic sewing supplies
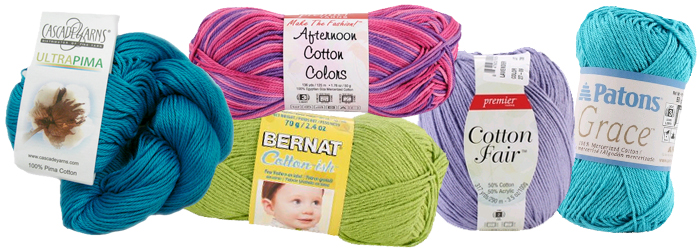
Suggested Yarns: Bernat Vickie Howell Cotton-ish, Premier Afternoon Cotton Colors, Patons Grace, Premier Cotton Fair, Cascade Ultra Pima
Yarn used in examples: Bernat Vickie Howell Cotton-ish in Cotton Ball, Gun Powder, Royal Denim and Cotton Candy

● Invisible Join – Here is a video tutorial: http://www.youtube.com/watch?v=bsHggQGFq3A

sc – single crochet
dc – double crochet
trc – triple/treble crochet
ch – chain
sl st – slip stitch
rep – repeat
rnd – round
ea – each
sp – space
FO – finish off

This pattern is worked in joined rounds. Join at the end of each round as the pattern says.
Gauge is important so be sure to check it! If your gauge is off, your top will come out larger or smaller than intended.
Gauge: 6 dc = 1 inch
* * * This pattern uses DK weight yarn. If you want to use worsted or something else, be sure to read the help section at the bottom of this post.
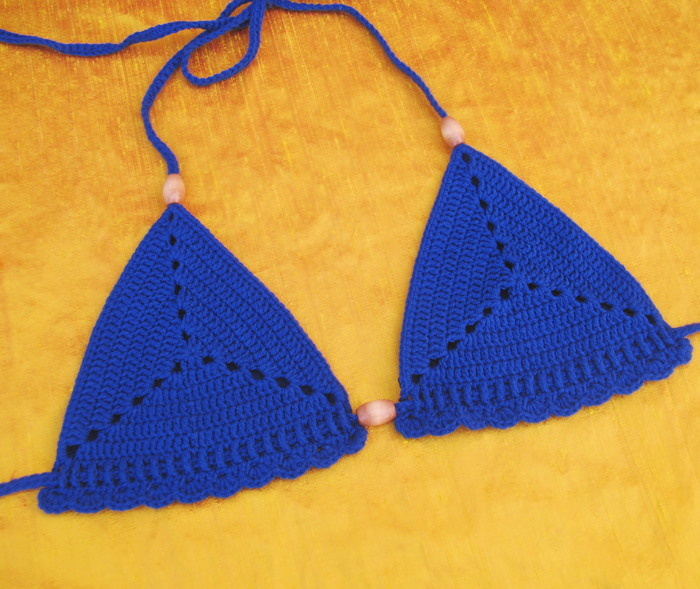
 (make 2)
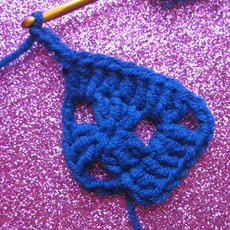
rnd 1: ch 3 (counts as 1 dc). 2 dc in 3rd ch from hook. [ch 3. 3 dc in original ch.] rep once. ch 3. sl st to join. (9 dc)
rnd 2: ch 3 (counts as 1 dc). 1 dc in ea of the next 2 sts. 3 dc in ch sp. ch 3. 3 dc in ch sp. [1 dc in ea of the next 3 sts. 3 dc in ch sp. ch 3. 3 dc in ch sp.] rep once. sl st to join. (27 dc)
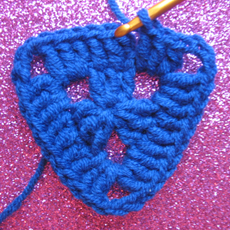
rnd 3: ch 3 (counts as 1 dc). 1 dc in ea of the next 5 sts. 3 dc in ch sp. ch 3. 3 dc in ch sp. [1 dc in ea of the next 9 sts. 3 dc in ch sp. ch 3. 3 dc in ch sp.] rep once. 1 dc in ea of the next 3 sts. sl st to join. (45 dc)
rnd 4: ch 3 (counts as 1 dc). 1 dc in ea of the next 8 sts. 3 dc in ch sp. ch 3. 3 dc in ch sp. [1 dc in ea of the next 15 sts. 3 dc in ch sp. ch 3. 3 dc in ch sp.] rep once. 1 dc in ea of the next 6 sts. sl st to join. (63 dc)
rnd 5: ch 3 (counts as 1 dc). 1 dc in ea of the next 11 sts. 3 dc in ch sp. ch 3. 3 dc in ch sp. [1 dc in ea of the next 21 sts. 3 dc in ch sp. ch 3. 3 dc in ch sp.] rep once. 1 dc in ea of the next 9 sts. sl st to join. (81 dc)
* Size extra small – invisible join instead of sl st to join, FO and proceed to edging pattern *
rnd 6: ch 3 (counts as 1 dc). 1 dc in ea of the next 14 sts. 3 dc in ch sp. ch 3. 3 dc in ch sp. [1 dc in ea of the next 27 sts. 3 dc in ch sp. ch 3. 3 dc in ch sp.] rep once. 1 dc in ea of the next 12 sts. sl st to join. (99 dc)
* Size small – invisible join instead of sl st to join, FO and proceed to edging pattern *
rnd 7: ch 3 (counts as 1 dc). 1 dc in ea of the next 17 sts. 3 dc in ch sp. ch 3. 3 dc in ch sp. [1 dc in ea of the next 33 sts. 3 dc in ch sp. ch 3. 3 dc in ch sp.] rep once. 1 dc in ea of the next 15 sts. sl st to join. (117 dc)
* Size medium – invisible join instead of sl st to join, FO and proceed to edging pattern *
rnd 8: ch 3 (counts as 1 dc). 1 dc in ea of the next 20 sts. 3 dc in ch sp. ch 3. 3 dc in ch sp. [1 dc in ea of the next 39 sts. 3 dc in ch sp. ch 3. 3 dc in ch sp.] rep once. 1 dc in ea of the next 18 sts. invisible join, FO and proceed to edging pattern. (135 dc)
* Size large – invisible join instead of sl st to join, FO and proceed to edging pattern *
rnd 9: ch 3 (counts as 1 dc). 1 dc in ea of the next 23 sts. 3 dc in ch sp. ch 3. 3 dc in ch sp. [1 dc in ea of the next 45 sts. 3 dc in ch sp. ch 3. 3 dc in ch sp.] rep once. 1 dc in ea of the next 21 sts. invisible join, FO and proceed to edging pattern. (153 dc)

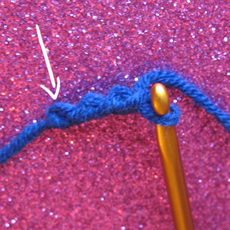
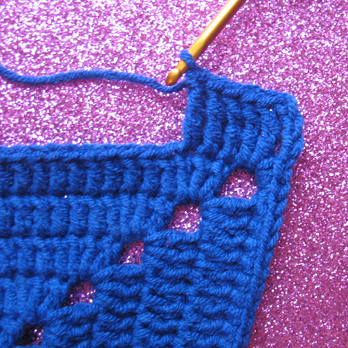
Starting in the bottom left ch sp (arrow in the photo below)
rnd 1: 3 sc in ch sp. 1 sc in ea st. 3 sc in ch sp.
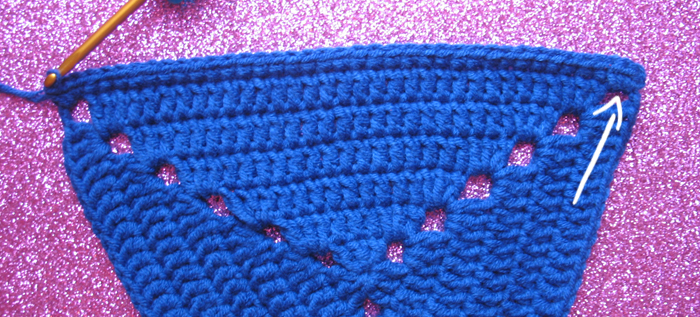
ch to desired length for neck strap. 1 sc in second ch from hook. 1 sc in ea ch.
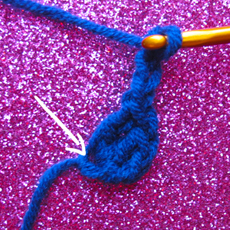
3 sc in ch sp (arrow in the photo above). 1 sc in ea st. 3 sc in ch sp.
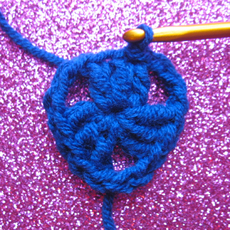
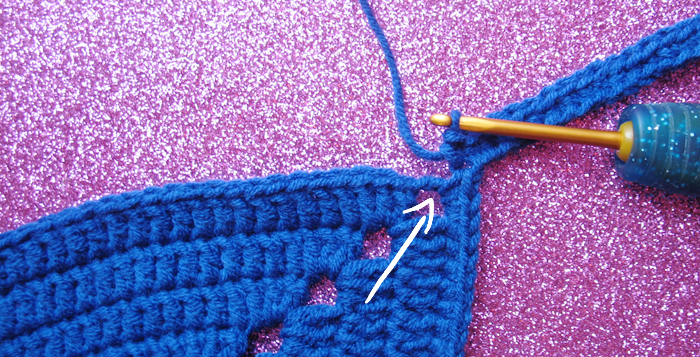
ch 4. 2 trc in ch sp. 1 trc in ea st. 2 trc in ch sp. 1 trc in first sc of this rnd (arrow in the photo below).

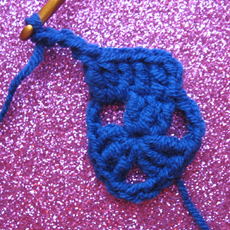
row 2: ch 3 & turn. skip 1 st, 1 sc in ea of the next 3 sts. [ch 2. skip 1 st, 1 sc in ea of the next 3 sts.] rep across until you get to the last 2 sts. ch 2. 1 sc in last st.
* if you will be doing fringe, you can invisible join to the last st rather than 1 sc, then FO. *


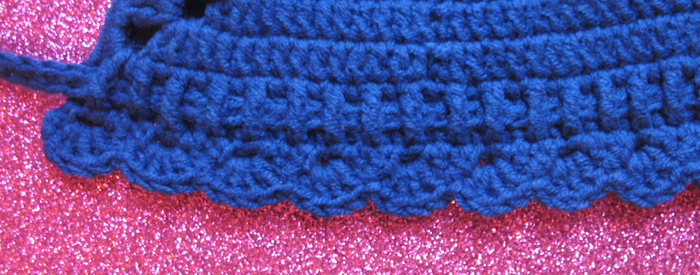
row 3: ch 1 & turn. 4 dc in ch sp. [skip 1 st. 1 sc in next st. 4 dc in next ch sp.] rep across. invisible join to top of last trc & FO.

ch to desired length. 1 sc in second ch from hook. 1 sc in ea ch. FO.
weave strap through the trc row by going over one trc and under the next all the way across on both cups.

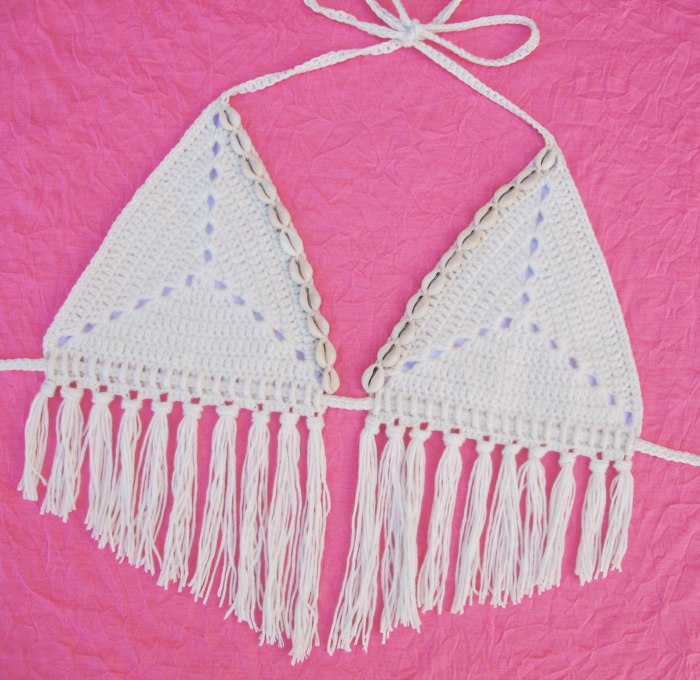
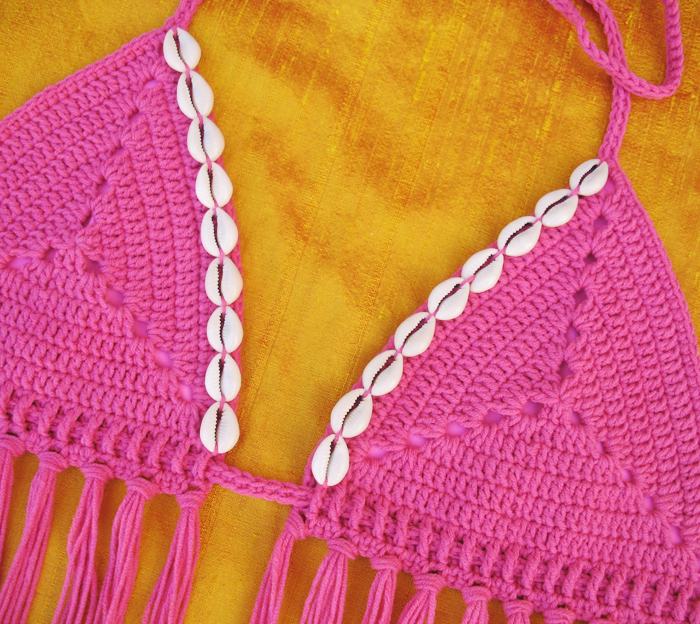
I’ve been attaching 6 pieces of fringe to each of the ch spaces from row 2.
Here is a tutorial on how to cut a lot of fringe at once: https://www.gleefulthings.com/blog/?p=6878
And here’s a tutorial on how I attach fringe: https://www.gleefulthings.com/blog/?p=6892

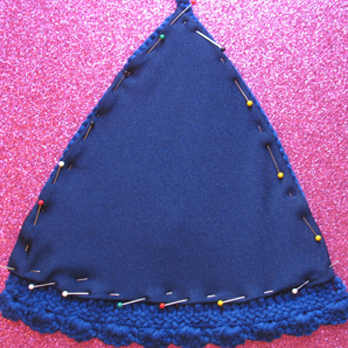
Lay your finished triangles on top of your lining fabric and cut out 2 triangles that are just slightly larger. I like leaving about a 1/4″ to turn under.
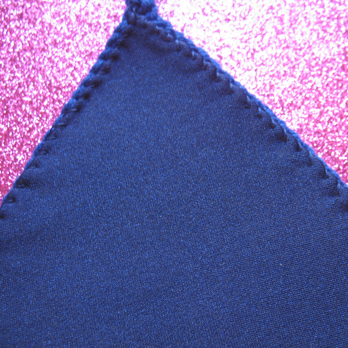
Pin the fabric in place with the extra turned under. Use a needle and thread to hand stitch around the edge. I just used a simple whipstitch because it allows it to still have some stretch.

If you use this free pattern, please consider supporting me by purchasing a pattern from my shop. Your support will help ensure that I’m able to continue making new patterns to share. Thanks for considering! :)

Using other weights of yarn
It’s easy to use any yarn with this pattern. Use whatever size hook is appropriate for your yarn. You want your stitches to be somewhat tight so there aren’t big gaps between your stitches when stretched.
I suggest following the pattern just as it’s written. Refer to the finished sizes above for an idea of what size each cup should be and stop at which ever round you’re on when it reaches your desired size. So for example, if you want to make a size small, you would work as many rounds as necessary until your triangle measures 6 inches across.
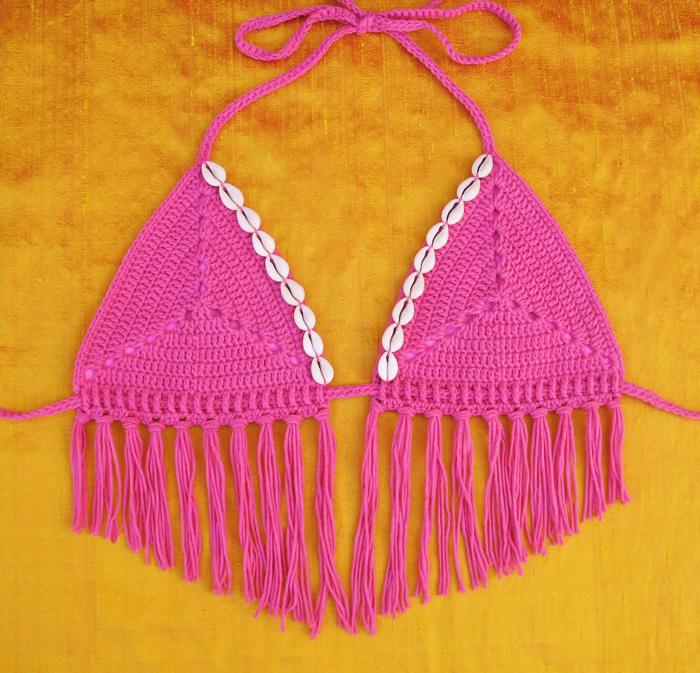
Have fun experimenting with ways to embellish your bikinis! I sewed some cowry shells on (you can find these really cheap on ebay & most craft stores sell them too) and any beads with big enough holes will look good on the straps!
Love this…going to make for my daughter! Do you have plans to post a matching bottom?? :)
so so sexy… Thanks for your support.
This is adorable, wish I was a skinny Minnie so I could wear one!!
Kinda really stoked you posted this! I was looking at using knitpicks cotlin dk yarn, but was wondering how many balls to get (123 yards). probably 2 will do it (im going to make a size small).
Cotlin would be perfect for this! I just bought some too actually! :) And yea, probably two balls would be safe.
Tank you for sharing!
beautiful ..love it…can’t wait to make some with my creative scraps…thankyou and blessings…..sparkles of love to you ***
Thank you! This is awesome! I just recently started practicing crochet and have been trying to find a bikini tutorial. This was fairly easy and so ffar my work looks great. Thanks a lot! You are awesome!
Achei lindoooo vou fazer um tb
Hi,
I was wondering in lbs, how much yarn you need for this project?
Also, what gauge is the yarn you used??
Thanks!
I use DK weight yarn. Check out the supplies section for a list of yarns I recommend :)
I think I used about 2 ounces for a size small.
Would you recommend wearing this is water for an extended period of time? I love the pattern but I have noticed on some others that I looked at the author suggested not actually wearing it in the water (not sure what the point in making a bikini is if you can’t swim in it lol). Thank you!!!
I don’t see why not! I make them with cotton yarn so it might shrink a bit when it dries but other than that I don’t see any problems. I line mine with swimsuit fabric too so I think they’re sturdy and not gonna become see through or anything.
Alright! So excited to make one to wear on my cruise :)
Do you have a pattern for baby bikinis? If not can you tell me how or where to find one.
I don’t, sorry! I’m sure you can find one by searching Ravelry or Pinterest! :)
If I wanted to make a xtra small would I just stop a round earlier?
Size extra small is included in the pattern, you’d stop at rnd 5. If you want to make it smaller than that then yep, just stop a round earlier :)
I was wondering, if I was using a thicker yarn (in this case i’m using lily sugar and cream) could I use that yarn and hook and then make this till I need it my size? I’m making a halter top and am only looking for the cup part. I love this tutorial however I might try it in sc first since that is the stitch I used in the rest of my top
You can definitely use Sugar & Cream but it’s pretty thick so if you were to wear it into the water, it’s gonna be really absorbent and probably heavy. I’d probably use a size G hook. I’d just compare it to a bikini you have and stop crocheting when the cup size matches.
I just made this for my wife. Finshed it last night. I am very happy with the results, and I love the look of this top. I am thinking I coulld use the same idea for a bottom, making one smaller for the front and a bigger one for the back, but I am not sure how to attach the two together. I am pretty new to crochet. I acturally learned just so I could make my wife a crochet bikini. Any ideas or guidence would be great! Thank you for just a wonderful patter!!
Thank you for using my pattern! I’m glad you enjoyed it! And that is so cool of you to learn so you could make her a bikini! :)
I’m sorry I haven’t made a bottom to go with this yet! :(
Very creative!! Love the variations!
Thank you Lori! :)
Hi and nice to meet you! I am Southern California (Oceanside) where are you.?
Hi Lisa! Nice to meet you too! I live by LAX. I think where only a couple hours apart :)