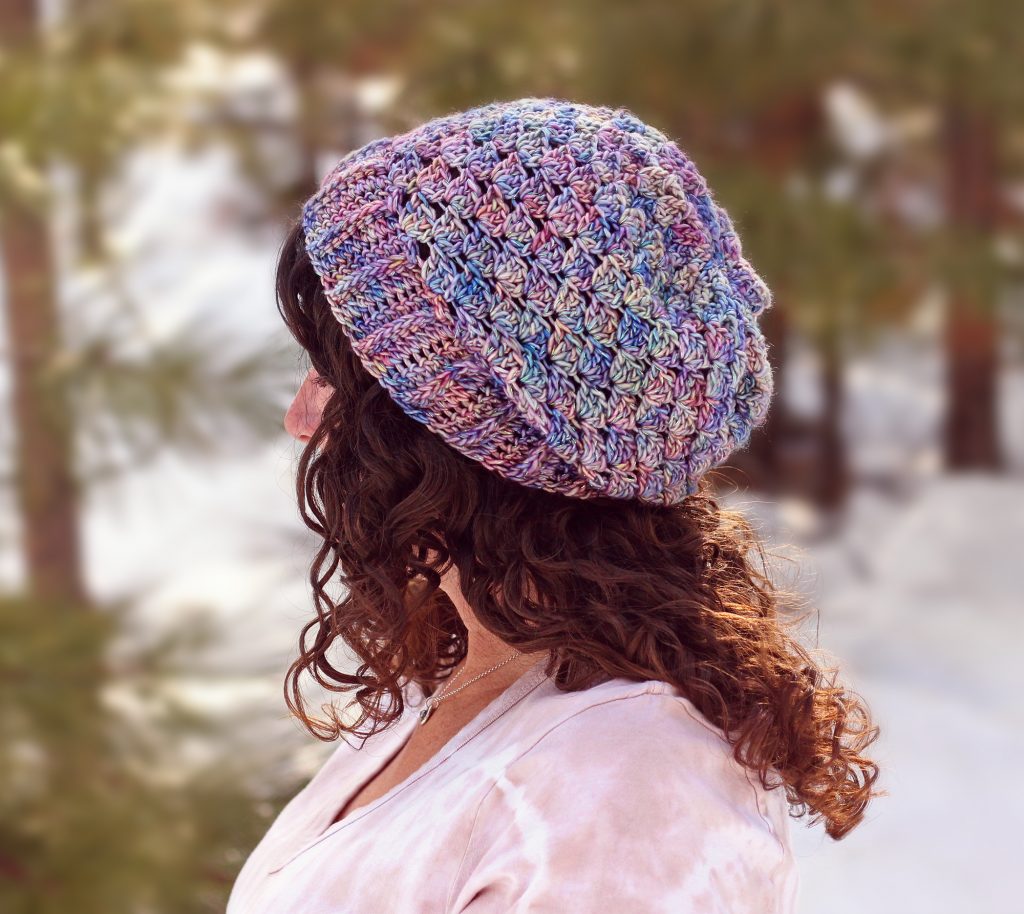
Moonstone Slouchy Beanie Free Crochet Pattern
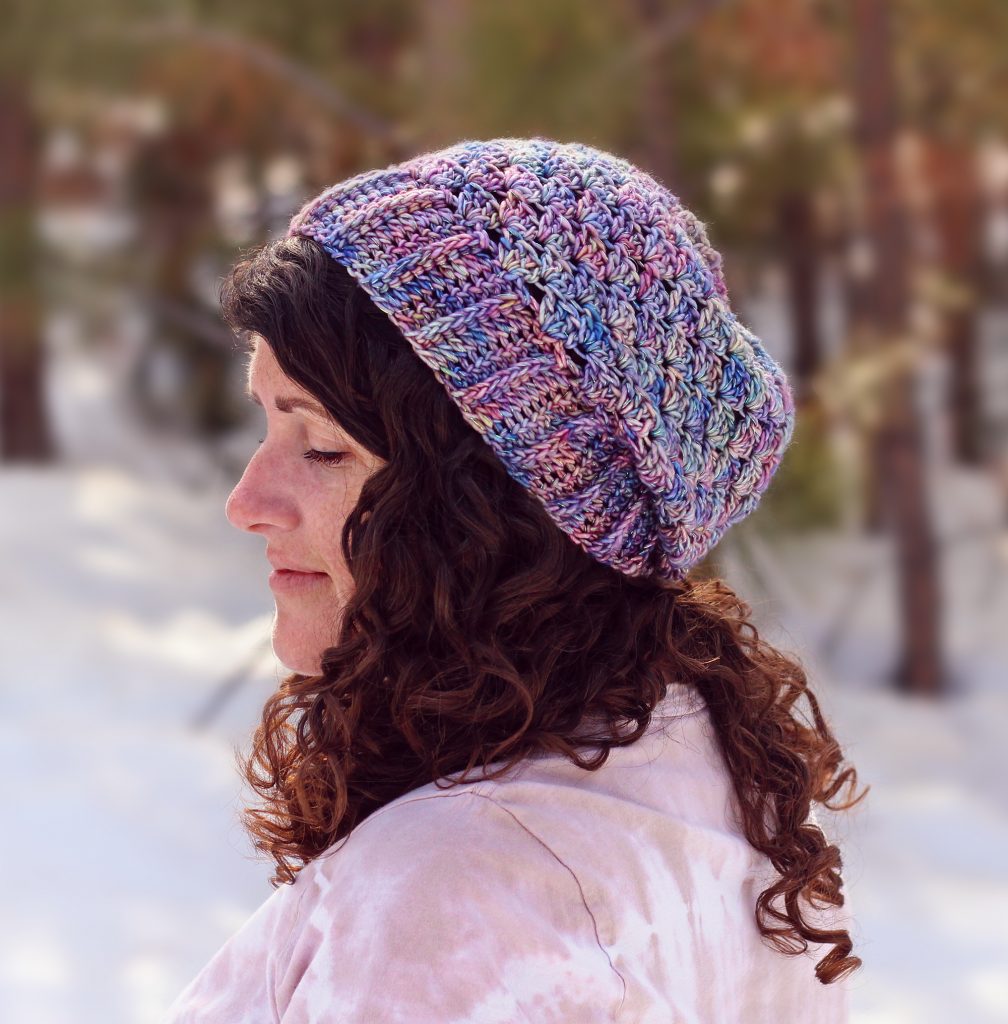
We all have a favorite beanie pattern that we’ve made in at least five colors, right? Well, this is mine! I’m so happy to be able to share it with you because I know it will become a favorite for you too!
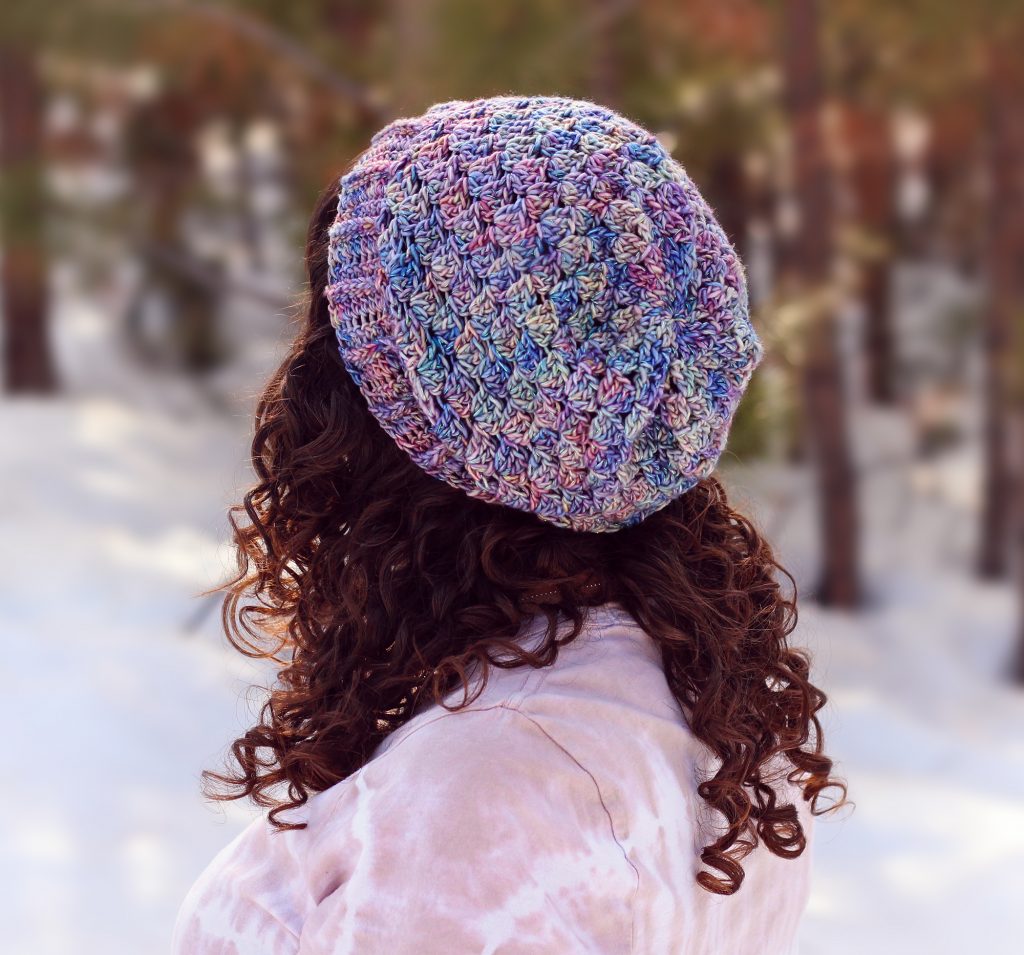
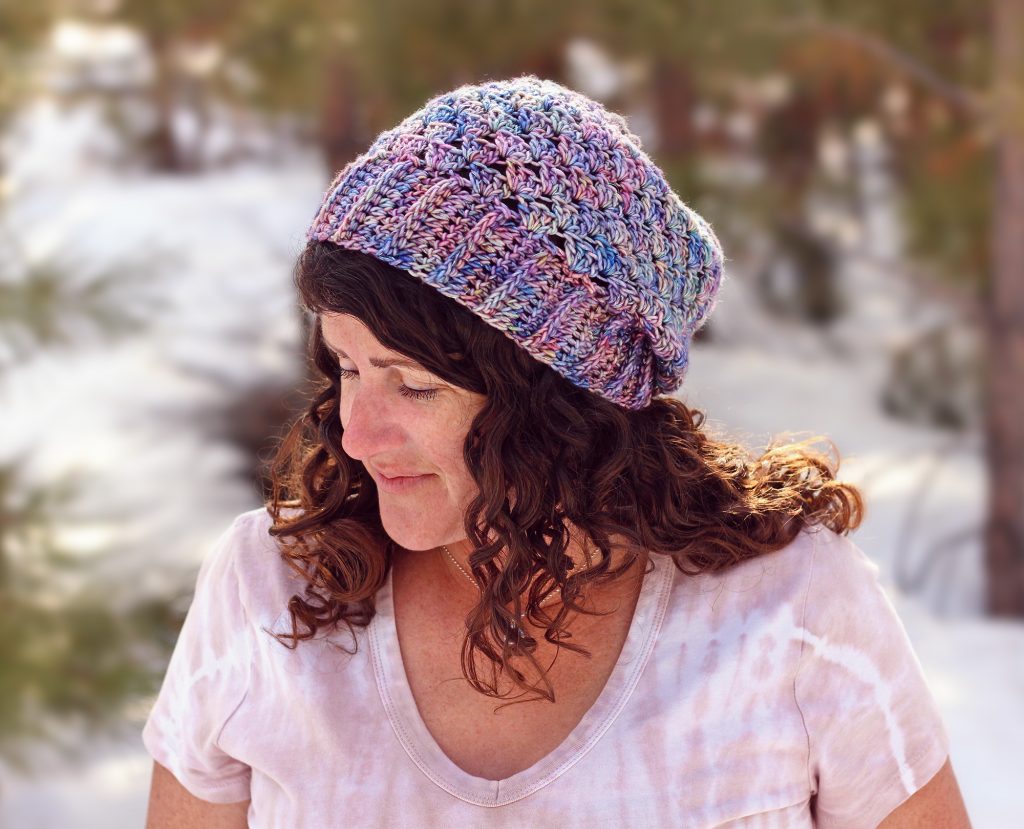
I designed this hat with my favorite ribbed edging, which is made with double crochets and front post double crochets. It goes really quickly and doesn’t require much thought, which is great when you’re multi-tasking.
The rest of the hat is made with just double crochets, so it’s a very beginner friendly project. Also awesome for when you want to multi-task!
I wanted to give this hat a little something extra special, so I added some sparkle! It’s a really simple technique. You just hold a sparkly thread (linked below) along with your yarn while you crochet. But it’s up to you if you want to use sparkle or not because it’s cute either way.
It’s a very comfortable, great looking hat that I promise, you will choose everytime you want to wear a beanie!
Disclosure: This post contains affiliate links. If you click and make a purchase, I will receive a small commission, at no extra cost to you. This, along with the ads shown on this blog, help to ensure that I’m able to continue posting free patterns and tutorials for you to enjoy. Thank you for your support!
Why You’ll Love This Pattern
- Netflix & crochet? – Or road trip, or watch the game, etc.? This beanie requires little attention so you can stitch while not having to focus too hard.
- So many yarn options! – This pattern makes it easy to use just about any #4 worsted weight yarn so grab your favorite and whip one up today!
- Add sparkle to any yarn – Using my super simple technique, you’ll be able to use your favorite yarn and make it extra special with a little sparkle!
- Goes with everything – Your new favorite beanie will look great dressed up with a cute outfit, or wear it for a cozy day at home while you relax & make it in another color! ;)
Yarn
#4 worsted weight yarn: approximately 180 (200, 220) yards of Malabrigo Washted in #875 Arapey
Yarn Substitute Ideas
- Knit Picks Muse – Very similar to Malabrigo Washted, this superwash wool yarn also has a nice selection of hand painted colors.
- Red Heart Soft or Lion Brand Basic Stitch – These budget-friendly acrylic yarns are always a great option for hats if you prefer solid colors.
- Lion Brand Mandala Ombre – This acrylic yarn offers some bright colored options with an almost hand painted look while still being budget-friendly.
- Caron Simply Soft Party – If you like the look of sparkle but don’t want to worry about holding the sparkly thread along with the yarn, check out this yarn with the sparkle already included.
Download The Pattern
You can find the FREE pattern by scrolling down. A print-friendly, ad-free PDF of this pattern is also available for a small fee. If you enjoy my patterns, please consider purchasing the PDF – your support is greatly appreciated and will help me keep the new patterns coming! :)
Supplies
- US Size I/9 (5.5mm) crochet hook or size needed to obtain gauge
- yarn needle
- scissors
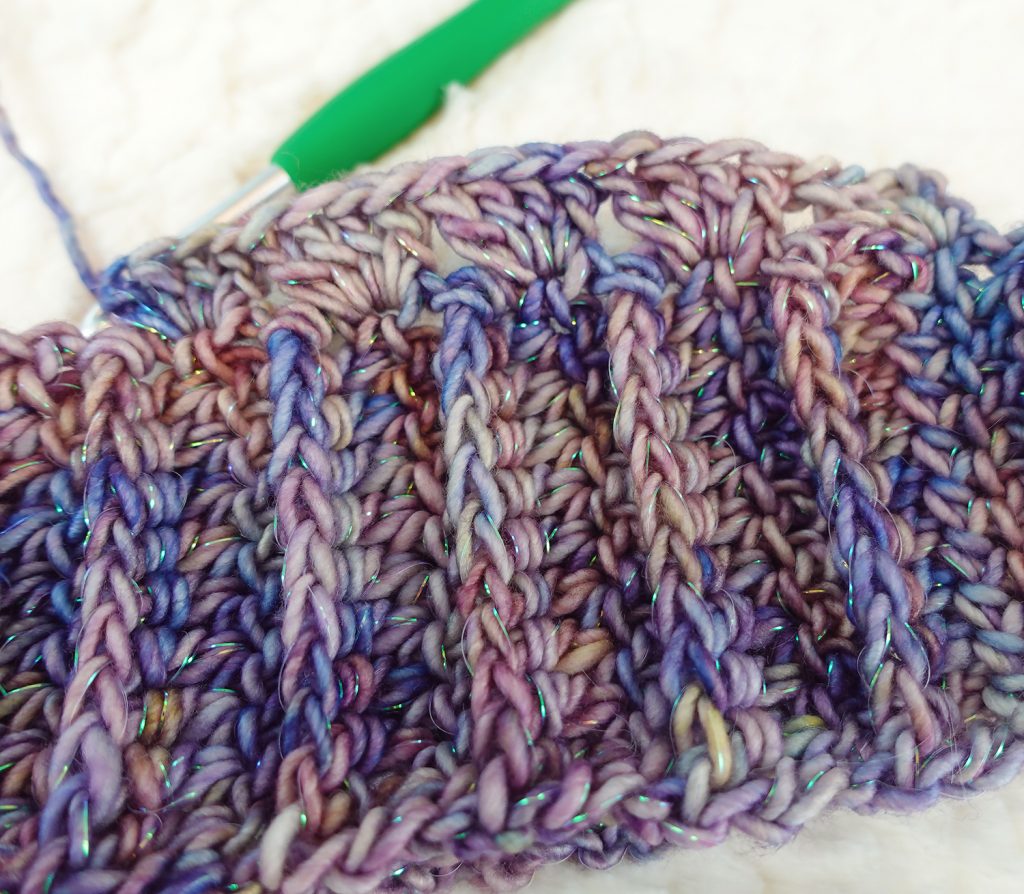
- Sulky Holoshimmer thread in Silver Metallic (optional – see special techniques section below for more info.)
Difficulty
Easy
Gauge
16 dc and 7 rows = 4”
Sizes & Finished Measurements
| Size | S | M | L |
| Length | 8.5″ | 10″ | 11.5″ |
| Around Edge | 17″ | 19″ | 21″ |
Abbreviations
- ch(s) – chain(s)
- dc – double crochet
- FPdc – front post double crochet
- st(s) – stitch(es)
- sl st – slip stitch
Special Techniques
The example hat pictured is made using a strand of Sulky Holoshimmer thread in Silver Metallic held together with the yarn throughout the entire project. This is optional, if you want to add sparkle. You can find this thread in a variety of colors to match your yarn.
Terms of Use
You are welcome to sell any items you make using this pattern, in small quantities. Mass production is prohibited. When selling online, please credit Julie King / Gleeful Things by linking to www.gleefulthings.com or tagging @gleefulthings. You may NOT sell or distribute the pattern itself in any form, alter it to claim it as your own, post it online, or create a video demonstrating the pattern.
Notes
- Edging of hat is worked flat in rows and then stitched together to form a ring. Body of hat is then worked in joined rounds into the side of the edging.
- In edging, ch 2 in beginning of rows will count as 1 dc or 1 FPdc.
- In body of hat, ch 3 in beginning of rounds always counts as 1 dc.
- Pattern is written for size S with adjustments for sizes M – L in parentheses like this: S (M, L).
Instructions
Ribbed Edging
Row 1: Ch 12 (13, 14), (1st 3 ch count as 1 dc) 1 dc in 4th ch from hook and in each ch across – 10 (11, 12) dc.
Row 2: Ch 2 (counts as 1 FPdc) & turn, 1 FPdc in each st across – 10 (11, 12) FPdc.
Row 3: Ch 2 (counts as 1 dc) & turn, 1 dc in each st across – 10 (11, 12) dc.
Row 4 – 35 (39, 43): Repeat rows 2-3.
Row 36 (40, 44): Repeat row 2.
Cut yarn leaving a long tail. Using yarn needle and the tail, stitch final row to beginning chain to form a ring and fasten off.
Body of hat
Begin in last st of row 36 (40, 44).
Round 1: Ch 3 (counts as 1 dc now & throughout), 3 dc in same st, *skip 1 st, 4 dc in next st; repeat from * around, sl st to join to top of ch 3 – 18 (20, 22) sets of 4 dc.
Round 2 – 9 (11, 13): Ch 3, 3 dc in same st, *skip 3 dc, 4 dc in next st; repeat from * around, sl st to join to top of ch 3 – 18 (20, 22) sets of 4 dc.
Round 10 (12, 14): Ch 3, 2 dc in same st, *skip 3 dc, 3 dc in next st; repeat from * around, sl st to join to top of ch 3 – 18 (20, 22) sets of 3 dc.
Round 11 (13, 15): Ch 3, 1 dc in same st, *skip 2 dc, 2 dc in next st; repeat from * around, sl st to join to top of ch 3 – 18 (20, 22) sets of 2 dc.
Round 12 (14, 16): Ch 3, *skip 1 dc, 1 dc in next st; repeat from * around, sl st to join to top of ch 3 – 18 (20, 22) dc.
Cut yarn leaving a long tail. Using yarn needle and the tail, stitch around round 12 (14, 16). Pull tight to cinch shut and fasten off.
Share Your Project
I hope you’ve enjoyed this pattern and I would love to see what you made! Please share your photos on social media and tag me @gleefulthings or use hashtag #gleefulthings. Don’t forget to add your project on Ravelry too! :)
This is such a pretty beanie! Thank you for sharing.