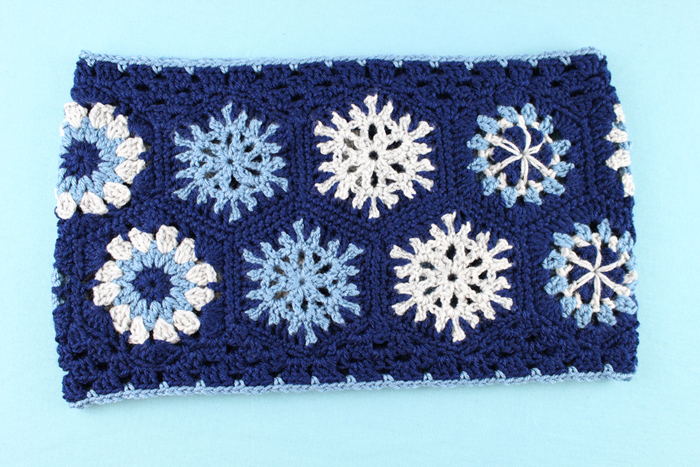
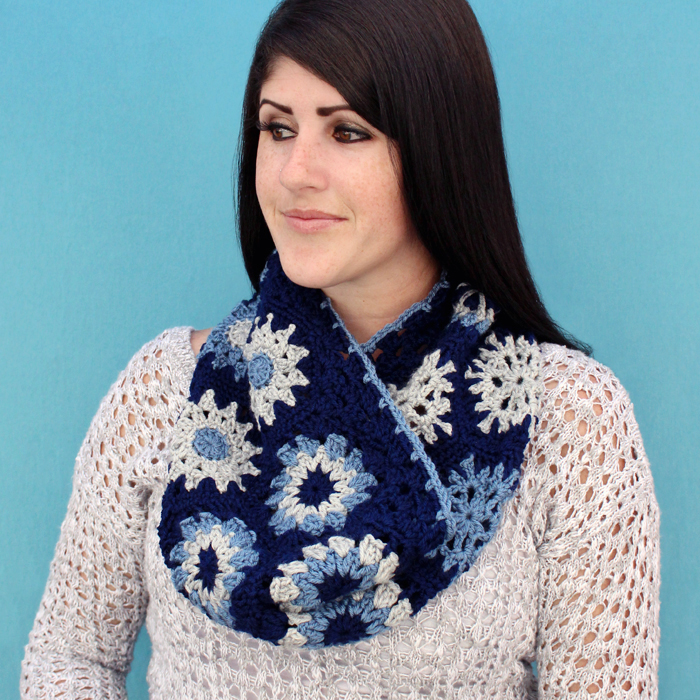
Hexagon Granny Cowl Free Crochet Pattern

Welcome back crochet-alongers! Today I’m gonna show you how to make this cowl using your hexagons from the crochet along!
This pattern is intended for 5 inch (across from point to point) hexagons that have 9 stitches on each side. All of the hexagons designed for the Blog Hop Crochet Along, including my snowflake hexagon, will work for this. You could really use any 5 inch hexagon pattern out there, just make sure that it has 9 stitches on each side.
Measurements: Approximately 32 inches around & 12 inches tall. You can easily make it fit tighter by using fewer hexagons (you can still follow the pattern as-is, there won’t be any confusing modifications if you use fewer hexagons).
Difficultly Level: Intermediate

• A crochet hook in a size that allows you to crochet somewhat loosely (I used a 4.5mm).
• Yarn needle for finishing.
• Worsted weight yarn in three colors.
The amount of yarn required will vary depending on which hexagon patterns you’re using. For my example, I used approximately 350 yards of CA, and approximately 150 yards each of CB & CC.
Yarn used in example: Knit Picks Brava in Solstice Heather (CA), Denim (CB) & Dove Heather (CC)
Thank you Knit Picks, for sending us Brava Worsted to work with! :)

sc – single crochet
dc – double crochet
sk – skip
ch/chs – chain/chains
sl st – slip stitch
rep – repeat
rnd – round
ea – each
st/sts – stitch/stitches
CA, CB, CC – Color A,B,C

You are welcome and encouraged to sell any items you make using this pattern! All I ask in return is that when selling online, please credit Julie King / Gleeful Things & provide a link to www.gleefulthings.com.
You may NOT sell the pattern, distribute it in any form, repost it online, or alter it to claim it as your own (this includes charts & translations to other languages). Copyright © 2015 Julie King / Gleeful Things. All Rights Reserved.

• Invisible join – here is a video tutorial: https://www.youtube.com/watch?v=bsHggQGFq3A
• Whip stitching – whip stitching is the method I use to join the hexagons. Here is a photo tutorial: http://crochet.about.com/od/Sewing-Techniques/tp/whip-stitch.htm
• Standing sc & dc – This is helpful to know but not necessary. I explain how to substitute chains in the pattern.

Step 1: Start out by making 16 hexagons. If you’d like your cowl to fit tighter, you could try it with 14 or 12 hexagons. The following directions will be the same regardless of how many you have.
Step 2: Lay out your hexagons however you like so that they are lined up as shown below:
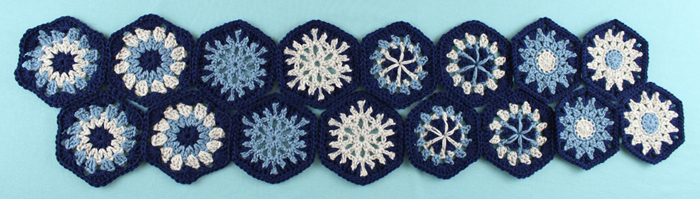
I used four different hexagon patterns and made two of each where CB was the prominent color and two of each where CC was the prominent color, always using CA as the edge color.
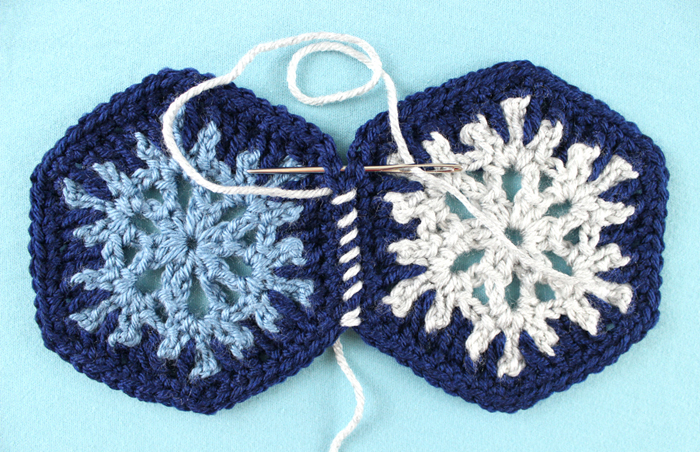
Step 3: Use your yarn needle & CA to whipstitch the hexagons together. Whip stitching is very easy. I show it below in gray so it’s easier to see. Put your needle through both loops on both hexagons and pull through.
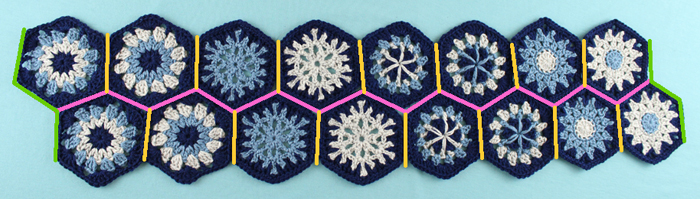
You can stitch them together in whatever order is easiest for you. I stitched them all together along the pink line first, then each of the orange lines. Last, stitch the ends (green lines) together.
FO all ends.
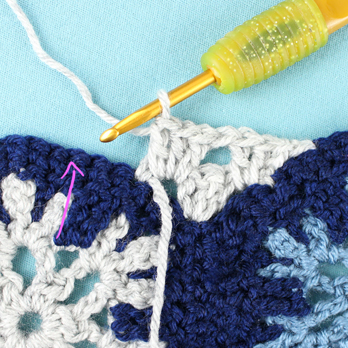
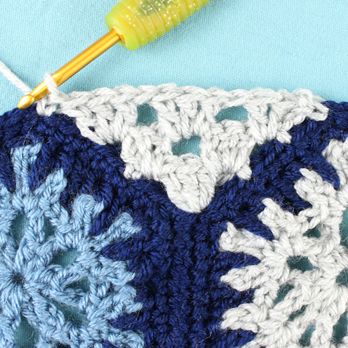
Step 4: Now we’re going to fill in the edges using CA (I’m just showing it in gray so you can see better).
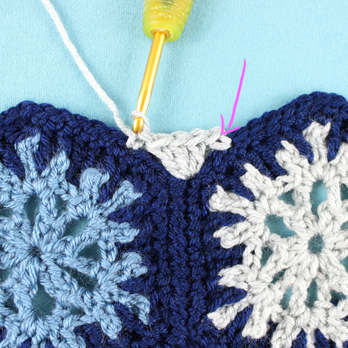
Start out 3 sts up one side (pink arrow). Make a standing sc if you know how, if not you can ch 2 which will count as an sc. Make 3 dc in the center of the two hexagons. Make 1 sc three sts up from that.
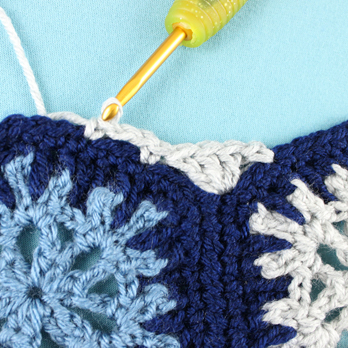
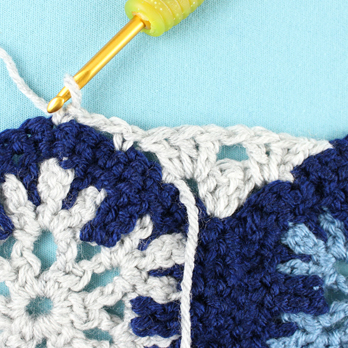
ch 2 then make 1 sc three sts up from your previous sc.
Turn, then make 2 dc below the sc where the pink arrow is pointing.
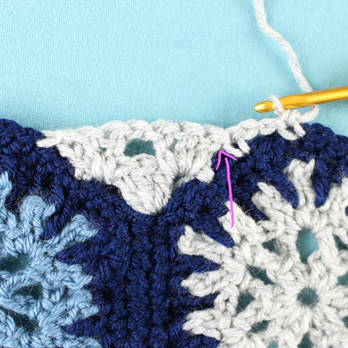
ch 1. Make 3 dc below the sc where the pink arrow is pointing.
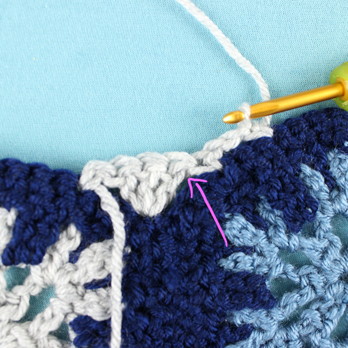
Make 1 sc where the pink arrow is pointing (three sts up from the one below it).
ch 2 then make 1 sc three sts up from your previous sc (this should be at the top point of the hexagon).
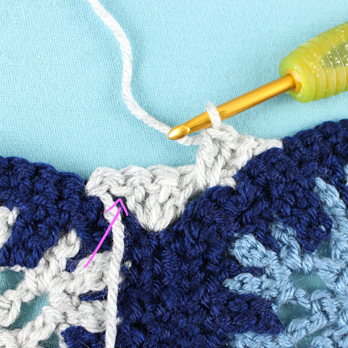
Turn, then make 2 dc below the sc where the pink arrow is pointing.
ch 1. 3 dc in next ch sp.
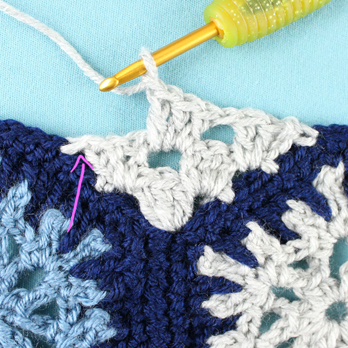
ch 1. 3 dc below the sc where the pink arrow is pointing.
1 sc in the top point of the hexagon. FO.
Repeat step 4 to fill in each space between the hexagons.
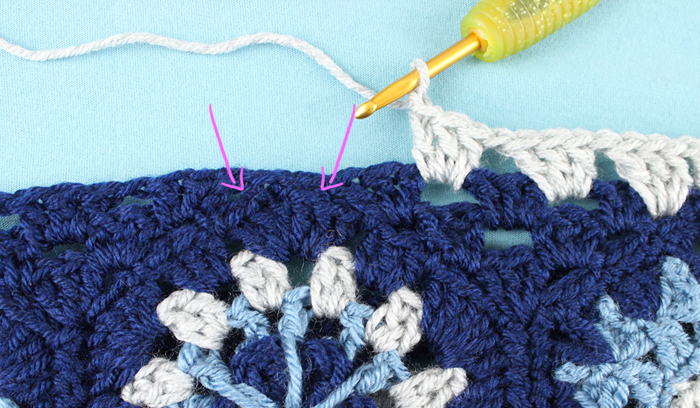
Step 5: Using CA (again, I’m using gray so you can see better), starting in any ch sp: Make a standing dc if you know how, if not you can ch 3 which will count as a dc. 2 dc in same ch sp. ch 1. [3 dc in next ch sp. ch 1.] rep around. Invisible join to first dc of this round and FO.
*special note: When you get to the top of each hexagon, treat the space below the sc’s where the arrows are pointing as a ch sp and make 3 dc in each sp (just like in step 4). Refer to the two photos below:
Repeat step 5 on the bottom edge of the cowl as well.
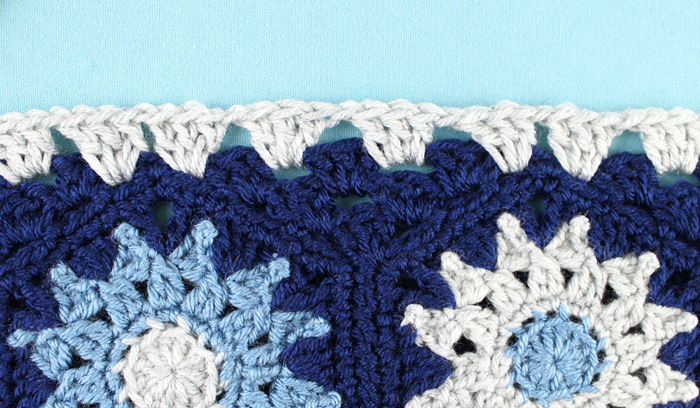
Step 6: With CB, starting in any ch sp: Make a standing sc if you know how, if not you can ch 2 which will count as an sc. ch 3. [1 sc in next ch sp. ch 3.] rep around. Invisible join to first sc of this round and FO.
Repeat step 6 on the bottom edge of the cowl as well.

If you use this free pattern, please consider supporting me by purchasing a pattern from my shop. Your support will help ensure that I’m able to continue making new patterns to share. Thanks for considering! :)
Below you can find links to all of the projects you can make as part of the Blog Hop Crochet Along. And if you haven’t seen yet, you can find links to all of our hexagon patterns here.
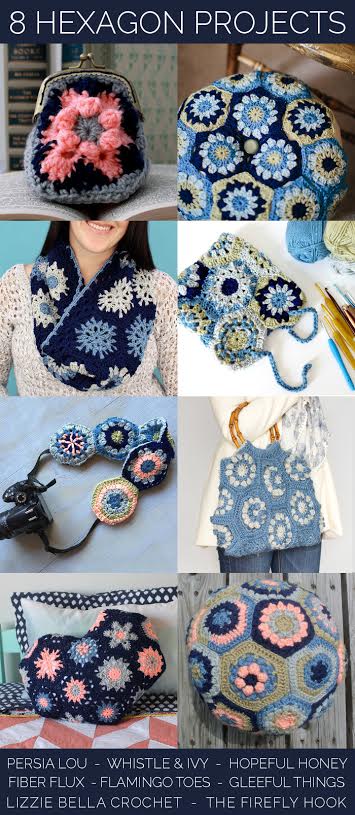
Crochet Hexagon Coin Purse – Flamingo Toes
Hexagon Floor Pouf – The Firefly Hook
Hexagon Project Bag – Fiber Flux
Hexagon Camera Strap – Whistle & Ivy
Dahlia Hexagon Handbag – Hopeful Honey

3 Comments