DIY Duck Tape® Pumpkin Tutorial #StickOrTreat
This is a Sponsored post written by me on behalf of Duck Brand provided by ShurTech Brands, LLC. All opinions are 100% mine.
Duck Tape® is having a Halloween pumpkin decorating contest! All you have to do to enter is submit a photo of a pumpkin decorated with Duck Tape®! The contest is already running and wraps up on October 31st. The winners will be announced on November 11th.
The prizes: First Place: $1,000 and a Cricut Mini® Personal Electronic Cutter
Second Place: $500
Third Place: $300
I have never made anything with Duck Tape® before so I thought this was a fun challenge! Check out my tutorial below!
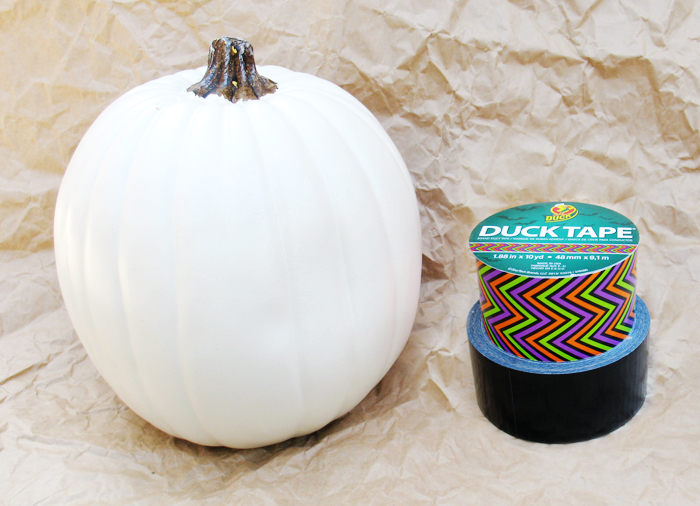
Supplies:
♥ Fake Pumpkin
♥ 2 Colors of Duck Tape® – I used Scary Chevron & solid black
♥ Pipe Cleaner
♥ Scissors
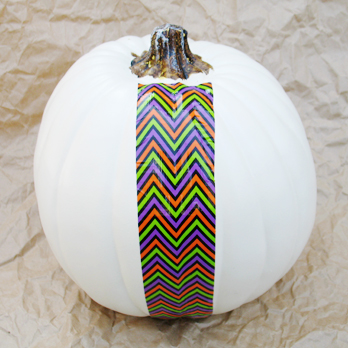
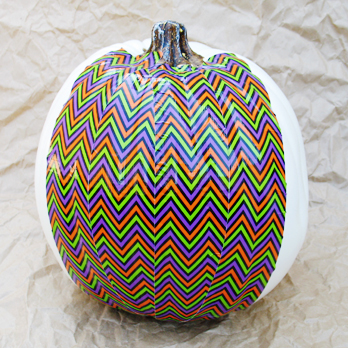
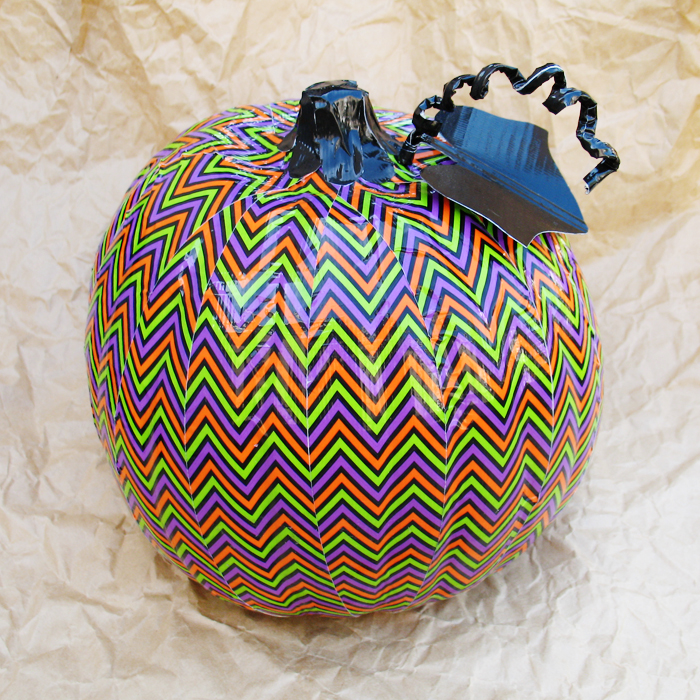
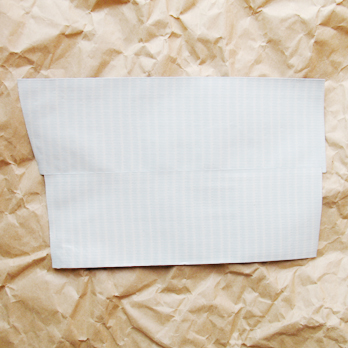
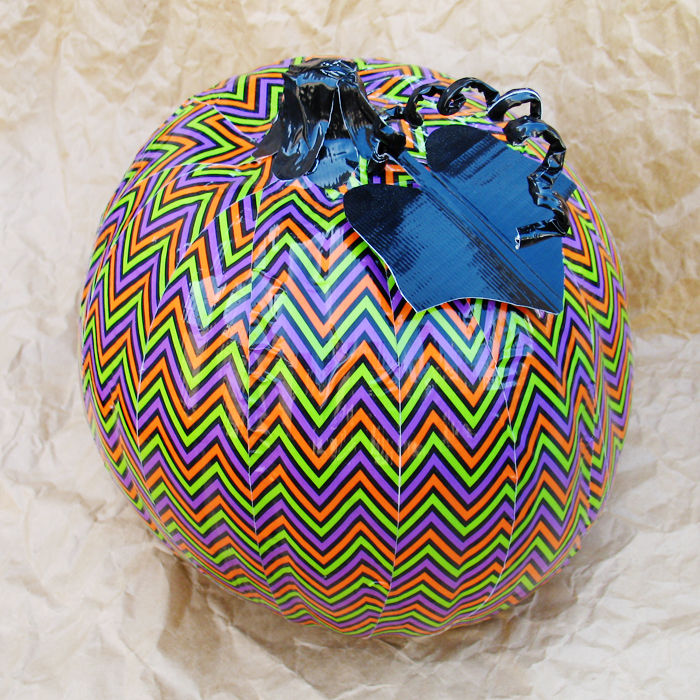
Step 1: Cover your pumpkin in strips of Duck Tape®.
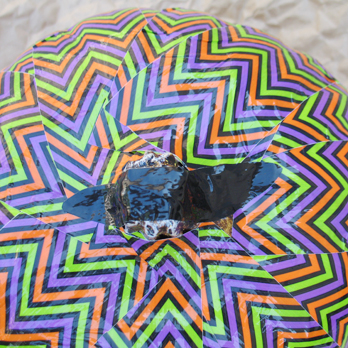
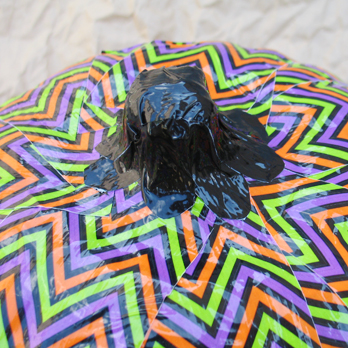
Step 2: Cut small strips of Duck Tape® that are long enough to go over the stem. I rounded the ends of my strips.
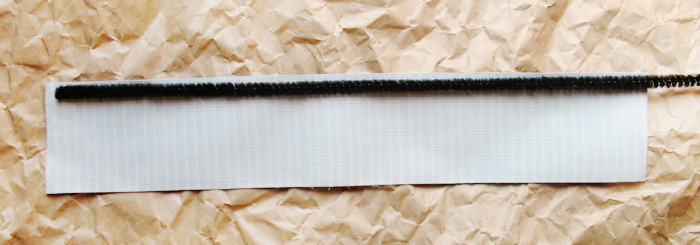
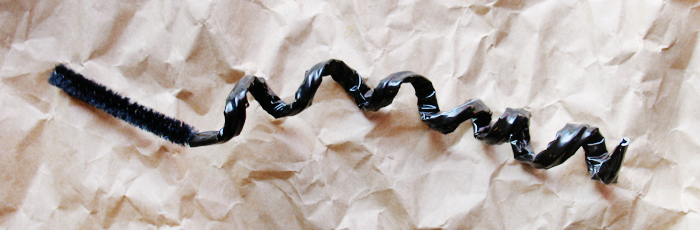
Step 3: Cover your pipe cleaner in Duck Tape®, leaving about an inch of it exposed at the end. Wrap it around a pencil or your finger to make it curl.
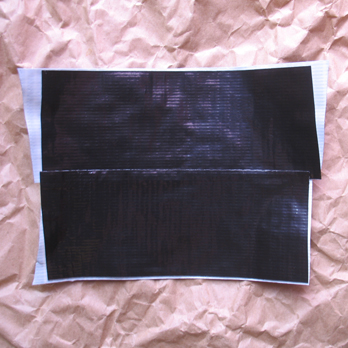
Step 4: Cut four pieces of Duck Tape®. Slightly overlap two of them, then stick the other two on top, also slightly overlapped, with sticky sides together.
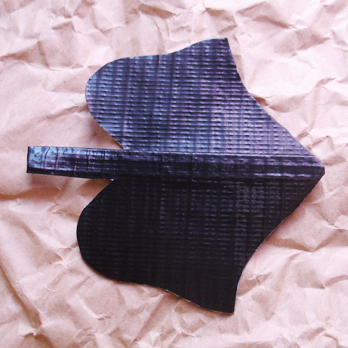
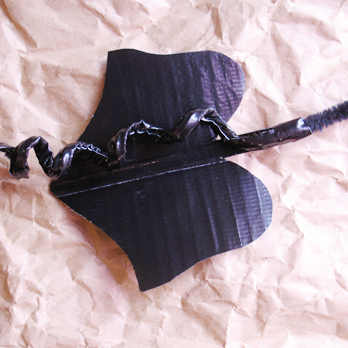
Step 5: Cut out a pumpkin leaf shape. Then using a tiny strip of Duck Tape®, tape your leaf to the curly piece you made.
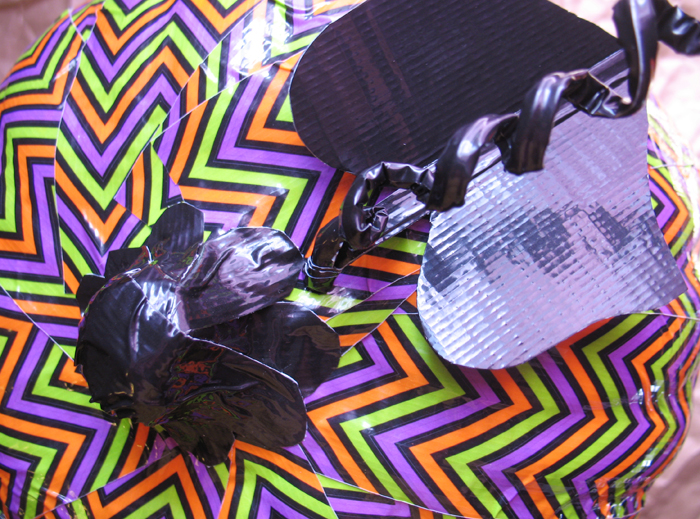
Step 6: Use your scissors to poke a small hole next to the stem on your pumpkin. Insert the exposed end of the pipe cleaner into the hole.
If you’d like more info on the Duck Tape® Stick or Treat Contest, you can visit the contest website by clicking here. You can also follow @TheDuckBrand on Twitter for more inspiration! Be sure to share photos of your pumpkin in comments on this post! I’d love to see if you use my tutorial! :)