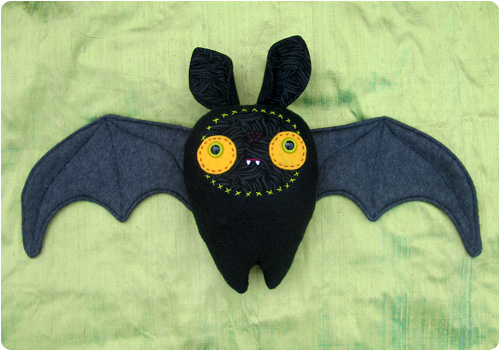
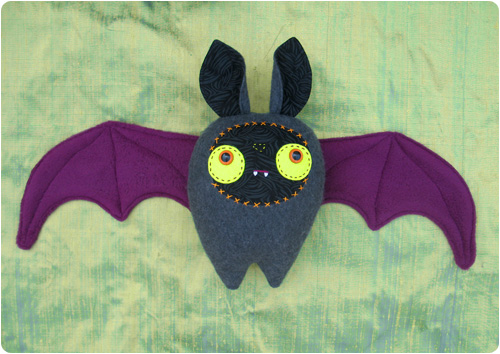
DIY Tutorial: Halloween Bat Plushie!
This is the grand finale of my Halloween tutorials for this year! I have ideas for so many more but I need some time to work on a costume now! I’m kinda sad that this is the last one because I’ve just loved making them! But I’m also super excited to be sharing my first real plushie pattern!
I know, I made a bat plushie tutorial last year! But I had the idea for this one, based on my bunnies, and I couldn’t resist making it too!
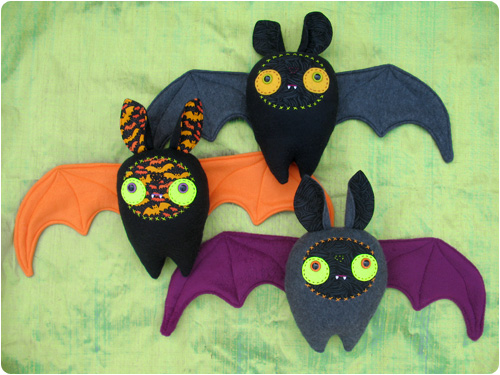
These bats are surprisingly quick to make so I hope you’ll enjoy the pattern! :)
Supplies:
– Fleece fabric in 2 colors
– Small piece of matching cotton fabric
– Felt scraps in contrasting colors
– Embroidery floss in contrasting colors
– Stuffing
– 15mm Safety eyes
– Sewing machine & basic sewing supplies (scissors, thread, needle, etc.)
– Iron
Click here to download the pattern (PDF file).
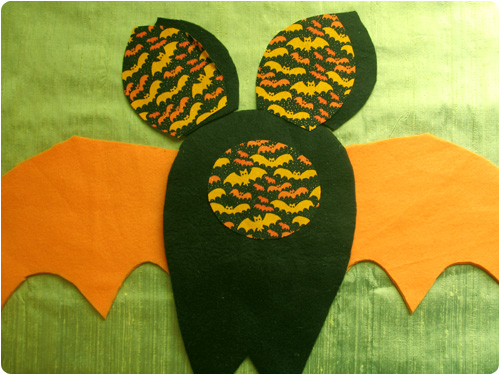
Step 1: Cut out all of your pieces.
– 2 body pieces from fleece
– 2 wing pieces from fleece
– 2 ear pieces from fleece
– 2 ear pieces from cotton
– 1 face piece from cotton
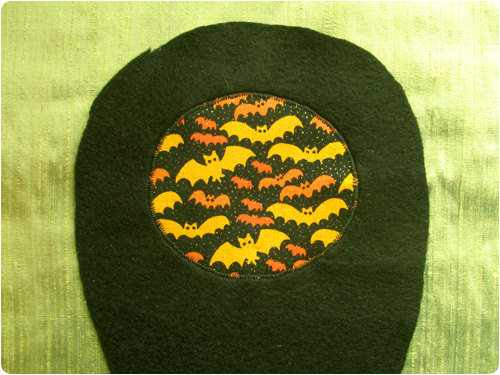
Step 2: Use a zig zag stitch on your sewing machine to attach the face piece to one of the body pieces.
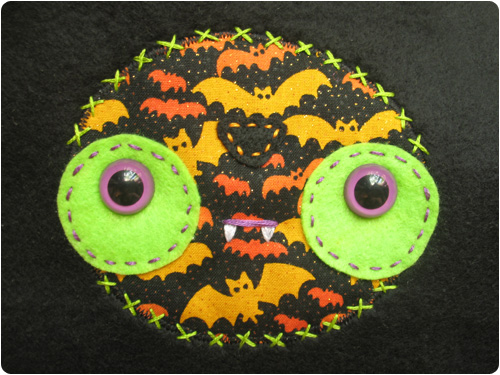
Step 3: Cut the eye pieces and a nose from felt scraps and sew on (by hand) using embroidery floss. Make any other decorative stitching you want. I like to stitch X’s over the zig zag stitching to give it a little more handmade charm. Attach your safety eyes and embroider a mouth/teeth.

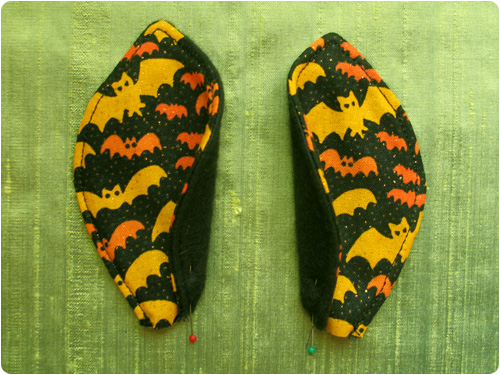
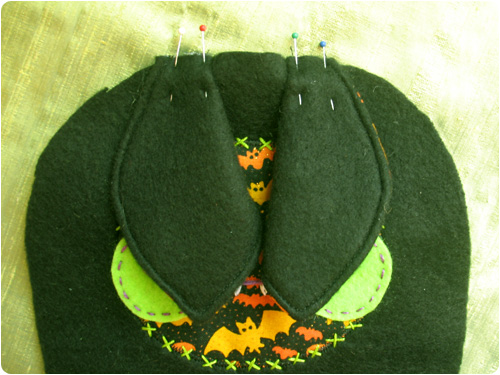
Step 4: With right sides together, sew your ear pieces together (with fleece on one side & cotton on the other) using 1/2″ seam allowances. Then trim the excess fabric like the one on the right.
Step 5: Turn them right side out and press with an iron. Then top stitch around the edges. Fold one edge over a little bit and pin in place.
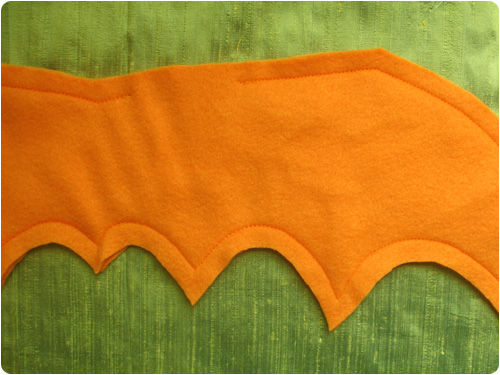
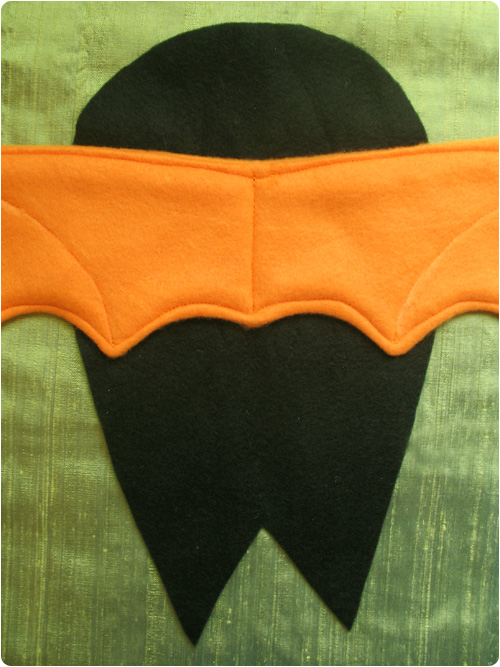
Step 6: With right sides together, sew your wing pieces together using 1/2″ seam allowances. Be sure to leave a little spot open at the top so you can turn it right side out. Trim the excess fabric around the edges just like you did for the ears.
Step 7: Turn the wings right side out and press with the iron.
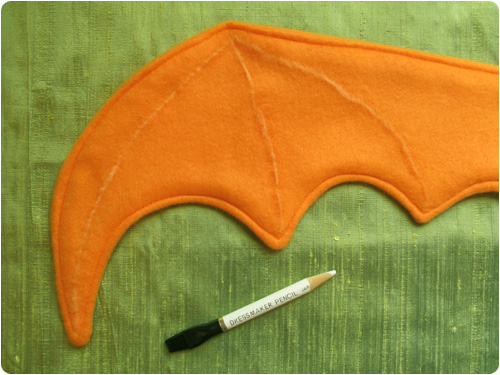
Step 8: Top stitch around the edge as shown above (this will close the hole you left for turning). If you have a chalk pencil or fabric marker, draw lines going to all of the points on the wing. Then top stitch over those.
Step 9: Pin your wings in place on the back piece of the body (right side) and stitch a line down the middle to attach the wings to the body.
If you’d prefer, you can wait until the very end to hand sew the wings on. Sewing them on now does make it a tiny bit difficult to sew the body pieces together because they’re so big.
Step 10: Pin your ears in place and then pin the body right sides together. Be sure to roll up the wings to keep them out of the way if you’ve already attached them. Sew the body together using 1/2″ seam allowances. Be sure to leave a little place to turn it right side out. You don’t need to trim the excess fabric from the seams here unless you want to.
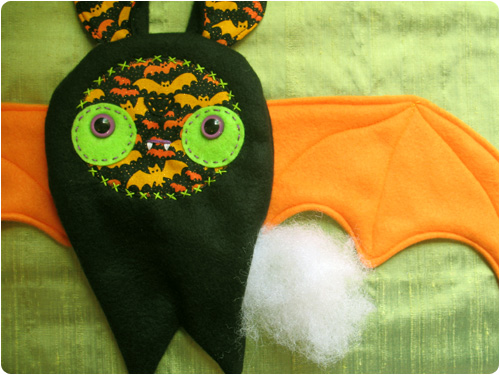
Step 11: Turn it right side out and stuff! Stitch the stuffing hole up and you’re done! :)
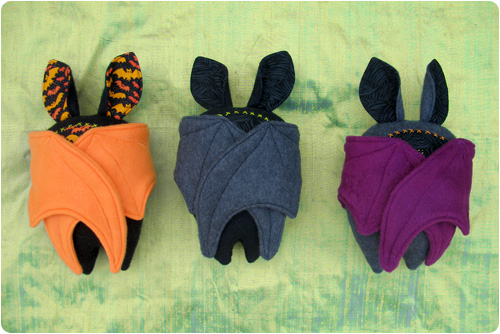
Happy Halloween!!
TERMS OF USE:
This pattern is protected by United States & International Copyright law. This pattern and anything made from it may not be used for commercial purposes. You may not sell anything made from this pattern. You may not resell or redistribute this pattern in part or in whole. Derivative works are prohibited. This pattern and items made from it are intended for your personal use only.Copyright © 2011 Julie King / Gleeful Things. All Rights Reserved.
These little guys are so cute. Found your post on Craftster this morning. Thanks for the great tutorial!
Totally adorable!! I don’t have these kinds of materials right now, otherwise I’d make a whole bunch and never give any to anybody.
I love it!! Thanks so much for sharing!
IIIH, It’s cute!!! :D
Thanks for the tutorial!
OMG, do you sell these already made??
Thank you for sharing this cute tutorial with us. My son loves bats and I just made one for him. He adores him and always wraps him in his wings, when going to sleep.
hi i am a nanny for 2 families and i love this bat…made another one for halloween a few years ago…but this might do the trick to help a 3 yr old sleep better. I was going to sew it today..but rethought..it is more fun for him and sister to help me sew and cut out fabric..a great learning task..thanks for this bat!