DIY Tutorial: Halloween Jar Luminaries
I’m back with another Halloween craft tutorial! I’m going to show you how to make luminaries! I love projects that reuse jars. I’ve been hoarding them ever since I saw this picture and knew that I had to do a Halloween version!
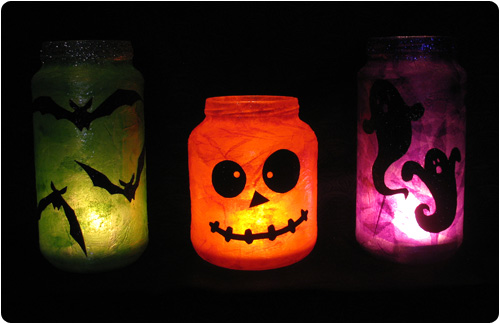
They’re pretty quick to make and the supplies are all really cheap! I added glitter to make them a little fancier but it’s totally not necessary if you don’t wanna deal with the inevitable mess! ;)
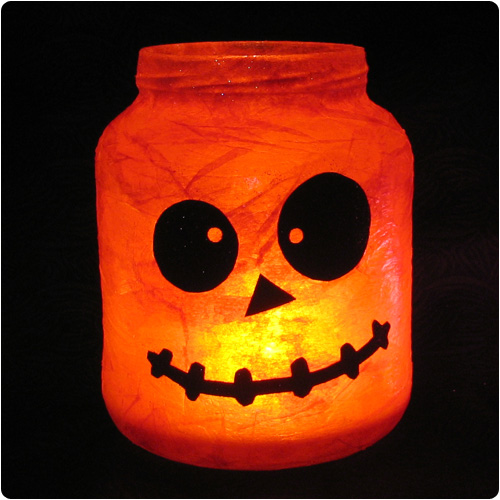
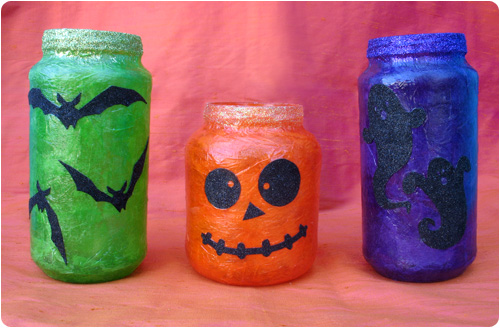
Recognize that pumpkin face? I tried to copy Bath & Body’s pumpkin because it’s so cute! :) On to the tutorial! Here’s what you’ll need:
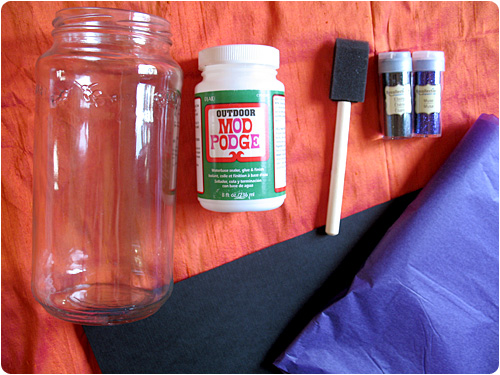
Supplies
– Glass jar with label removed
– Mod Podge (doesn’t have to be the outdoor kind, that’s just what I had already)
– Sponge brush
– Tissue paper (one sheet will do!)
– Black construction paper
– Glitter (optional) in black & the same color as your tissue paper
– Scissors
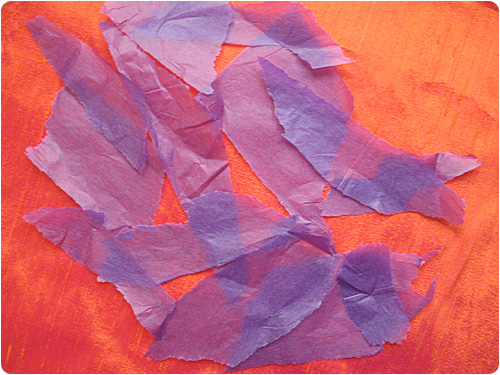
Step 1: Start by tearing your tissue paper up into lots of little pieces.
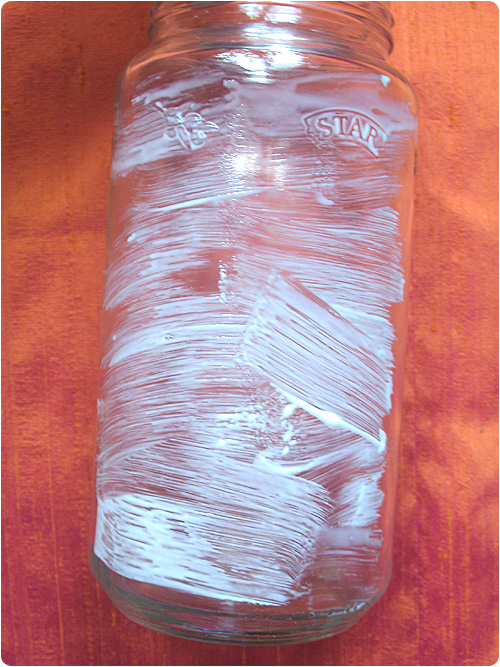
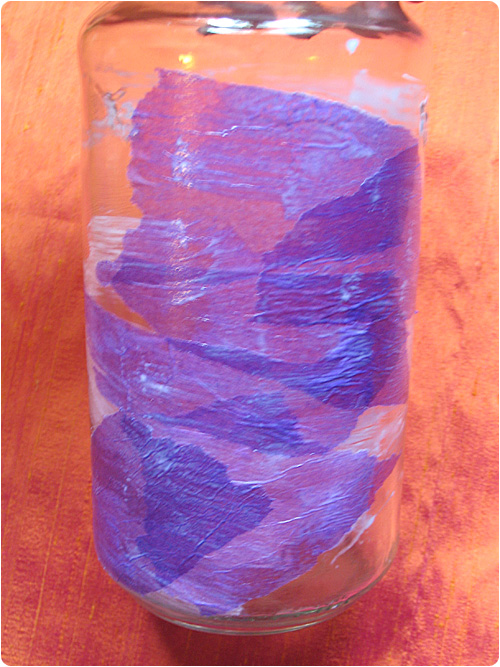
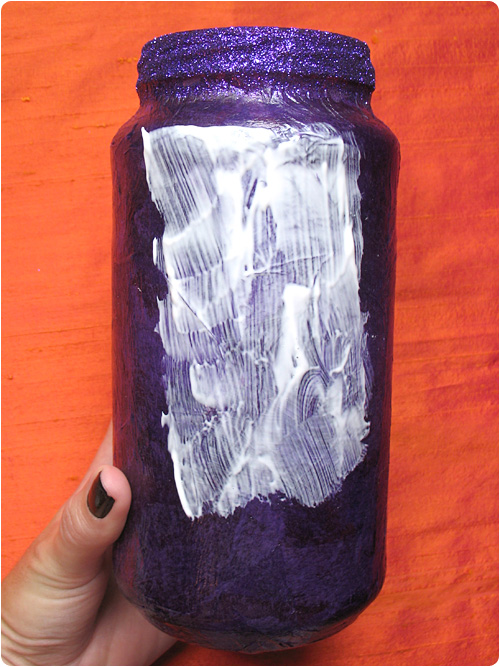
Step 2: Use your sponge brush to paint Mod Podge all over the jar. Lay tissue paper pieces on and use the sponge brush to flatten them & coat them with Mod Podge.
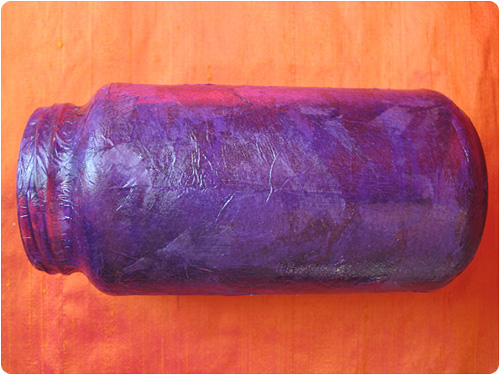
Continue layering pieces of tissue paper until you’re happy with it.
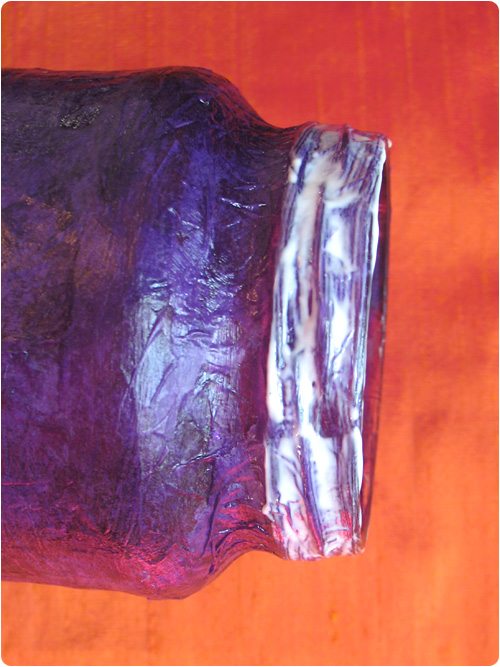
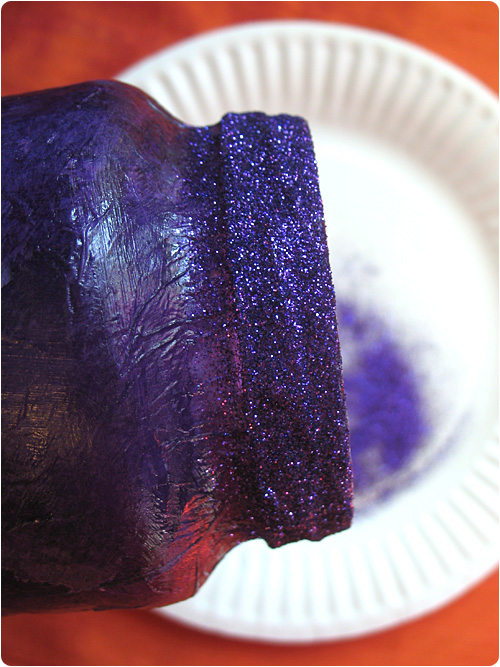
Step 3: (skip to step 4 if you’re not using glitter) When it’s completely dry, paint a layer of Mod Podge around the rim and sprinkle it with glitter.
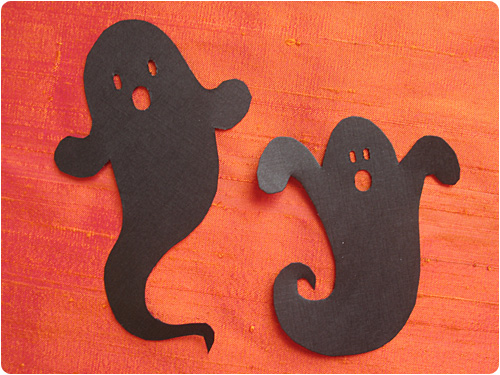
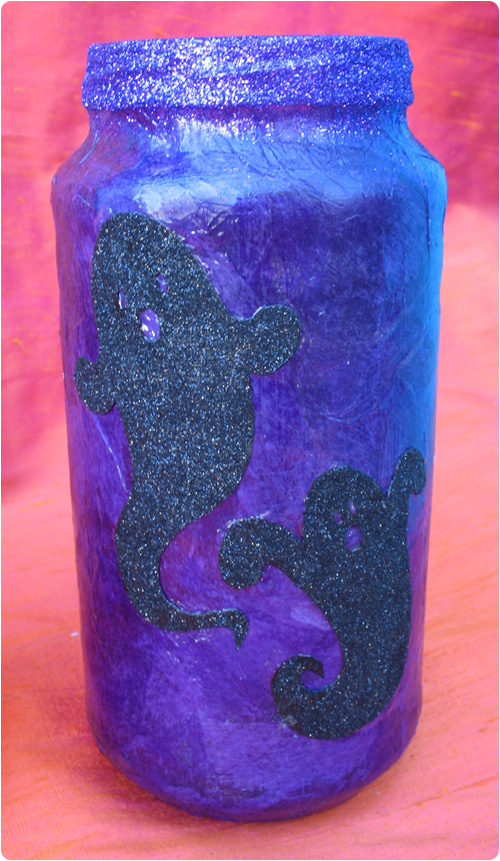
Step 4: Draw your designs onto black construction paper and cut them out. If you need some inspiration (I did!), try Google image search and look for ghost, bat, etc, silhouettes. Print them out and trace them onto your construction paper! :)
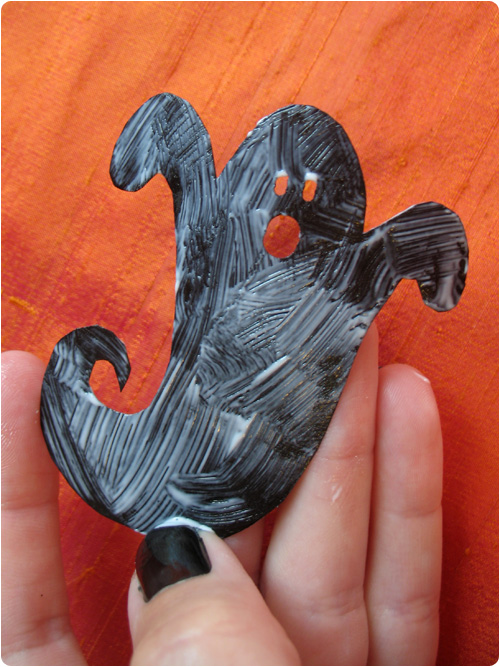
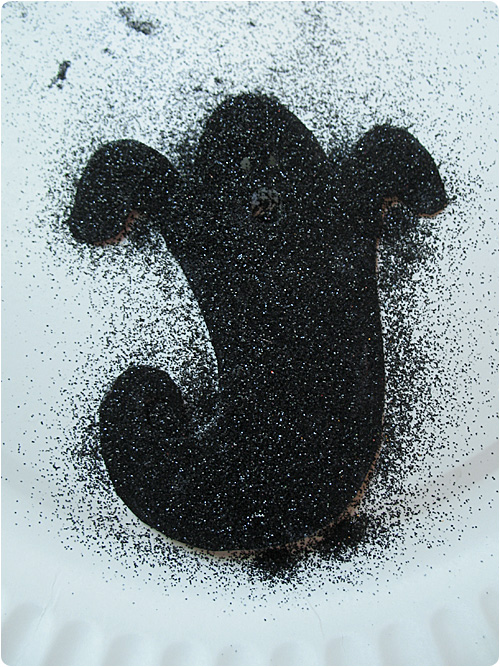
Step 5: (skip to step 6 if you’re not using glitter) Brush a layer of Mod Podge onto your shapes and sprinkle them with glitter. Give them time to dry before you try to shake off the excess and move onto the next step.
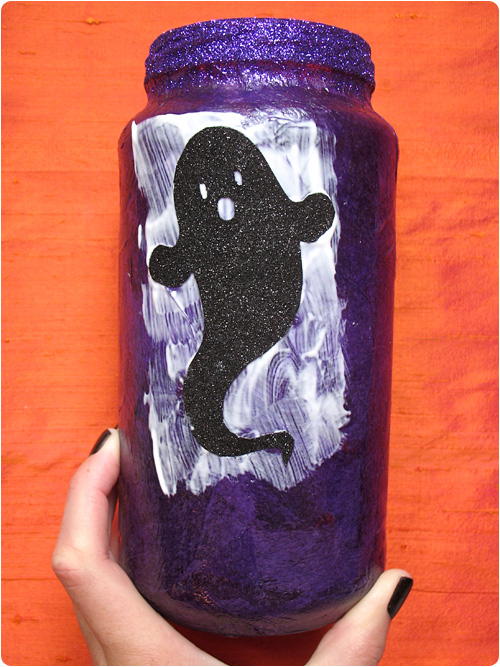
Step 6: Figure out where you want to put your shapes. Brush on a layer of Mod Podge and press your shapes into it. Let it dry and enjoy!! :D
Happy Halloween!!

Stay tuned for more Halloween tutorials! I have a few more in the works!
Those are awesome!! The bonus is I have everything I need except the tissue and jars. What a wonderful idea for a quick Halloween craft. :D
I’m glad you like! I love it when crafts can be cheap to make and quick!
So cute!!!
Thank you!
They look great! Spooky and cute at the same time. ^^
Hugs, Myriam
Thanks!
These are to cute:)
Thank you! :)
I love these and we will be making these this year!
yay! I’m so happy to hear that! :)
what a wonderful idea- so cute. I think I’d like to make it with my older son! :) PERFECT for Halloween. Thanks for this great idea. :)
The pumpkin face is ADORABLE!!! What a GREAT idea .. esp since I do have tons of clear jars as well :)
I made these with my 3 years old this morning! It looks great!
LOVE!! What a cute, fabulous idea! Perfect rainy day craft with the kids, too!! Thanks! :)
I love this project. You can use any size jar and make them for every holiday. I use baby food jars and put votive candles in them at Christmas. For Halloween, I also take milk jugs – using a Sharpie marker, color a face on the jugs and then put candles in it. Fun and festive – and you can make new every year!!
That is absolutely adorable! I keep pickle jars because I can’t bear to toss them and this would be a great way to reuse them!
You could also make Christmas luminaries out of them. We light luminaries on Christmas Eve so Santa can find our house.
Thanks for sharing this with us!
What a great idea!
Great tutorial and idea. I love new halloween crafts!
Thank you so much for posting this! I love these! My whole family ended up making them. The possibilities our endless.
You can see our little creations here: http://blog.jenniferfraley.com/2011/10/17/pumpkin-solutions/
SOOOOOOOOOOOOO stinkin’ cute!!!!
This is so cute and fast! And pretty cheap. I usually recycle my glass jars, but I love finding ways to re-purpose stuff! I am so going to make a few of these. You rock for sharing your creativity! Thank you!
These look awesome! Can’t wait to try with my Storytime kids.
Love it .. very crafty :-) gave me an idea for my Halloween party for this year…
These luminaries are super cute! I would have never guessed you used tissue paper to color each one. I hope it’s okay, I just finished a Halloween crafts/decor round-up and just couldn’t resist featuring your cute lanterns.. You can see it here:
http://jamiebrock.hubpages.com/hub/Super-Cute-DIY-Project-Ideas-Decorating-for-Halloween
Thank you for sharing the awesome tutorial. I can’t wait to make some of these for this upcoming Halloween, I just hope they turn out as cute as yours :)
But wont this burn or something when you put a candle inside? you know the tissue paper might set on fire on something? :/ I really want to make this, but I don’t want to light my house on fire :/
Just finished making one of these, got the instructions from a friend and it’s so much fun and so easy to do.