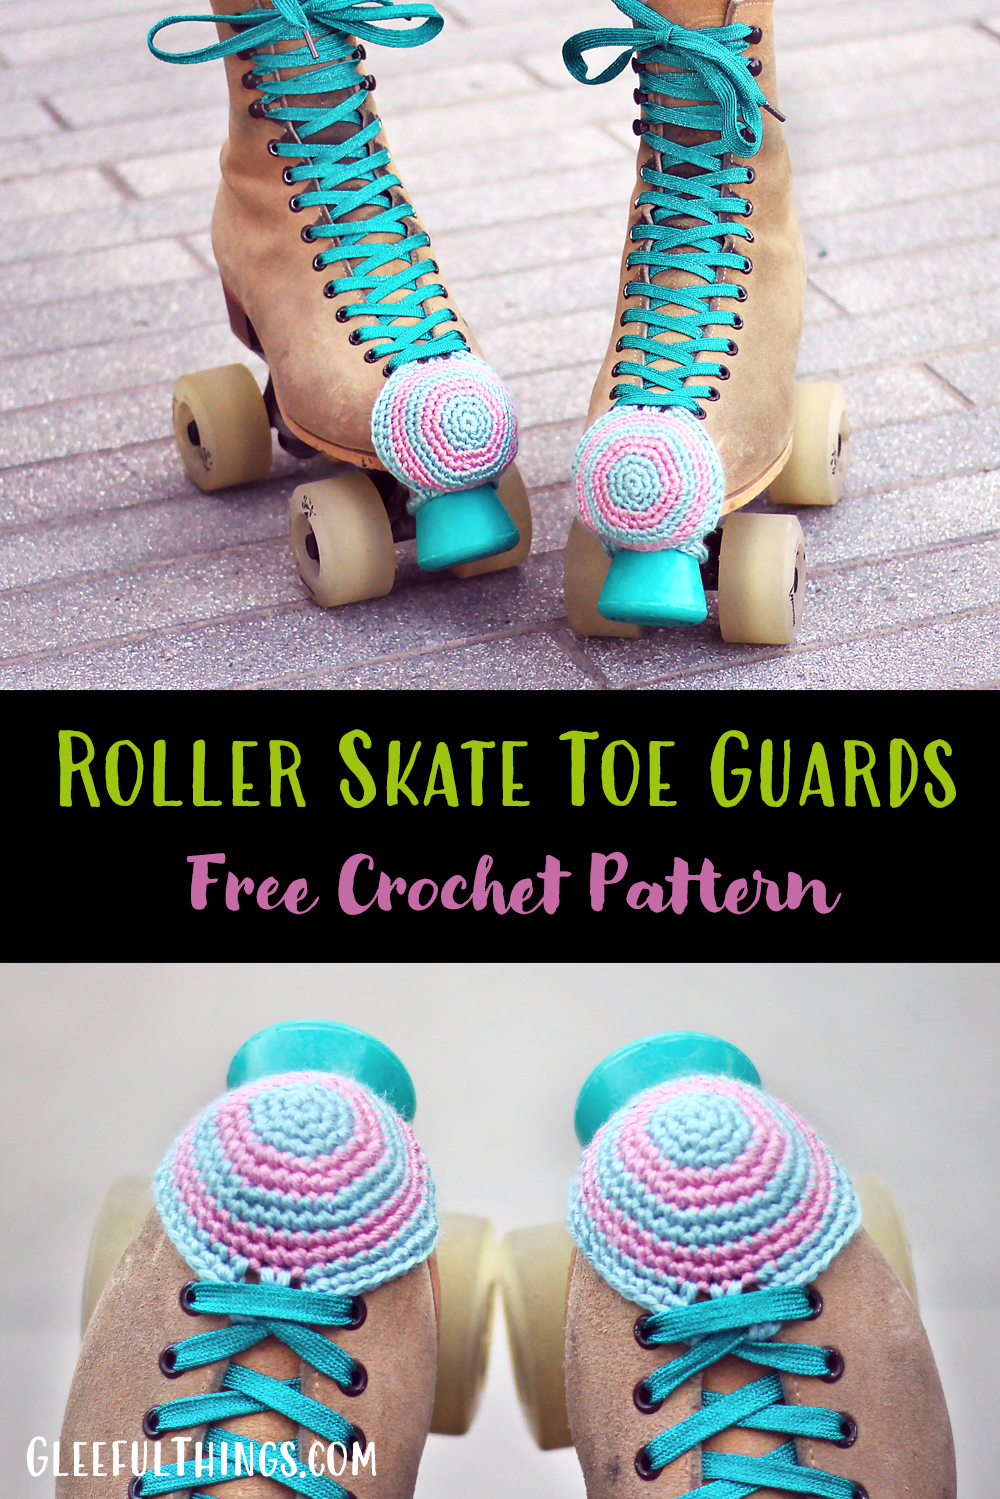
Roller Skate Toe Guards Free Crochet Pattern

Ok, so I know this is a super specific item and it probably isn’t gonna appeal to most of my usual readers… lol! But I’m really proud of these so I wanted to share the pattern anyway! I hope there are a few of you who also roller skate, and hope that those of you who don’t will still stick around for what’s next! :)
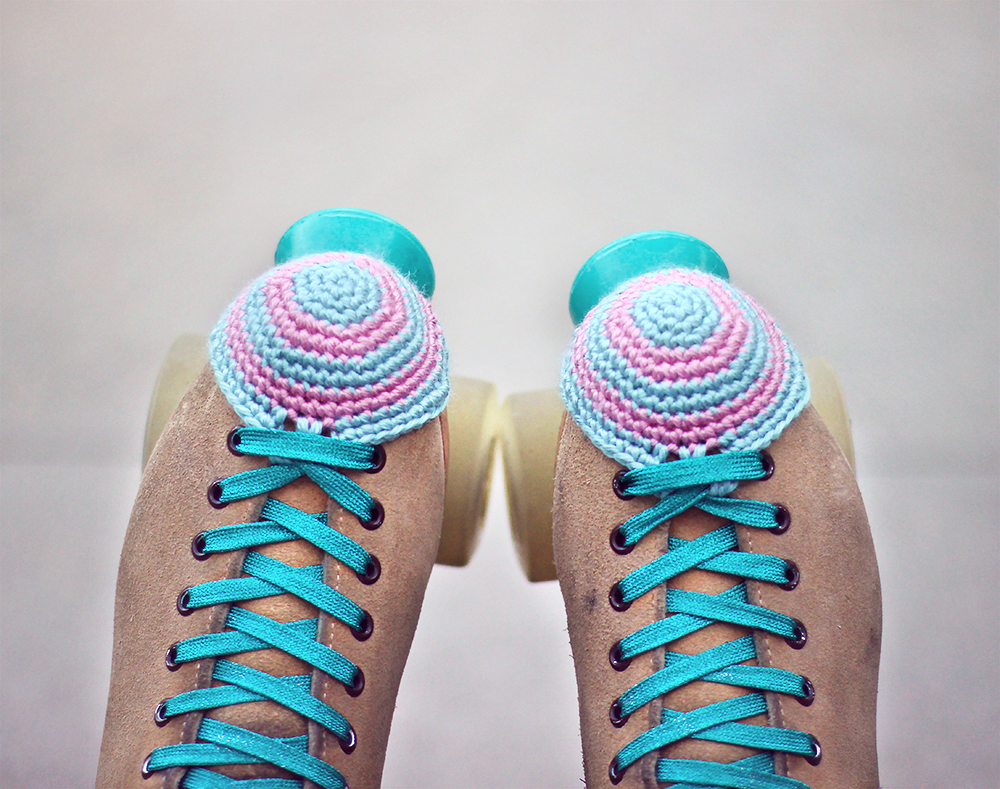
Anywho! I designed these toe guards after realizing that I don’t 100% like any of the ones I’ve seen in stores. They’re too boxy or they move around too much or they just plain aren’t cute. So I couldn’t pass up this opportunity to combine two of my favorite hobbies in an attempt to make something better. Not only are these cute, but they also fit really well! Look how snug they are! On top of that, I designed these amigurumi style, using really tight stitches, which creates a sturdy fabric that is actually going to protect your skates!
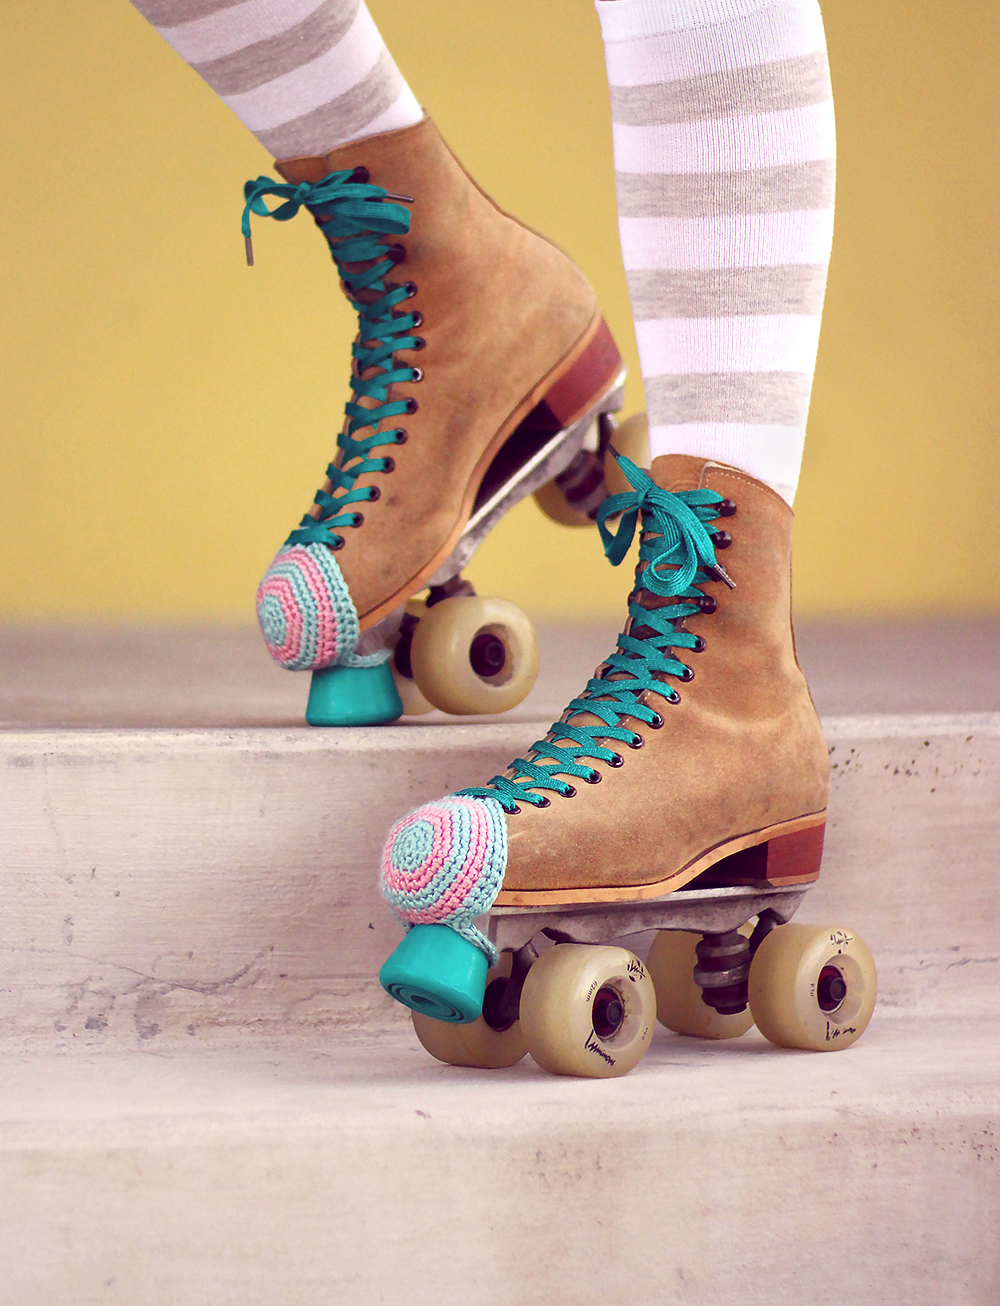
I wish I could have designed these to fit all of the different skates out there but unfortunately, these (Riedell 135 boots) are the only ones I have, so I can’t guarantee how they’re going to fit others. They will probably also fit Riedell Citizen & most boots with bolt on toe stops. If you have skates with adjustable toe stops such as the popular Moxi Lollys or Sure Grip Boardwalks, you will probably need to make the loop that goes around the toe stop smaller.
If you make a pair of these, please leave a comment and let me know what kind of skates you have and how they fit. I’m really curious to know what skates they fit and I’m sure it will help others out too! :)
Download the Pattern
You can find the FREE pattern by scrolling down. A print friendly, ad free PDF of this pattern is also available to download for a small fee. If you enjoy my patterns, please consider purchasing the PDF – your support will help me keep the new patterns coming! :)
>> Click here to get the PDF on Etsy <<
>> Click here to get the PDF on Ravelry <<
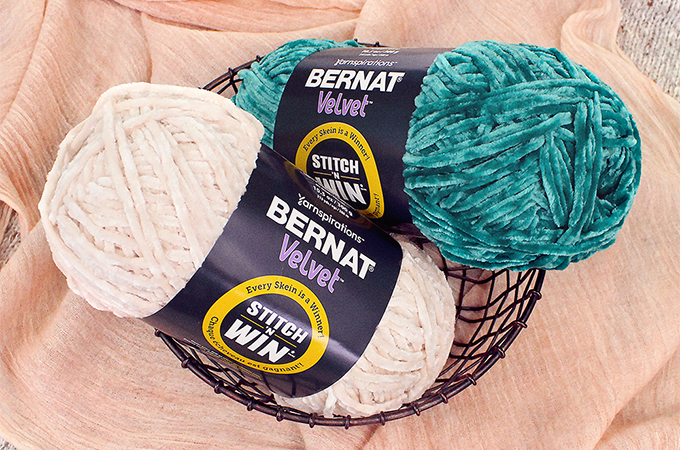
Yarn
Red Heart Soft, #4 worsted weight yarn: Small amounts of #9520 Seafoam (A) and #9770 Rose Blush (B)
Disclosure: This post contains affiliate links. If you click & make a purchase, I will receive a small commission at no extra cost to you. This helps to ensure that I’m able to continue posting free patterns and tutorials! Thank you for your support! :)
Materials
US Size E/4 (3.5mm) crochet hook or size needed to obtain gauge, yarn needle, scissors, stitch marker
Difficulty
Easy
Sizing/Fit info
These should perfectly fit roller skates similar to the Riedell 135 boot with bolt on toe stops. If you have a similar boot with adjustable toe stops, you may need to alter the pattern to fit around them.
Finished Measurements
Length (from center to edge): 2”, Circumference: 7.5”
Gauge
5 sc and 6 rows = 1”
Special Stitches
Standing sc – make a slip knot & place loop on hook, insert hook into st, yarn over & draw up a loop, yarn over and draw through both loops.
Abbreviations
ch(s) – chain(s), sc – single crochet, hdc – half double crochet, dc – double crochet, st(s) – stitch(es), sl st – slip stitch
Notes
1. Pattern is worked in continuous rounds. Do not join unless instructed.
2. It may be helpful to use a stitch marker to keep track of the beginning of rounds.
3. Pattern is worked amigurumi style – keep your stitches tight to create a sturdy fabric!
4. For the solid color instructions, you’ll use one color through out. For the striped instructions, use two colors and alternate as instructed in pattern. You’ll be using invisible joins and standing single crochets to create the most discreet transition possible between colors.
Solid Color Instructions:
Make magic ring.
Round 1: Ch 1 (does not count as a st), 6 sc in ring – 6 sc.
Round 2: 2 sc in each st around – 12 sc.
Round 3: *1 sc in next st, 2 sc in next st; repeat from * around – 18 sc.
Round 4: *1 sc in each of the next 2 sts, 2 sc in next st; repeat from * around – 24 sc.
Round 5: *1 sc in each of the next 3 sts, 2 sc in next st; repeat from * around – 30 sc.
Round 6: *1 sc in each of the next 4 sts, 2 sc in next st; repeat from * around – 36 sc.
Round 7-8: 1 sc in each st around – 36 sc.
Round 9: 1 sc in each of the next 6 sts, 1 hdc in each of the next 5 sts, 1 sc in each of the next 18 sts, 1 hdc in each of the next 5 sts, 1 sc in each of the next 2 sts – 26 sc + 10 hdc.
Round 10: 1 sc in next st, ch 18, skip 3 sts, 1 sc in each of the next 3 sts, 1 hdc in each of the next 5 sts, 1 sc in each of the next 7 sts, ch 10, skip 2 sts, 1 sc in each of the next 7 sts, 1 hdc in each of the next 5 sts, 1 sc in each of the next 3 sts – 21 sc + 10 hdc.
Round 11: 1 sc in next st, 1 sl st in each of the next 18 chs, 1 sc in each of the next 4 sts, 1 hdc in each of the next 5 sts, 1 sc in each of the next 6 sts, 1 sl st in each of the next 4 chs, 1 dc in each of the 2 skipped sts in the previous round (working over the next 2 chs as well), 1 sl st in each of the last 4 chs, 1 sc in each of the next 6 sts, 1 hdc in each of the next 5 sts, 1 sc in each of the next 4 sts, invisible join to 1st sl st & fasten off – 22 sc + 10 hdc + 26 sl st + 2 dc.
Two Color Striped Instructions:
With A, make magic ring.
Round 1: Ch 1 (does not count as a st), 6 sc in ring – 6 sc.
Round 2: 2 sc in each st around – 12 sc.
Round 3: *1 sc in next st, 2 sc in next st; repeat from * around, invisible join to 2nd sc & fasten off A – 18 sc.
Round 4: With B, 1 standing sc in invisible join, 1 sc in next st, 2 sc in next st, *1 sc in each of the next 2 sts, 2 sc in next st; repeat from * around – 24 sc.
Round 5: *1 sc in each of the next 3 sts, 2 sc in next st; repeat from * around, invisible join to 2nd sc & fasten off B – 30 sc.
Round 6: With A, 1 standing sc in invisible join, 1 sc in each of the next 3 sts, 2 sc in next st, *1 sc in each of the next 4 sts, 2 sc in next st; repeat from * around – 36 sc.
Round 7: 1 sc in each st around, invisible join to 2nd sc & fasten off A – 36 sc.
Round 8: With B, 1 standing sc in invisible join, 1 sc in each st around – 36 sc.
Round 9: 1 sc in each of the next 6 sts, 1 hdc in each of the next 5 sts, 1 sc in each of the next 18 sts, 1 hdc in each of the next 5 sts, 1 sc in each of the next 2 sts, invisible join to 2nd sc & fasten off B – 26 sc + 10 hdc.
Round 10: With A, 1 standing sc in invisible join, ch 18, skip 3 sts, 1 sc in each of the next 3 sts, 1 hdc in each of the next 5 sts, 1 sc in each of the next 7 sts, ch 10, skip 2 sts, 1 sc in each of the next 7 sts, 1 hdc in each of the next 5 sts, 1 sc in each of the next 3 sts – 21 sc + 10 hdc.
Round 11: 1 sc in next st, 1 sl st in each of the next 18 chs, 1 sc in each of the next 4 sts, 1 hdc in each of the next 5 sts, 1 sc in each of the next 6 sts, 1 sl st in each of the next 4 chs, 1 dc in each of the 2 skipped sts in the previous round (working over the next 2 chs as well), 1 sl st in each of the last 4 chs, 1 sc in each of the next 6 sts, 1 hdc in each of the next 5 sts, 1 sc in each of the next 4 sts, invisible join to 1st sl st & fasten off A – 22 sc + 10 hdc + 26 sl st + 2 dc.
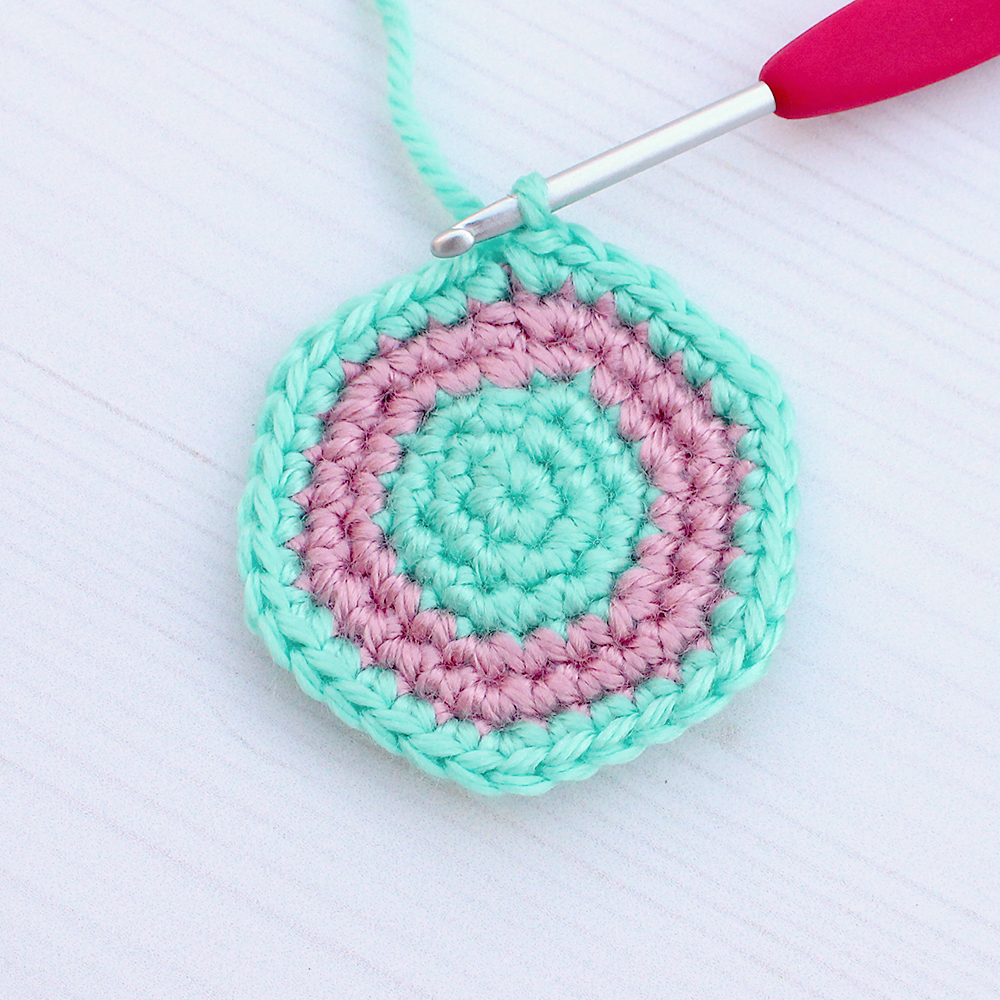
Helpful Photos – How joining works with this pattern:
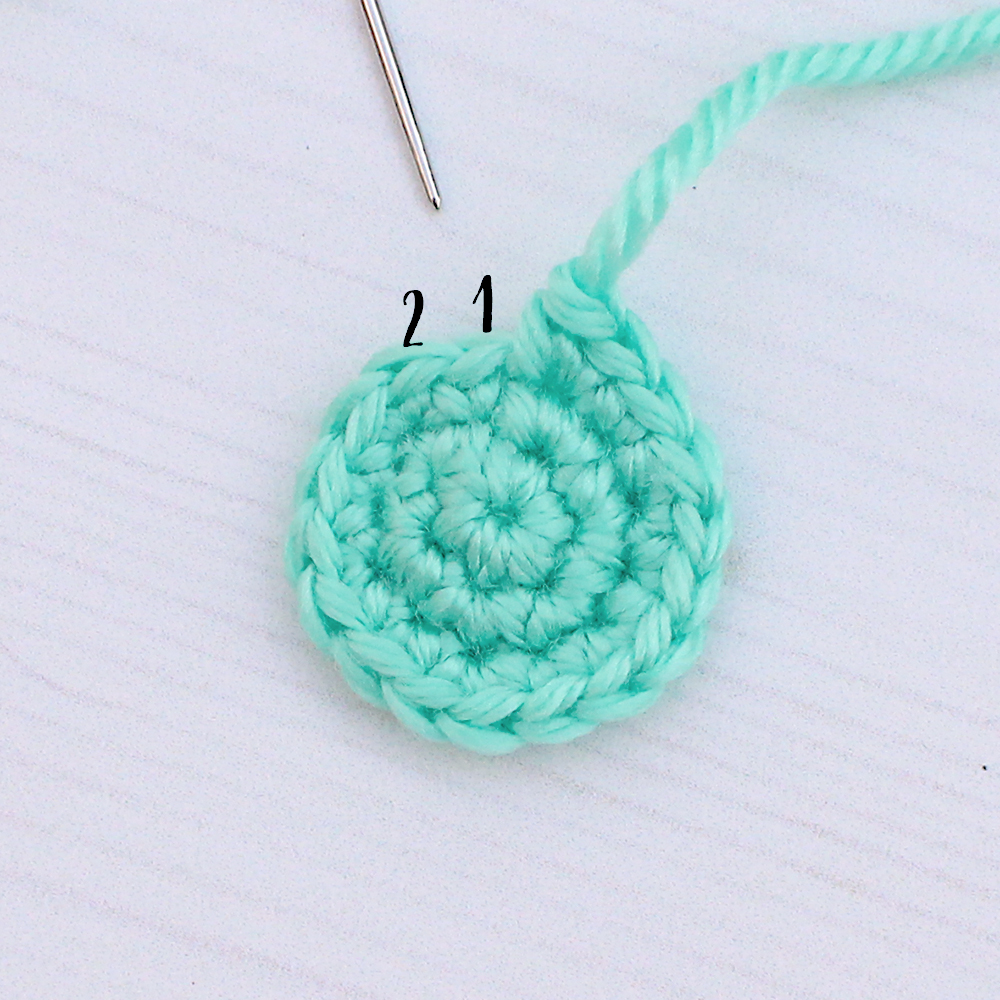
At the end of the rounds where you’re instructed to “invisible join to 2nd sc”, you’ll skip the 1st sc of the round (labeled “1” below) & make your invisible join to the next sc (labeled “2” below).
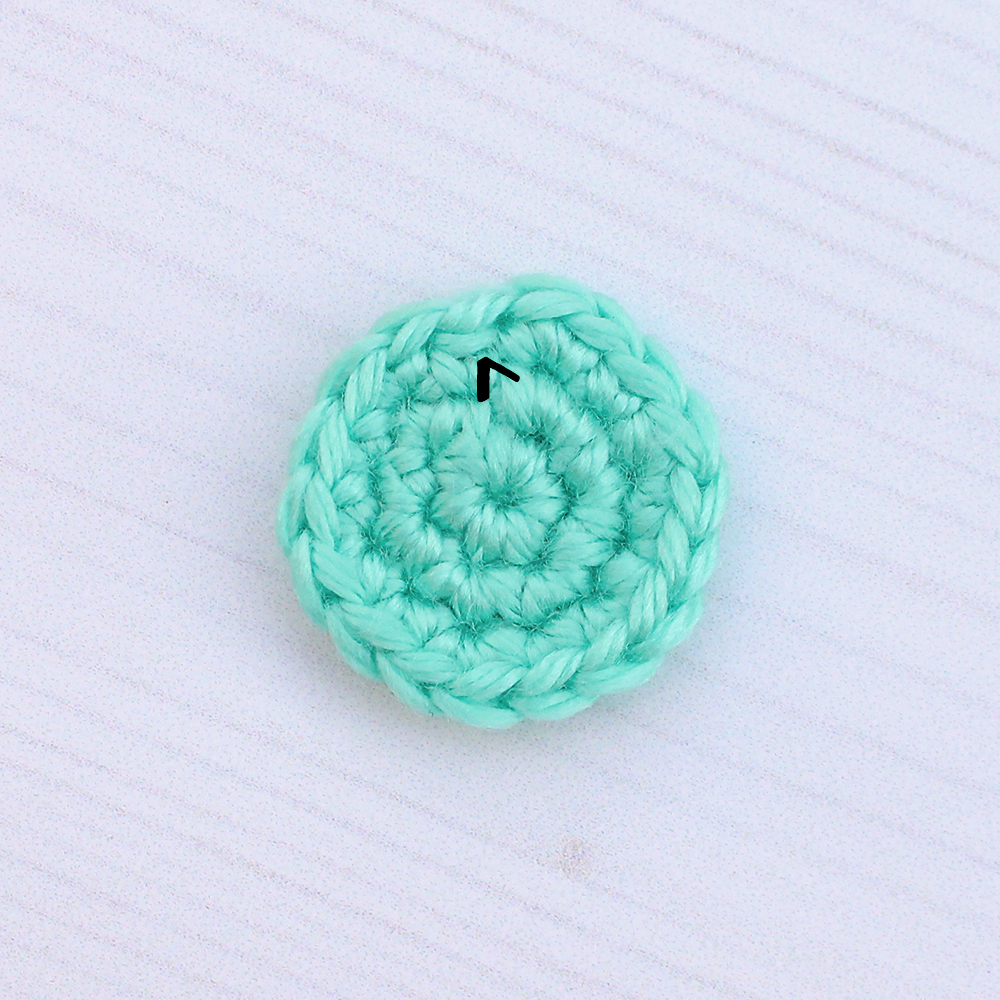
You can see what the completed invisible join should look like in the photo below. When starting the next round, with a new color, you’ll make a standing single crochet into the join. Disregard the stitch below it (where the arrow is pointing in the photo below), you will not work into that.
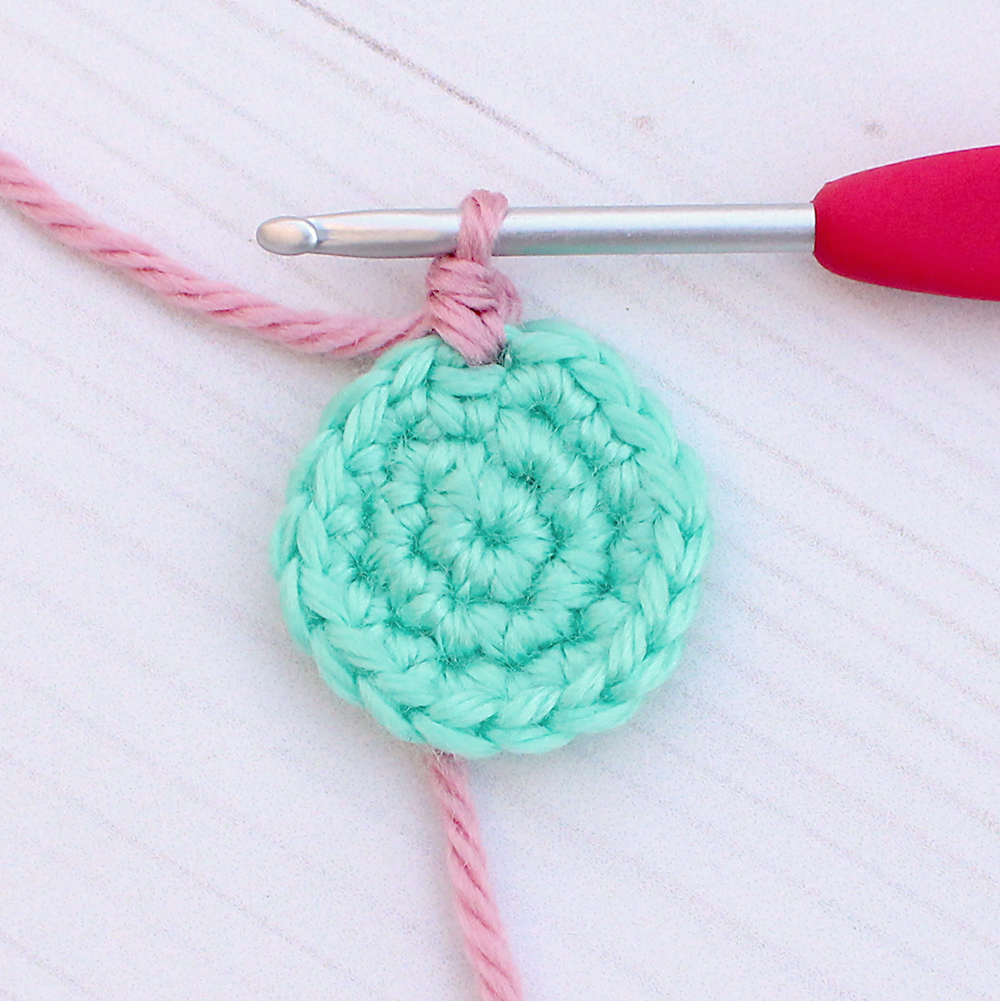
The photo below shows what the standing single crochet should look like/where it should go.
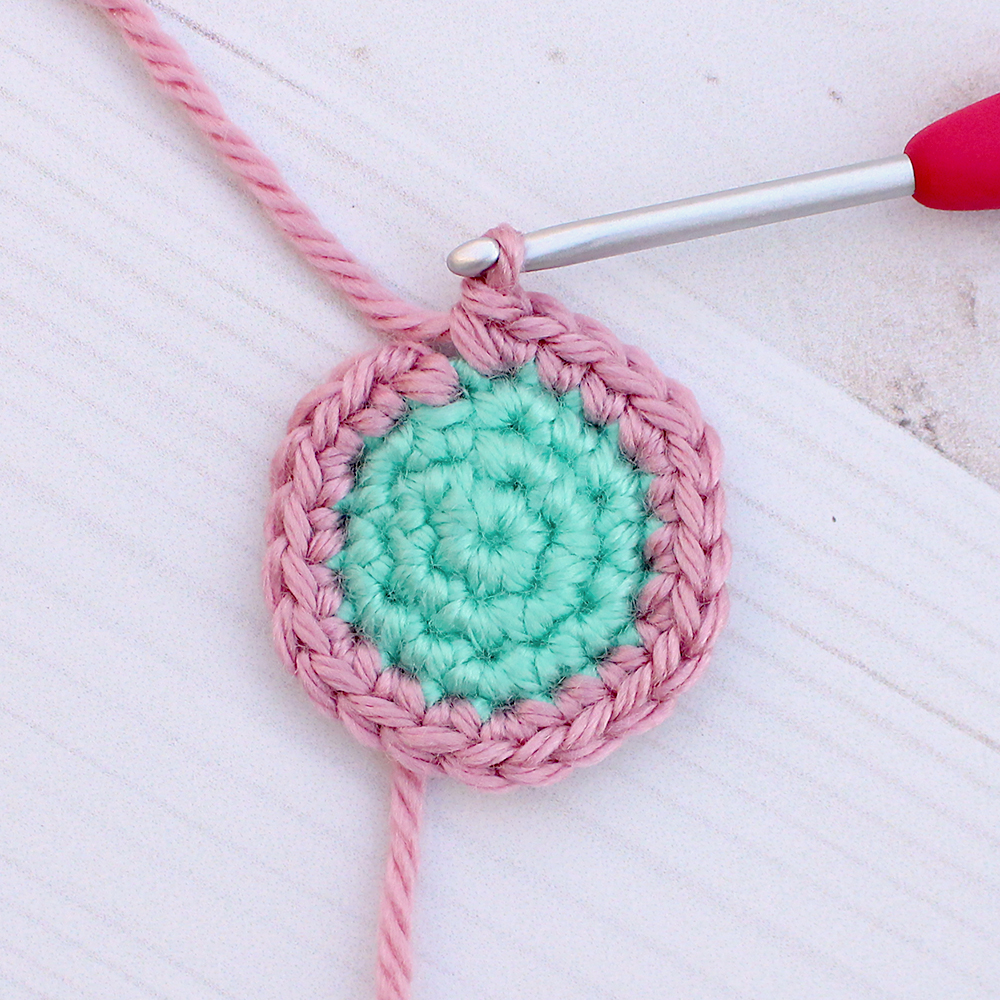
The photo below shows what that completed round looks like. Remember not to join at the end of rounds except when instructed (when you’re about to change colors).
The photo below shows a couple more rounds completed. As you can see, we’re creating a really nice transition between colors, so it’s not super obvious where your joins are! :)
Terms of Use:
You are welcome and encouraged to sell any items you make using this pattern! All I ask in return is that when selling online, please credit Julie King / Gleeful Things & provide a link to www.gleefulthings.com.
You may NOT sell the pattern, distribute it in any form, repost it online, or alter it to claim it as your own. Copyright © 2019 Julie King / Gleeful Things. All Rights Reserved.
Pin it to save for later!
I love this idea! How great!