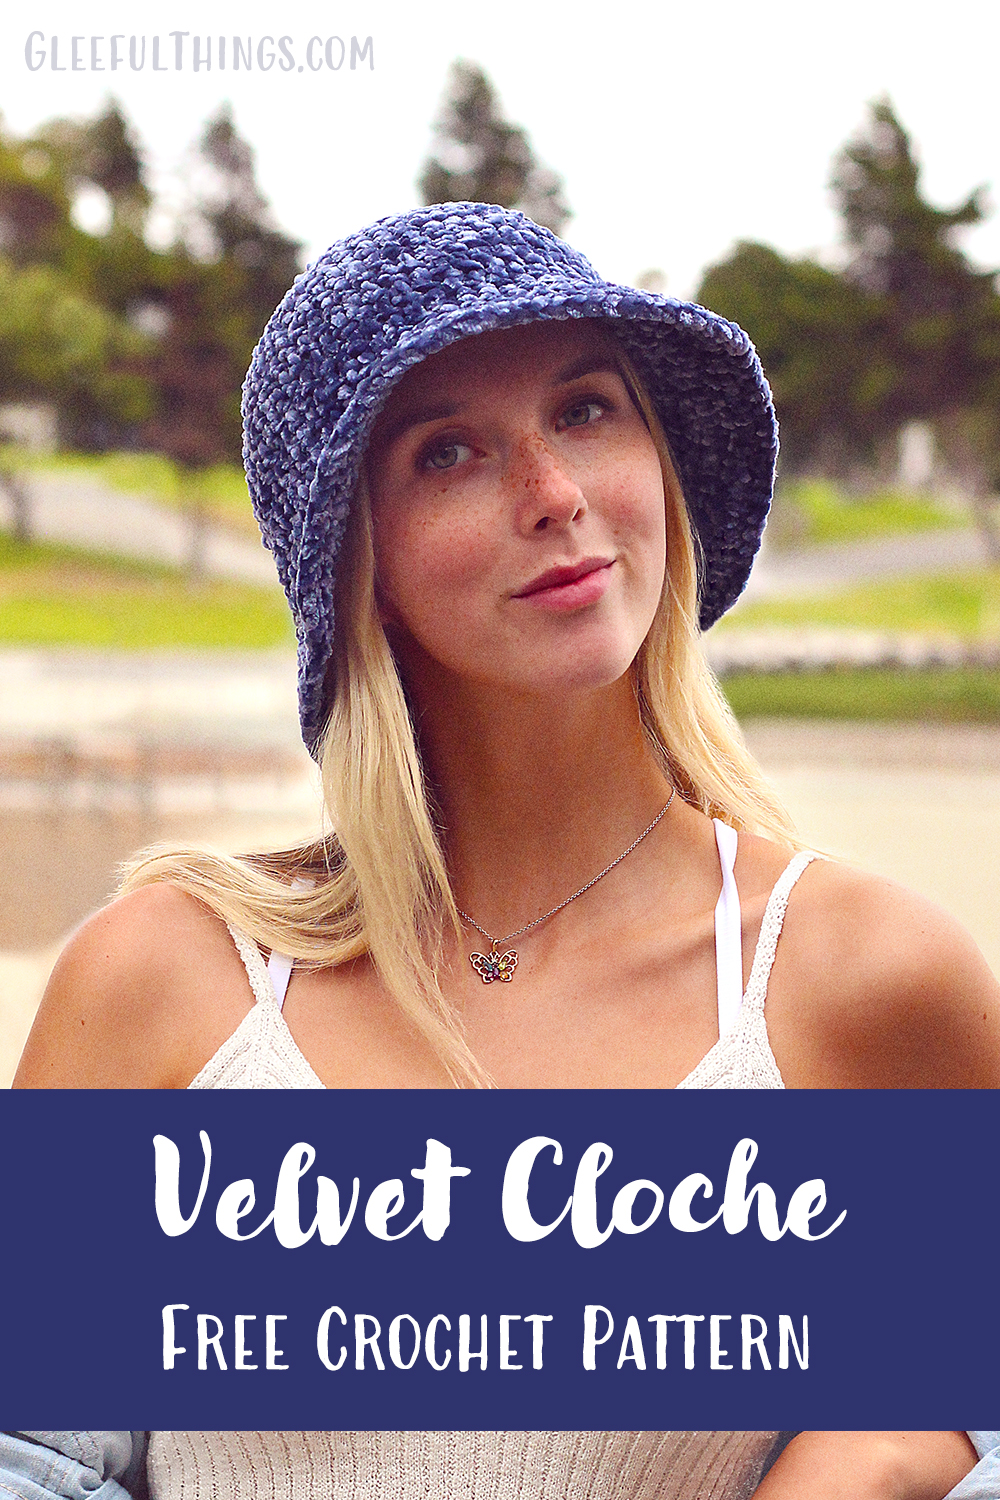
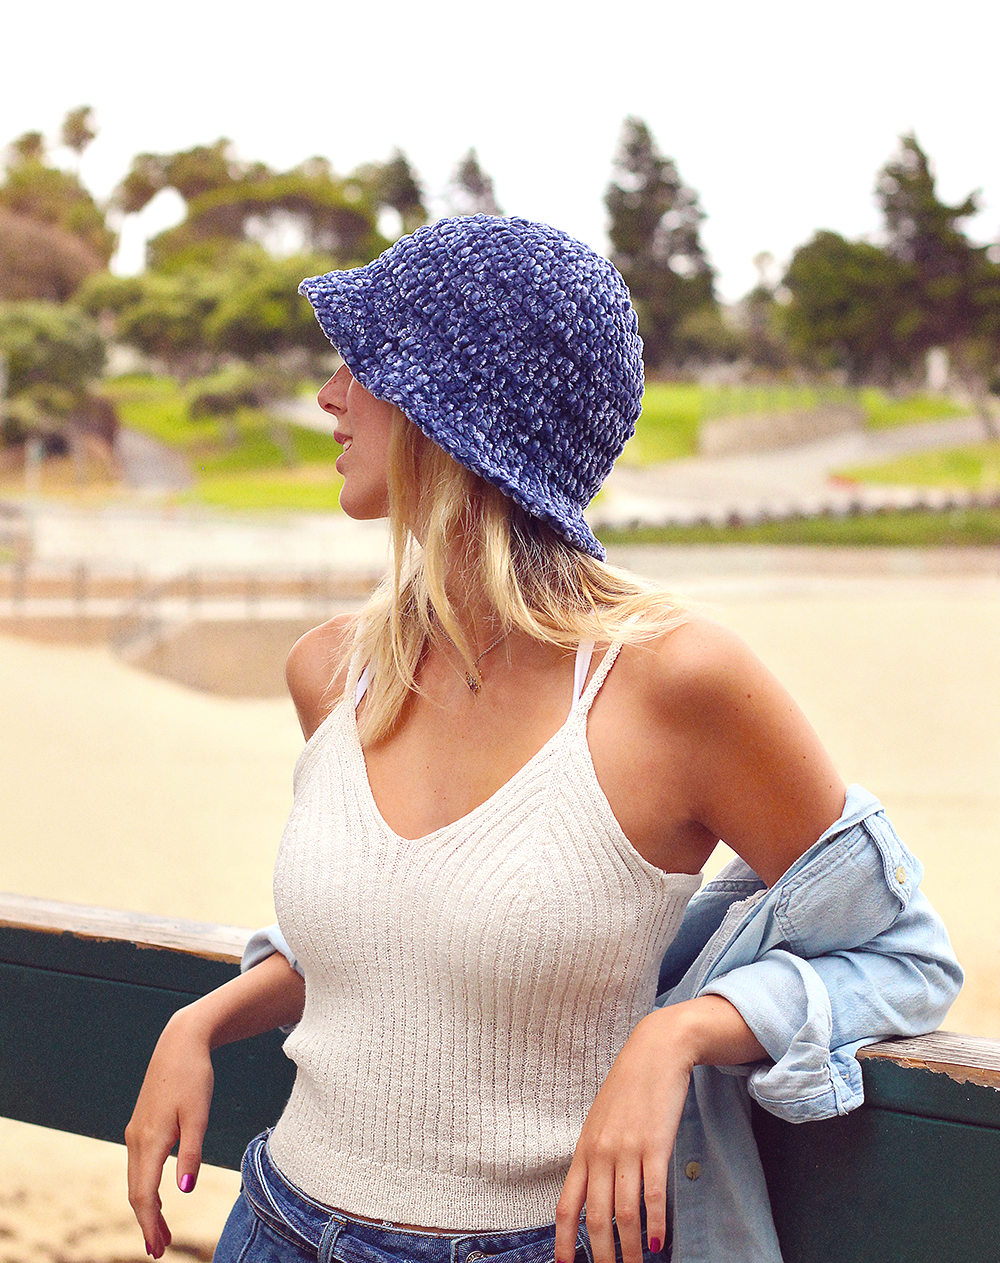
Velvet Cloche Free Crochet Pattern
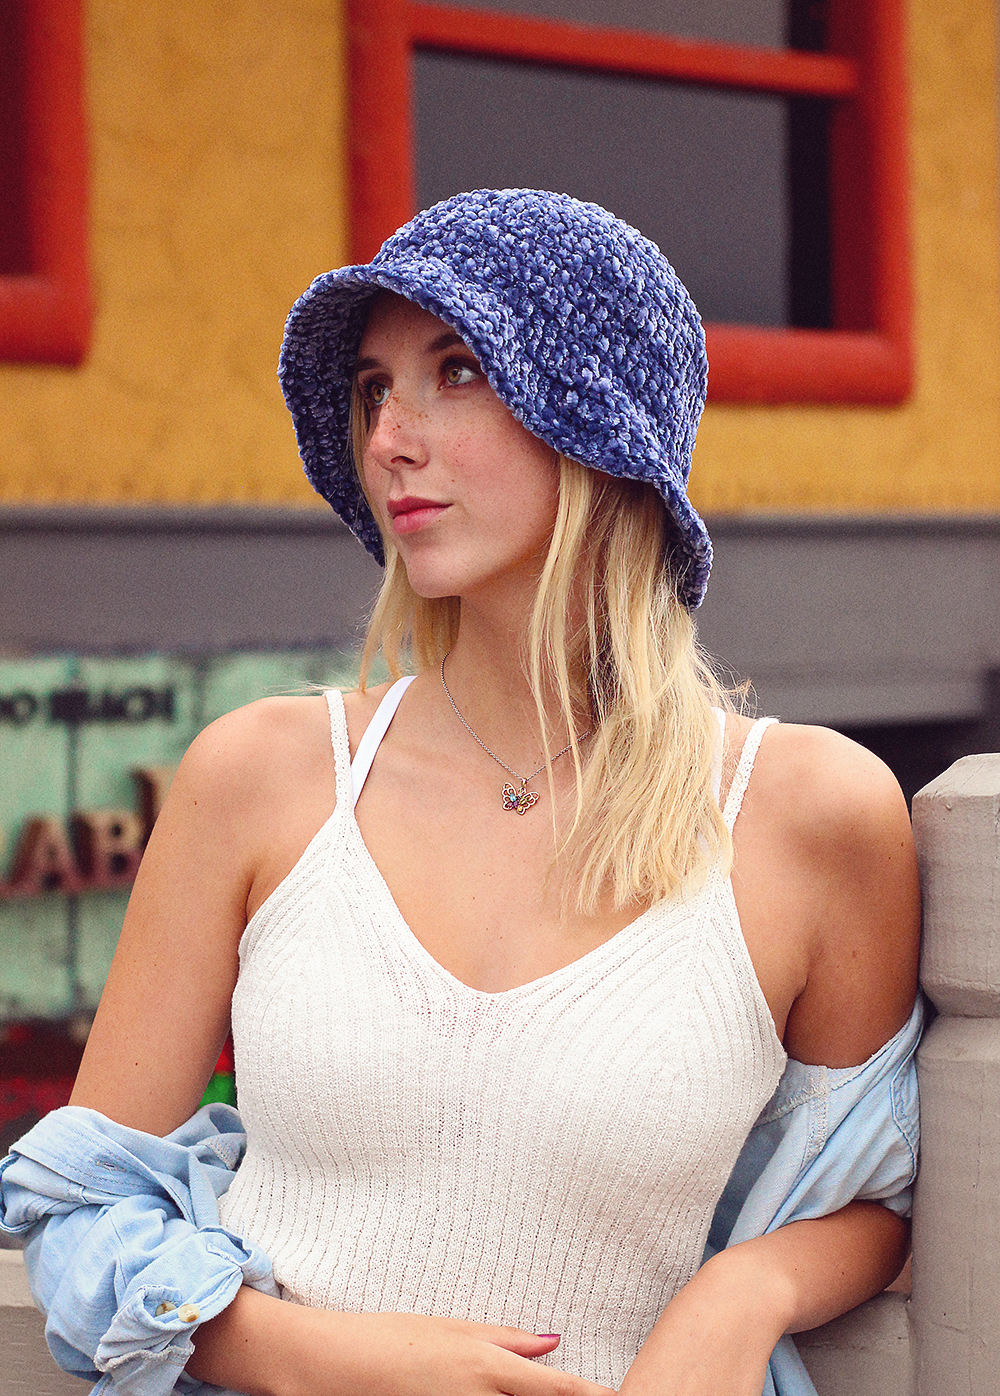

Ever since I made the Velvet Witch Hat last Halloween, I’ve been wanting a similar but non-pointy version of it. You know, a more everyday kind of hat! ;) This simple cloche is exactly that and I’m so pleased with out it turned out using the same Bernat Velvet yarn!
I see this as the type of hat that you could wear when you want something cozy like a beanie, but fancier! Because when you make something with velvet, it really can’t help but feel a little fancy, right? :) It can easily be dressed up or down depending on how casual (or not!) the rest of your outfit is.
This super beginner friendly hat is made entirely with double crochets and best of all, both sizes use less than half a skein of Bernat Velvet so you can make one for yourself and one for a friend!
DOWNLOAD THE PATTERN
You can find the FREE pattern by scrolling down. A print friendly, ad free PDF of this pattern is also available to download for a small fee. If you enjoy my patterns, please consider purchasing the PDF – your support will help me keep the new patterns coming! :)
>> CLICK HERE TO GET THE PDF ON ETSY <<
>> CLICK HERE TO GET THE PDF ON RAVELRY <<
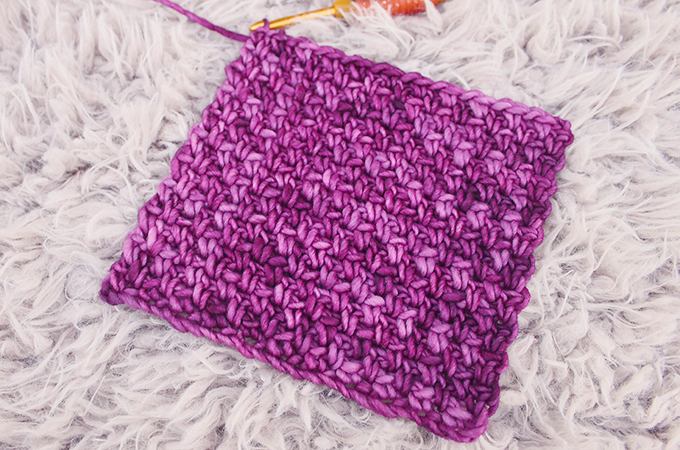
Yarn
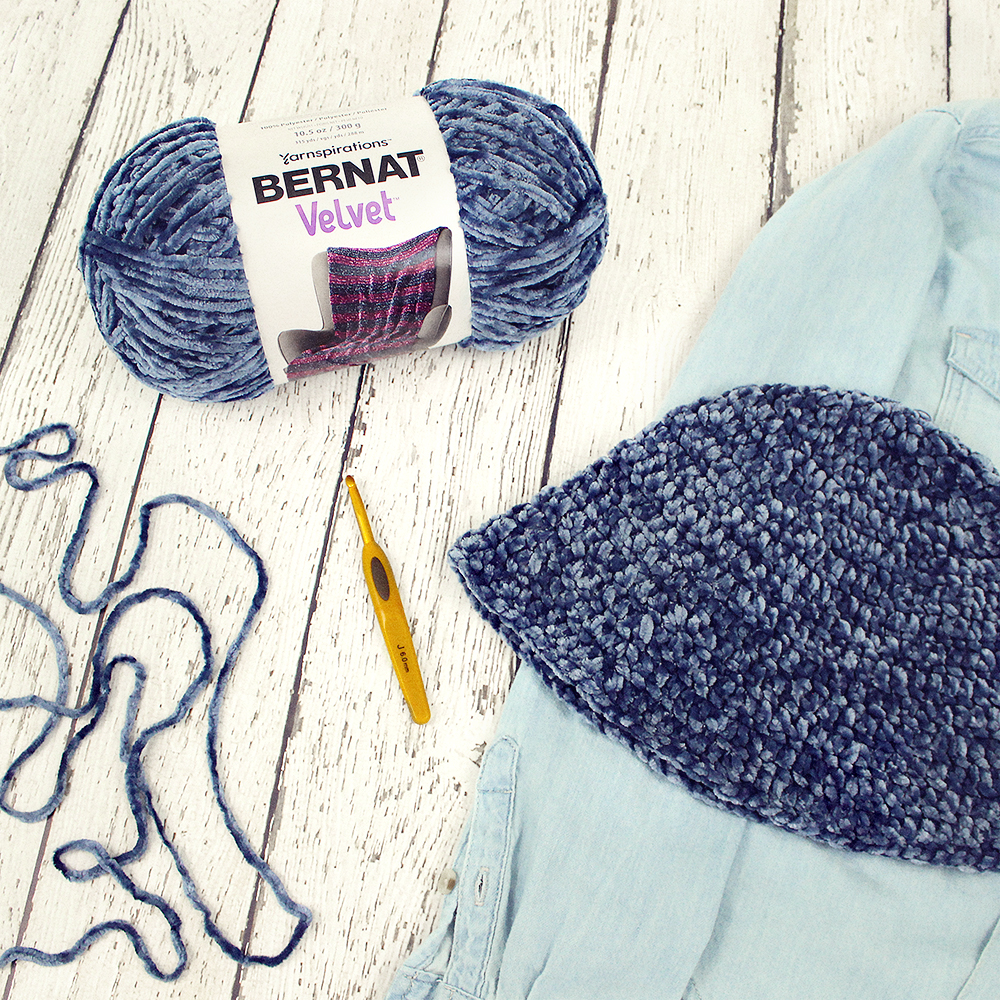
Bernat Velvet, #5 bulky weight yarn: Approximately 130 yards (size small) / 150 yards (size medium) of #32007-Indigo Velvet
Materials
US Size J/10 (6mm) crochet hook or size needed to obtain gauge, yarn needle, scissors
Disclosure: This post contains affiliate links. If you click & make a purchase, I will receive a small commission at no extra cost to you. This helps to ensure that I’m able to continue posting free patterns and tutorials! Thank you for your support! :)
Difficulty
Easy
Finished Measurements
Size Small:
Length: 8” (from center of top to edge of brim, laid flat)
Circumference before brim: 22” (at round 11)
Size Medium:
Length: 9” (from center of top to edge of brim, laid flat)
Circumference before brim: 24” (at round 12)
Gauge
6 dc and 3 rows = 2”
Abbreviations
ch(s) – chain(s), dc – double crochet, st(s) – stitch(es), sl st – slip stitch
Notes
1. Pattern is worked in joined rounds, starting at the top.
2. Ch 2 at beginning of rounds will always count as 1 dc.
3. If you would prefer the brim to be stiffer, you could crochet the final round over a piece of jewelry wire.
Size Small Instructions:
Make magic ring.
Round 1: Ch 2 (counts as 1 dc now and through out), 11 dc in ring, sl st to top of ch 2 to join – 12 dc.
Round 2: Ch 2, 1 dc in same st, 2 dc in each st around, sl st to top of ch 2 to join – 24 dc.
Round 3: Ch 2, 2 dc in next st, *1 dc in next st, 2 dc in next st; repeat from * around, sl st to top of ch 2 to join – 36 dc.
Round 4: Ch 2, 1 dc in next st, 2 dc in next st, *1 dc in each of the next 2 sts, 2 dc in next st; repeat from * around, sl st to top of ch 2 to join – 48 dc.
Round 5: Ch 2, 1 dc in each of the next 2 sts, 2 dc in next st, *1 dc in each of the next 3 sts, 2 dc in next st; repeat from * around, sl st to top of ch 2 to join – 60 dc.
Round 6-11: Ch 2, 1 dc in each st around, sl st to top of ch 2 to join – 60 dc.
Round 12: Ch 2, 1 dc in each of the next 4 sts, 2 dc in next st, *1 dc in each of the next 5 sts, 2 dc in next st; repeat from * around, sl st to top of ch 2 to join – 70 dc.
Round 13: Ch 2, 1 dc in each of the next 5 sts, 2 dc in next st, *1 dc in each of the next 6 sts, 2 dc in next st; repeat from * around, sl st to top of ch 2 to join – 80 dc.
Round 14: Ch 2, 1 dc in each of the next 6 sts, 2 dc in next st, *1 dc in each of the next 7 sts, 2 dc in next st; repeat from * around, invisible join to top of ch 2 and fasten off – 90 dc.

Size Medium Instructions:
Make magic ring.
Round 1: Ch 2 (counts as 1 dc now and through out), 10 dc in ring, sl st to top of ch 2 to join – 11 dc.
Round 2: Ch 2, 1 dc in same st, 2 dc in each st around, sl st to top of ch 2 to join – 22 dc.
Round 3: Ch 2, 2 dc in next st, *1 dc in next st, 2 dc in next st; repeat from * around, sl st to top of ch 2 to join – 33 dc.
Round 4: Ch 2, 1 dc in next st, 2 dc in next st, *1 dc in each of the next 2 sts, 2 dc in next st; repeat from * around, sl st to top of ch 2 to join – 44 dc.
Round 5: Ch 2, 1 dc in each of the next 2 sts, 2 dc in next st, *1 dc in each of the next 3 sts, 2 dc in next st; repeat from * around, sl st to top of ch 2 to join – 55 dc.
Round 6: Ch 2, 1 dc in each of the next 3 sts, 2 dc in next st, *1 dc in each of the next 4 sts, 2 dc in next st; repeat from * around, sl st to top of ch 2 to join – 66 dc.
Round 7-12: Ch 2, 1 dc in each st around, sl st to top of ch 2 to join – 66 dc.
Round 13: Ch 2, 1 dc in each of the next 4 sts, 2 dc in next st, *1 dc in each of the next 5 sts, 2 dc in next st; repeat from * around, sl st to top of ch 2 to join – 77 dc.
Round 14: Ch 2, 1 dc in each of the next 5 sts, 2 dc in next st, *1 dc in each of the next 6 sts, 2 dc in next st; repeat from * around, sl st to top of ch 2 to join – 88 dc.
Round 15: Ch 2, 1 dc in each of the next 6 sts, 2 dc in next st, *1 dc in each of the next 7 sts, 2 dc in next st; repeat from * around, invisible join to top of ch 2 and fasten off – 99 dc.
TERMS OF USE
You are welcome and encouraged to sell any items you make using this pattern! All I ask in return is that when selling online, please credit Julie King / Gleeful Things & provide a link to www.gleefulthings.com.
You may NOT sell the pattern, distribute it in any form, repost it online, or alter it to claim it as your own. Copyright © 2019 Julie King / Gleeful Things. All Rights Reserved.
Pin it to save for later!