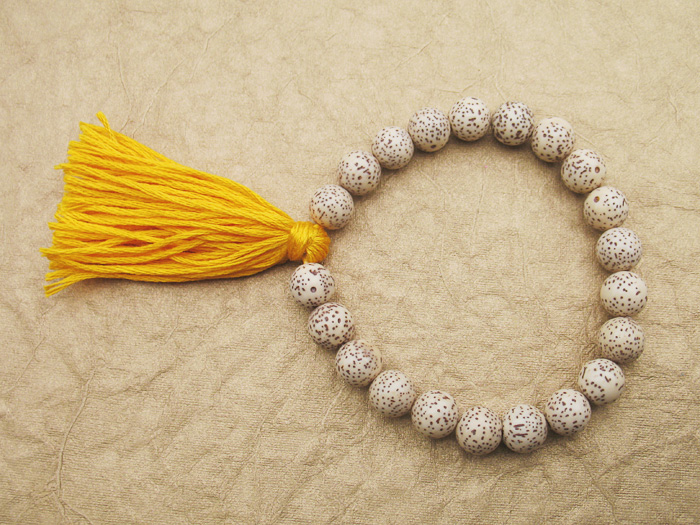
DIY: Tassel Beaded Bracelet Tutorial
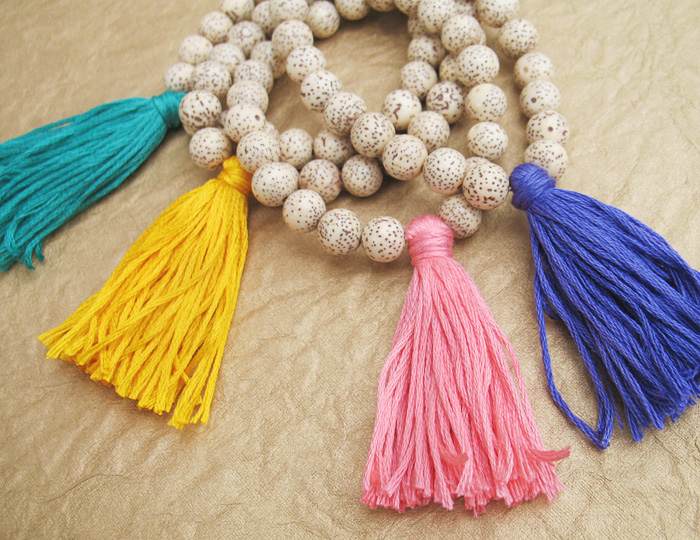
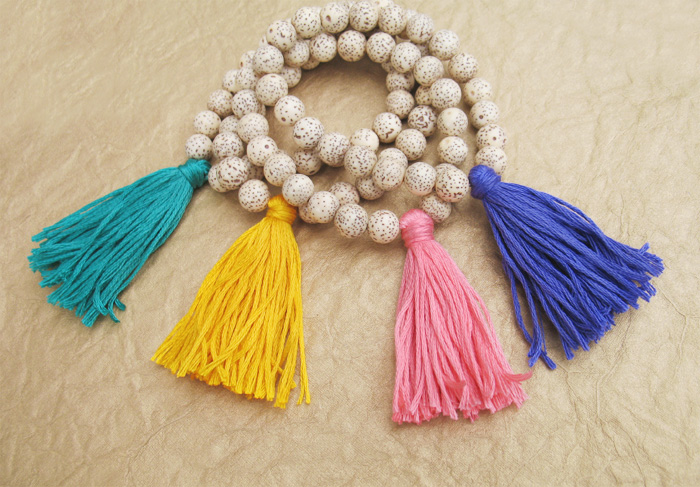
Over the Summer when I was making Barefoot Sandals, I kinda fell in love with embroidery floss because it comes in sooo many pretty colors, and kept thinking of new things to make with it! I came up with these fun little tassel bracelets!

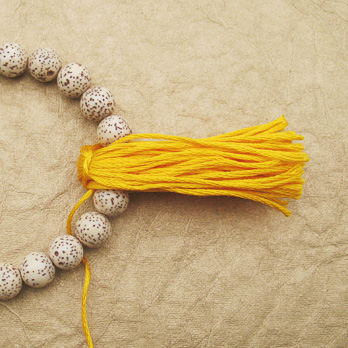
I like pairing the bright colors of embroidery floss with neutral colored beads (try seed, nut, or wood beads!) to add a subtle and fun pop of color to your outfit! Here’s how I made them:
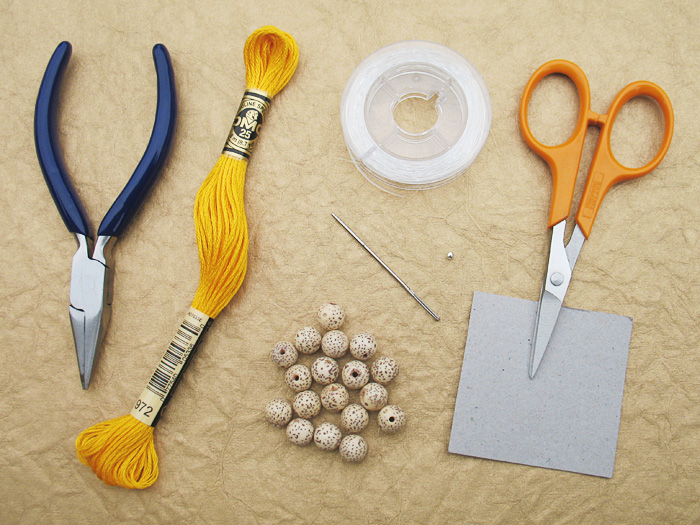
Supplies:
♥ Embroidery Floss
♥ Beads (I’m using 8mm buri seed beads)
♥ Needle
♥ Scissors
♥ Elastic Cord
♥ Crimp Bead
♥ Pliers
♥ 2×2 inch square of cardboard
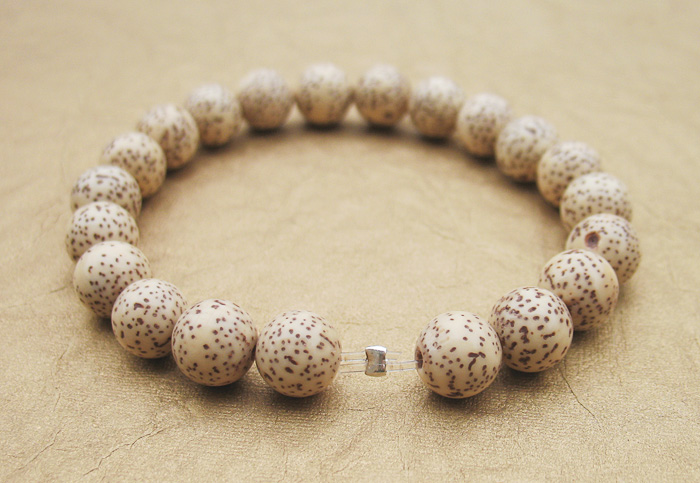
Step 1: String your beads on the elastic cord and secure it with a crimp bead using pliers. Be sure to leave a little extra space (about the size of a bead) where the crimp is because you’ll need room to put the tassel there.
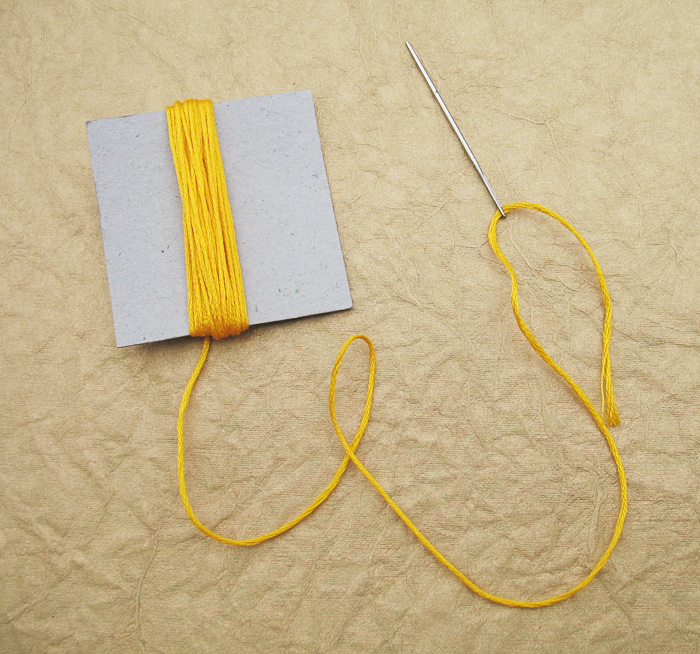
Step 2: Wrap embroidery floss around the cardboard square about 35 times (more or less if you want a thicker or thinner tassel). Cut the embroidery floss leaving approximately a 10 inch tail and put your needle on the end.
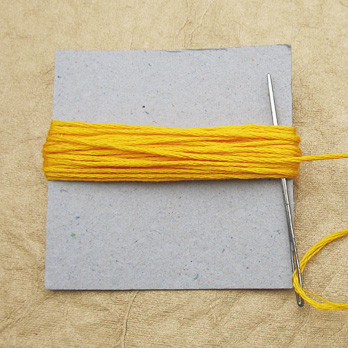
Step 3: Insert your needle under the threads and pull through. Pull tight and repeat once more.
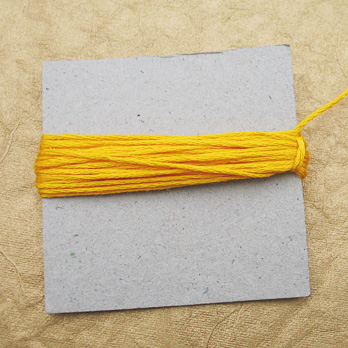
Step 4: Cut all of the threads along the opposite end of the cardboard. Carefully slip the cardboard out and carefully slip the bracelet in so that the tassel is wrapped around the crimp bead.
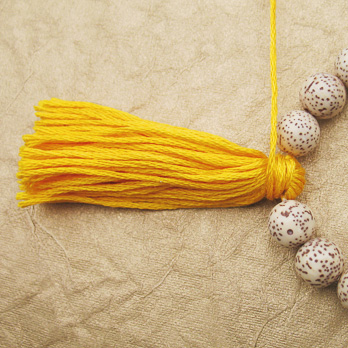
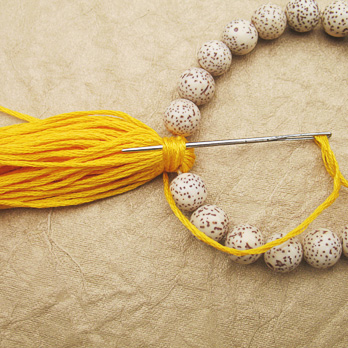
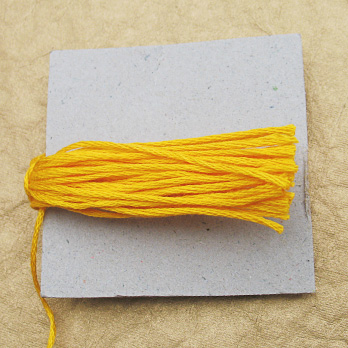
Step 5: Tightly wrap the thread around the tassel several times. Insert your needle under those wraps and pull through. Pull tight and trim the end to the same length as the rest of the tassel.
You could also do this with chain to make a necklace! :)
Hi,this is Coco from OuHua International,we are a beads beads&necklace&bracelet factory located in China,we have our own factory that can offer you the best competitive price,if you are interested ,pls contact me as above mail.BTW,we can produce as customer request
How cute! Thanks for sharing.