DIY Tutorial: Studded Hula Hoop Makeover
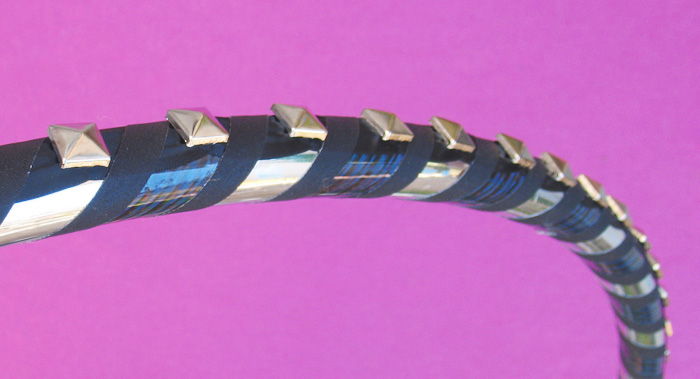
So I had this idea a while back to stud a hula hoop! I knew it wouldn’t be the most usable hoop though since the studs kinda hurt or get in the way for certain tricks, so I never made it. Until recently when my friend’s boyfriend mentioned how much he wanted a studded hoop! I was so stoked that I finally had a reason to make this hoop! So here’s what I did:
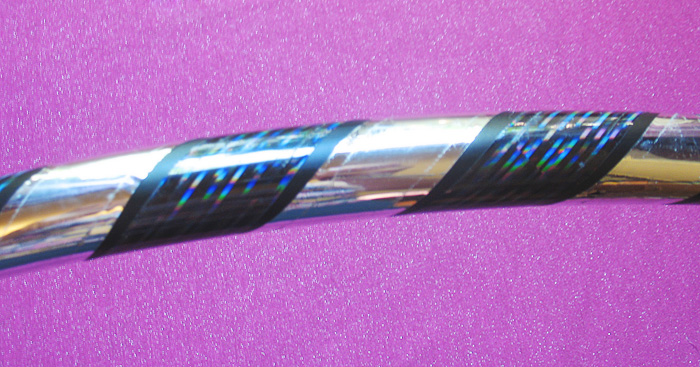
First of all, you’re going to need a hoop that’s already taped (or tape one especially for this! You can see my taping tutorial at the bottom of this post.). I had this old heavy hoop that I never use anymore so I just peeled off the old gaffer tape and it was good to go since the sparkle tapes were still in good shape!
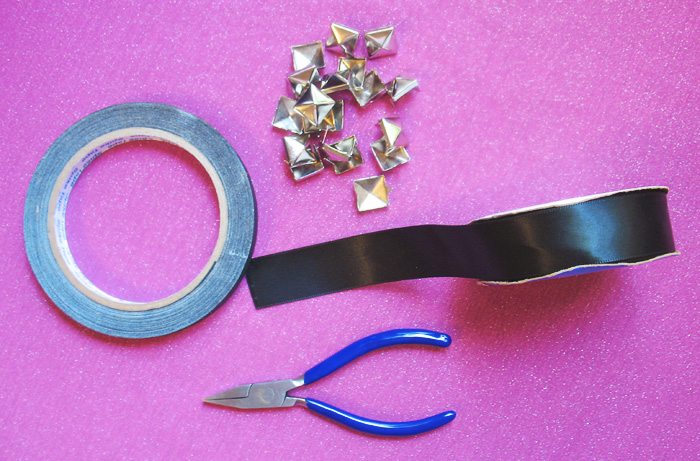
You’re going to need 1/2″ gaffer tape, Studs (I used 1/2″ ones), Ribbon (I used 3/4″), and pliers.

Start off by putting two studs on the ribbon, about an inch apart. Hold the ribbon along the outer edge of the hoop and wrap your gaffer tape around, in between every other stud to hold the ribbon in place. I worked my way around the hoop adding two studs at a time. When you make it all the way around, you’ll have to go around again with the gaffer tape between every other stud. Make sure the ribbon edges are secured and taped over.

It’s a little time consuming but unique and bad ass! :D
This is amazing! I need to share this with my hoop friends.