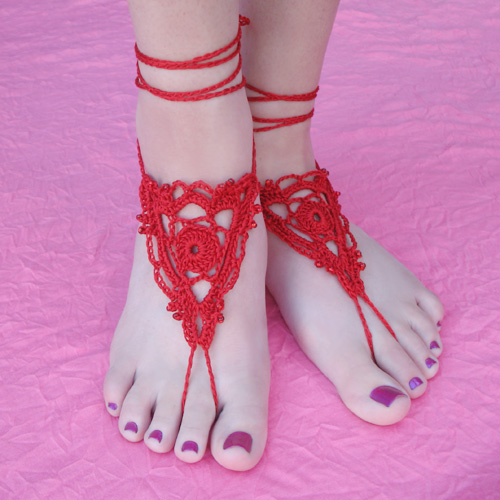
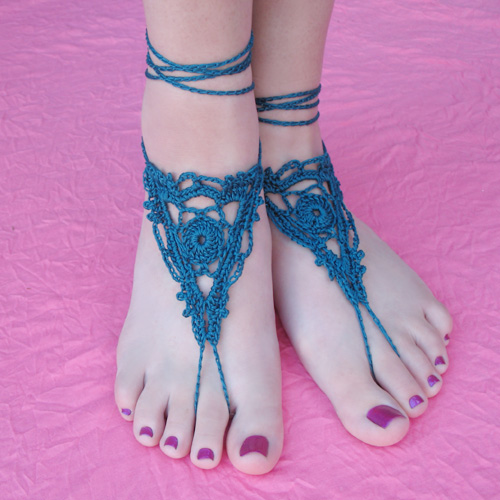
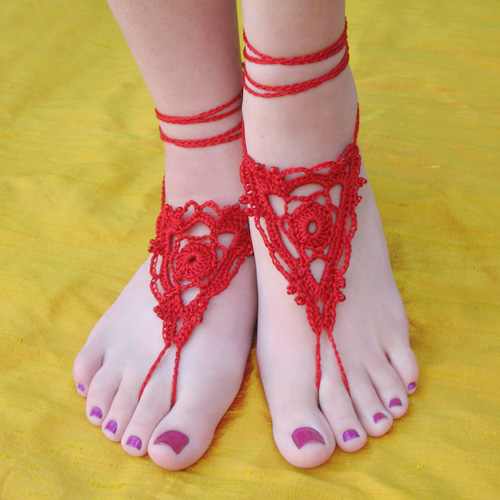
Goddess Barefoot Sandals Free Crochet Pattern
As promised, here is the freebie barefoot sandal pattern! These sandals are made with embroidery floss or crochet thread, which I know can be intimidating, but I use a size C hook which is larger than what you would normally use for such small thread, and makes it much easier to work with! This pattern is the easiest of the sandals I’ve designed but is definitely not a beginner pattern. I hope you enjoy! :)
Finished Size: (unstretched) Approx. 3 1/2 inches across/tall. Straps can be made any length.
Difficulty Level: Advanced Intermediate.

You are welcome and encouraged to sell any items you make using this pattern! All I ask in return is that when selling online, please credit Julie King / Gleeful Things & provide a link to www.gleefulthings.com.
You may NOT sell the pattern, distribute it in any form, repost it online, or alter it to claim it as your own (this includes charts & translations to other languages). Copyright © 2012 Julie King / Gleeful Things. All Rights Reserved.

• Size C (2.5mm) crochet hook (or size needed to obtain gauge).
• Needle for finishing.
• Beads (optional).
• 5 skeins of embroidery floss.
Colors used in examples: DMC Mounline 25 Embroidery Floss in 3808 and 817

sc ‐ single crochet
hdc – half double crochet
dc – double crochet
ch ‐ chain
sl st ‐ slip stitch
p – picot
rep ‐ repeat
rnd ‐ round
ea ‐ each
sk- skip
sp ‐ space
st/sts ‐ stitch/stitches
FO ‐ finish off

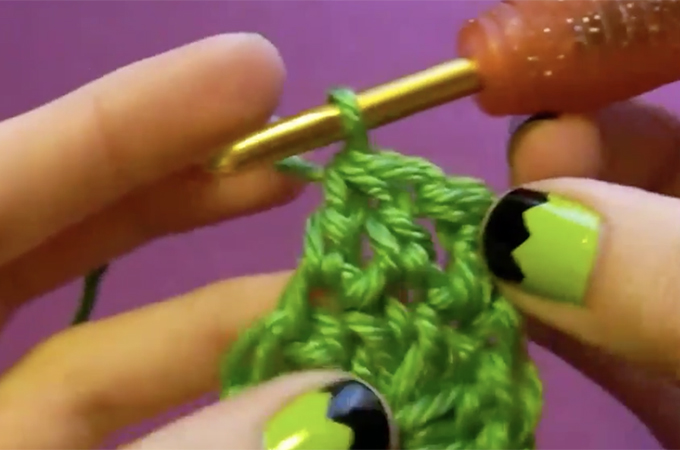
Video tutorials for these three special stitches/techniques are available on YouTube: http://www.youtube.com/user/GleefulThings
picot (p) – The picots I’m using in this pattern are a bit different than what you’ll find in other patterns, but really easy. All you have to do is ch 2 and then sl st in the same sc you started the ch in.
Invisible Join – Photo tutorial here.
Adding beads – If you want to add beads to this pattern, I recommend adding them in the middle of the picot. What you would do is ch 1. add a bead. ch 1. sl st in the sc you started the ch in.

This pattern is worked in rounds. Join rounds where the pattern says to. Gauge isn’t super important for this project, but keep in mind that if your gauge is significantly different from mine, your sandals will end up smaller or larger than mine. It may also require extra embroidery floss if your gauge is larger/more loose than mine.
Gauge: After rnd 1, the circle should measure approximately 1 inch across. Double crochets should be approximately 1/2″ tall.

rnd 1: ch 6. sl st to join.
rnd 2: sl st into ring and ch 3 (counts as 1 dc). 18 dc in ring. sl st to join. (18 dc)
rnd 3: [ch 4, sk 2 sts, 1 sc.] 5 times. ch 4. sl st to join. (6 ch 4 sps)
rnd 4: ch 1, sc in next ch sp. [ch 6, 1 sc in next ch sp.] 5 times. ch 6. sl st to join. (6 ch 6 sps)
rnd 5: sl st in ch. ch 2 (counts as 1 hdc). 1 hdc & 3 dc in same ch sp. ch 4. 3 dc & 2 hdc in same ch sp. 9 sc in next ch sp. [2 hdc & 3 dc in next ch sp. ch 4. 3 dc & 2 hdc in same ch sp. 9 sc in next ch sp.] rep around. sl st to join.
rnd 6: 1 sc. 1 sc & p. 1 sc. 1 sc & p. 1 sc. 4 hdc in ch sp. ch to desired length for the toe loop (I used 20 ch). 4 hdc in same ch sp. 1 sc. 1 sc & p. 1 sc. 1 sc & p. 1 sc. [ch 5. sk 4 sts. 1 sc.] twice.
* 1 sc & p. 1 sc. 1 sc & p. 1 sc. 4 hdc in ch sp. ch to desired length for the strap (I made mine 26 inches). Tie a knot at the end and FO. Draw up a loop in the last hdc where you started the chain. 4 hdc in same ch sp. 1 sc. 1 sc & p. 1 sc. 1 sc & p. 1 sc. [ch 5. sk 4 sts. 1 sc.] twice.
Repeat from * once. Invisible join to FO.

If you use this free pattern, please consider supporting me by purchasing a pattern from my shop. Your support will help ensure that I’m able to continue making new patterns to share. Thanks for considering! :)

Click on any of the photos below to enlarge.
 < After rnd 2.
  < After rnd 3.
 < After rnd 4.
  < After rnd 5.
 < After rnd 6.

Starting the 1st & 2nd rounds:


It starts with a chain of 6. Slip stitch into the very first ch you made (the one furthest from the hook) to join and make a ring.


Slip stitch around the ring and ch 3. This counts as your first dc of round 2. Continue making dc’s in the ring.
Where to start after the strap:


The arrow in the first picture points to the last hdc you made before you started chaining to make the strap. After you’re done making the strap, to start crocheting again, you’ll draw up a loop in the hdc that the arrow is pointing to. The arrow in the second picture points to the loop, which became part of the first hdc when you started crocheting again.
Thank you Julie you are a ROCKSTAR!!! this pattern was amazing to work up!!!
Thank you! My girls will all love these! I can’t wait to get started!
Hi, These are beautiful, someone just asked me to make some for her teenage daughter. mind if i use this pattern?
Thanks Julie! You are so amazing!
These are lovely! Thank you so much for posting these as a free pattern. I have bought patterns, which were not as nice as these. Kind regards
Hi again, sorry forgot to ask a question! You mention in the pattern that you can use crochet thread, instead of the DMC embroidery floss. Can I ask what number I would need to use i.e. No. 3, 5 or 10 etc. etc.? Kind regards
thanks for the free goddess pattern. how do i get the gypsy one free that i named in your naming contest?
Hi, you have a wonderful blog! I was wondering if you could make a video tutorial on how to make the goddess barefoot sandals?
Hi Julie,
Thanks for the cute pattern, I was wondering if at the end of each round you slip stitch to the ch3 space, or if you sl st to the first stitch? Thanks!
Hi…I don’t know what I am missing in your pattern but I have been sitting here forever, it’s 1:40 am and I am still not getting it! :( boo sad face
I am stuck at round 5…
A video of this pattern would be SOOO helpful or just step by step pictures to go with your directions?
I am still learning to read patterns and am a much better visual learner :)
I LOOOOVE these and would like to make myself some, as we do not wear shoes in our house or really at all if I don’t have to ;)
Thank you so much! I’d love to make these, I hope you can help….
This is an amazing pattern!
this is where i am stuck too did you figure it out i may just revise to make it work
Hi ladies! I just got done making a pair of these – the first of what I’m sure will be many haha! Anywho, to start round 5, you slip stich (sl st) into the space created by the chain (ch) 6 of the previous row. This moves your stitch over to where it needs to be since the entire round is worked in the SPACES created in round 4, not the stitches. Then you do the ch 2 which counts as your first half double crochet (hdc). The next hdc, 3 dc, ch 4, 3 dc, 2 hdc are all worked in the same first ch 6 space. This creates the first triangle point. Then you do 9 single crochets (sc) in the next ch 6 space. And then the pattern continues to make the next triangle point, working in the ch 6 space, 2 hdc, 3 dc, ch 4, 3 dc, 2 hdc. Continue that pattern around and join with a sl st in the top of your beginning ch 2.
I hope this helped and was the answer to what you were confused about! If not, let me know and I’ll try to clarify :)
This is a great pattern. It’s the first time I’ve ever used a pattern to make something. I have only been crocheting for about a week and have only made a scarf. I was pleasantly surprised how easy it was to follow your instructions. I did change one thing and that was at the end of the chain for the straps instead of just ending it I added a circle at the end, the same one the pattern starts with. Anyways thank you so much for this.
Thanks so much for posting the Invisible Join Photo tutorial, that was always something that bothered me in my finished pieces. Your barefoot sandals are beautiful and I am going to make all my friends jealous when I show up wearing them. Thanks again…your awesome.
Thank you so much for the pattern I want my brides maids to wear these!!!!!!!!!!!!
I love when I find your stuff on ravelry :) I’ve had your blog bookmarked for a long time and would love to be one of your pattern testers in the future when I can ensure that I’ll be able to devote the time your work deserves! I’m a working, student, wife and mother of two so my crocheting time has been significantly reduced lately haha! Still making market bags and hats for family and friends though :D Anywho, thanks for the post and again, I love your work!!
so I worked this up and it turned out beautiful but looks nothing like this so I must be doing something wrong! they are more rounded… but beautiful non the less!!!
Thanks for sharing this pattern!
I love it, and I’m sure my daughter will also love these.
I’m gonna make a bunch of these for our summer holiday to Turkey!!!
Thank you, Julie.
You’ve made our bride very happy!
Thank you so much. I just finished one and it took me far less time to make than I though and turned out beautifully. I know I’m going to be asked about them all the time
Julie, I want to thank you for a awesome pattern, I am 65 when I put them on I felt sexy. LOL, My daughters and my granddaughters will love these. Thanks again for the pattern, very easy to read and it worked up great. Keep up your good work.
I really enjoy this and it is something that I have been looking for for a long while. Thank you for having this posted.
How kind of you to share this pattern. Just what I was looking for. Thank you.
I Like Gleeful things on FB! TFS!
I”m following you on Blog Lovin’
I CANNOT wait to make this! Being that its almost November? Yes! Apparently these look hot in regular heels! Can’t wait to rock this…thank you for your hard work! Your patterns are awesome!
i have been recently disabled, i have been looking for ways to keep my self busy while my children are at school. i want to thank you for your fee goddess barefoot sandlals pattern. i’m now hooked.:)
My daughter has been wanting these for a few years now and I ran across your pattern while web surfing for new ideas. Thank you so much for the free pattern! I’m hoping to get them made after the Christmas rush and by next summer. :) I can hardly wait to get started on them.
These are the MOST beautiful barefoot sandals I have ever seen! Thank you for your creative gift!
I seem to have missed something on your pattern. When I got to the second tie, and finished it, where do I go from there? Am I missing something on the pattern? Please help?
I saw a pair of barefoot sandals a lot like this (but different in the center) on the app Wanelo, and I realized how easy it would be to make some instead of paying 30 dollars for them! However, I am super confused on Rnd 5 and was wondering if someone who has made them before would be able to do a video tutorial? I’m just now beginning to read patterns and I do better when I see it being done. It would be greatly appreciated!!!! Thanks!!