DIY: Crochet Project Bag Sewing Tutorial
I feel like I’m always toting around a plastic shopping bag full of yarn whenever I want to take my crochet project somewhere with me. So I thought it would be nice to make something a little less ghetto to carry my projects around in! :P
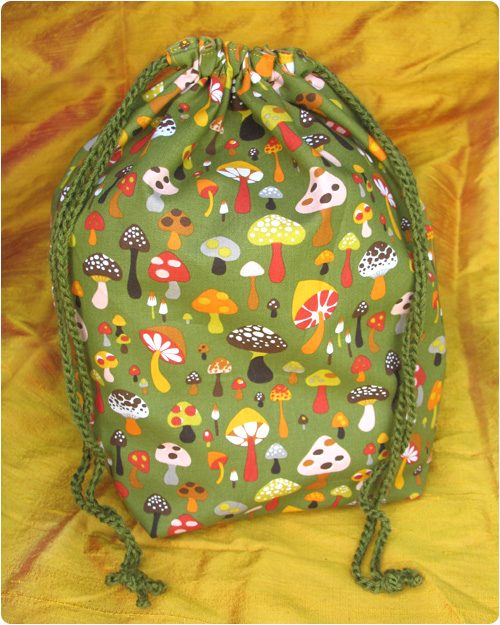
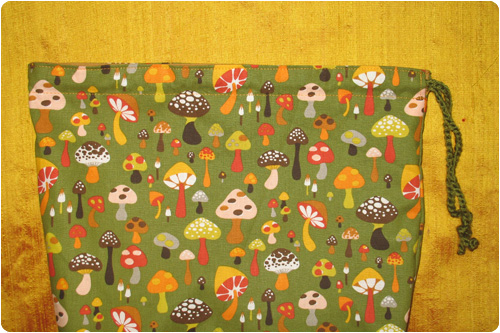
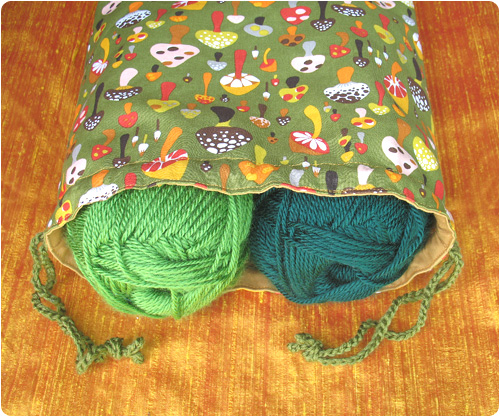
This is a really quick and easy bag to sew! It can hold 2-3 balls of yarn + hooks, scissors, pattern, etc. It has a square bottom so it can sit flat and has a simple drawstring closure. Nothing fancy or difficult! Just a nifty little bag that you can make in less than an hour!
SUPPLIES
– 2 Cotton fabrics, an outer & lining (about a 1/2 yard of each will do)
– Cord, ribbon, or yarn for the ties
– Sewing machine & basic sewing supplies
PATTERN
This pattern is a really simple shape so it would be much easier for you to draw it out with a ruler than to cut out and tape together a bunch of pieces like I normally give my patterns. Refer to the picture below for the measurements to make your pattern.
1/2″ seam allowances are included
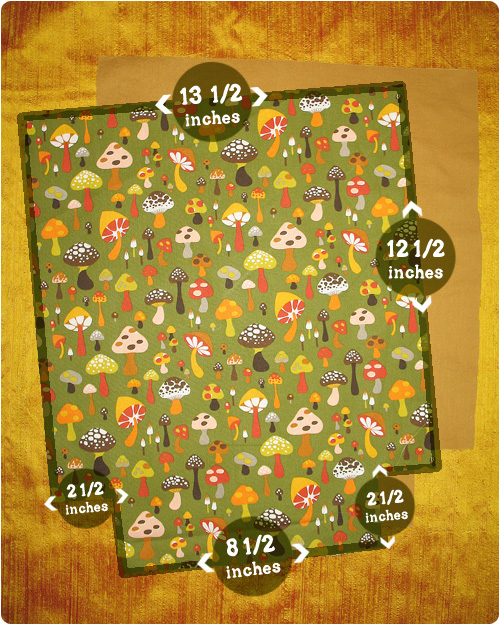
Step 1: Cut 2 pieces from each of your fabrics.
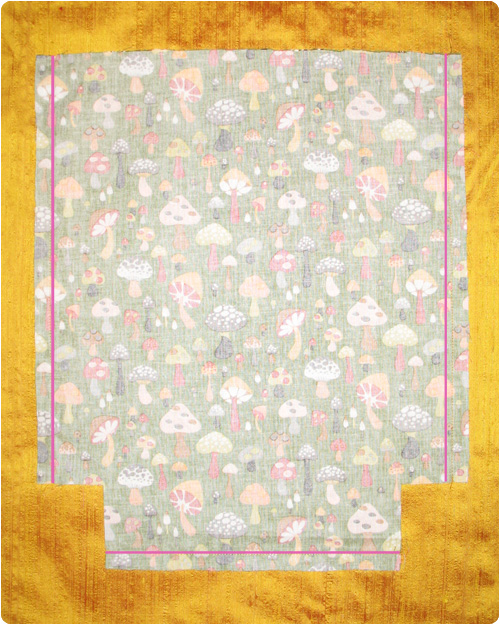
Step 2: With right sides together, sew along the sides and bottom (pink lines). Repeat this step on your lining fabric also.
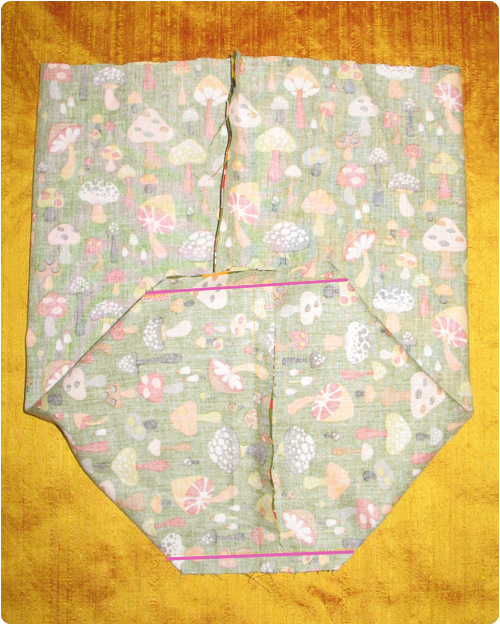
Step 3: Flatten the bottom of the bag so that the side and bottom seams that you just sewed are lined up. Sew across on both sides. Repeat this step on your lining fabric also.
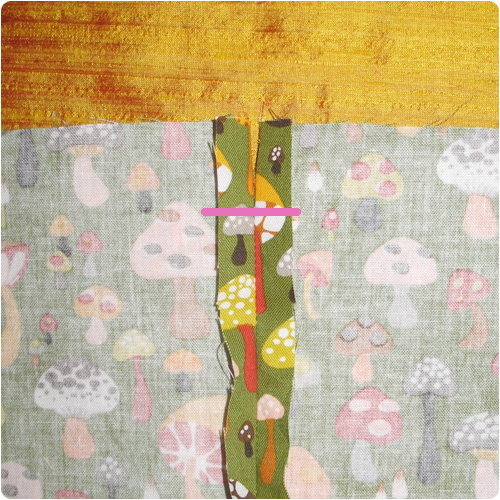

Step 4: At the top of both side seams, measure down 1 1/2 inches and undo the stitching up to that point. Next, sew closely around the edge, as shown in the picture on the right, to hold the seam down. (Do this step on outer fabric only, not the lining fabric).
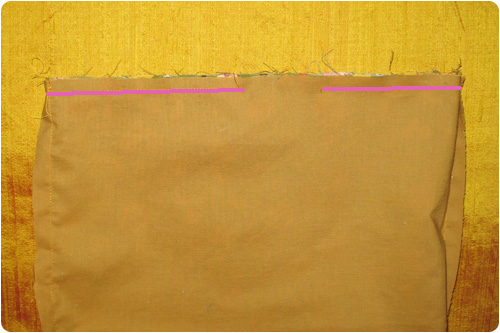
Step 5: With right sides together, sew your outer fabric and lining together around the top. Make sure to leave a little space where you can turn it right side out.

Step 6: Turn right side out and use your iron to press the top flat. Next, top stitch around about a 1/8″ from the top (this will sew the hole you left for turning shut). Then top stitch around again, right below the hole you left for the drawstrings (should be about 1 inch from the top).
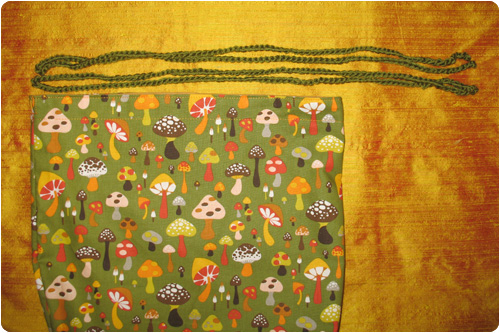
Step 7: Cut 2 drawstrings from cord or ribbon or make a crochet chain like I did. Each should be about 32 inches long.
Step 8: Put 1 drawstring into one of the holes on the side and weave it all the way through, bring it out the same side you started on and knot the ends together. Repeat the same with the other drawstring except start and finish in the hole on the opposite side of the bag.
Happy Crocheting!
If you use this pattern, please consider supporting me by purchasing a crochet pattern from my shop. Your support will help ensure that I’m able to continue making new patterns to share (both free & paid). Thanks for considering! :)
That is a great tutorial for a quick little drawstring bag! Thanks :)
This is a beautiful bag. The material is great also. Love the pattern. Thanks.
Awesome tutorial, thanks! I love the mushrooms.
Cute fabric!! :D
beauty full things
Hey~! I saw this and was like oh my gosh! because my best friend from high school made a purse out of this material in her needle arts class(yes we had a needle arts class at my high school, it was awesome!) I found that so funny. :] she adores mushrooms, not sure why xD she’s a little odd sometimes. but anyways, your blog is really great and im definitely going to start following you, you crafty little crafter you. hahah. :]