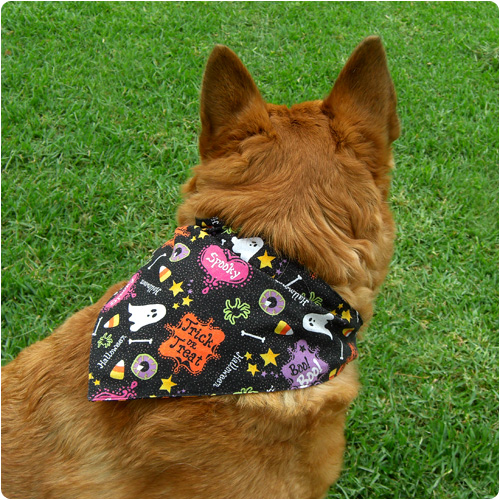
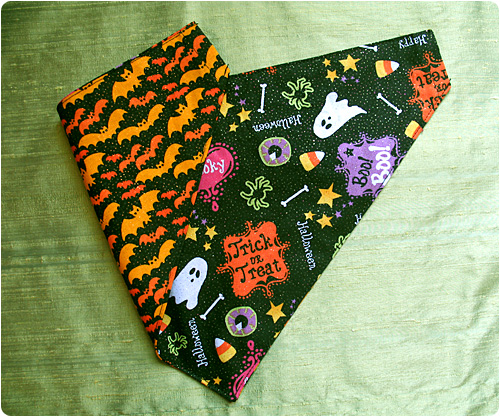
DIY Tutorial: Reversible Dog Bandanas
I’m excited to share this tutorial with you because it’s something I’ve been making for years and now, I’m finally gonna share it with the world! I’m calling it a Halloween project but you could really make this for any occasion or even just because! I’m going to show you how to make a bandana for your dog that slips over their collar so you don’t have to worry about it falling off! It’s also reversible! Spiffy, right?!
This is a really quick project and also very cheap to make! All that you need are two coordinating fabrics, basic sewing supplies, and an iron.
Click here to download my pattern (PDF file).
My pattern will fit a collar that is 15 inches long and 1 1/2 inches tall. If my pattern isn’t the right size for your dog, don’t worry! It’s super easy to make your own pattern.
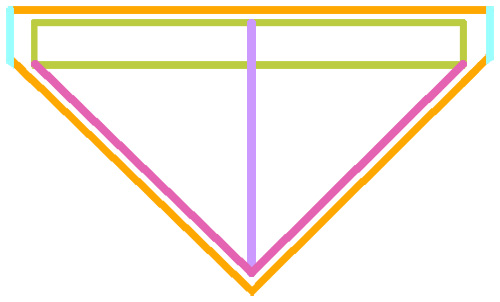
How to make your own pattern: You’ll need a piece of paper, pen, and a ruler. First, measure your dog’s collar. You’ll need to know the length (not including the buckle) & the height of the widest part of the collar (usually the buckle).
Refer to the diagram above. First, draw a rectangle that’s as tall as the widest part of the collar and as long as the length of the collar. Find the center point of the rectangle. Decide how long you want the bandana and draw a line that length. Draw a line from the bottom of that line to the bottom of the rectangle on both sides. Add a half inch around the entire thing (this will be your seam allowance) except on the short ends of the rectangle, add a 1 inch seam allowance instead.
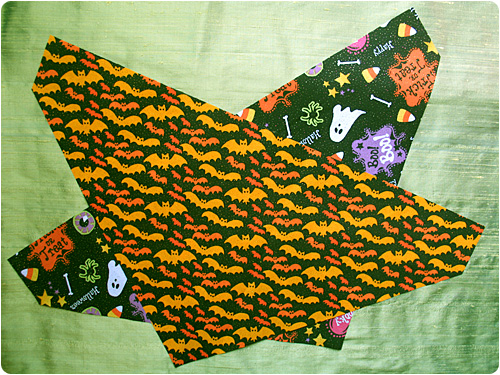
Step 1: Cut your bandana out of each of your fabrics.
Step 2: With right sides together, sew across the top using 1/2″ seam allowances.
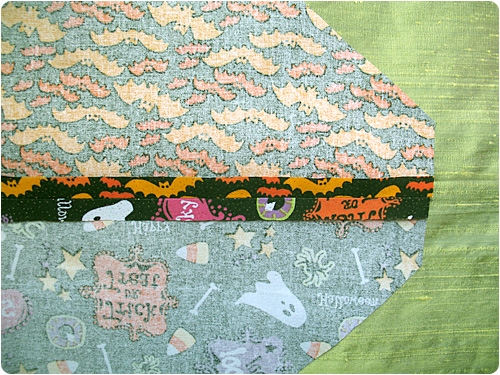
Step 3: Use your iron to press that seam flat.
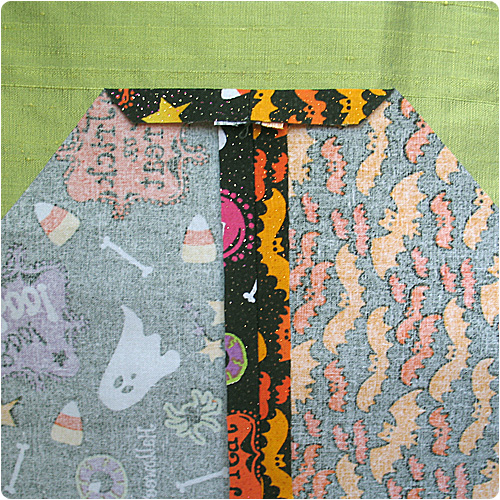
Step 4: On the side edges, fold over 1/2 inch and press with the iron. Then fold under another 1/2 inch and press. Sew across each end.
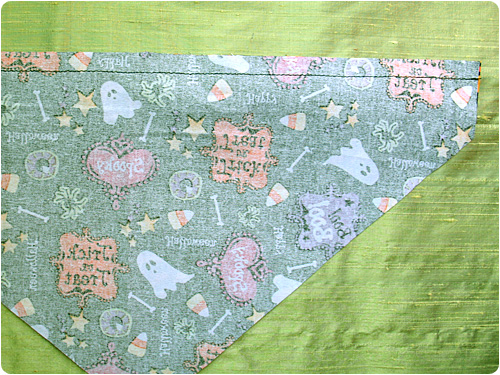
Step 5: With right sides together, sew along the bottom edges using 1/2″ seam allowances.
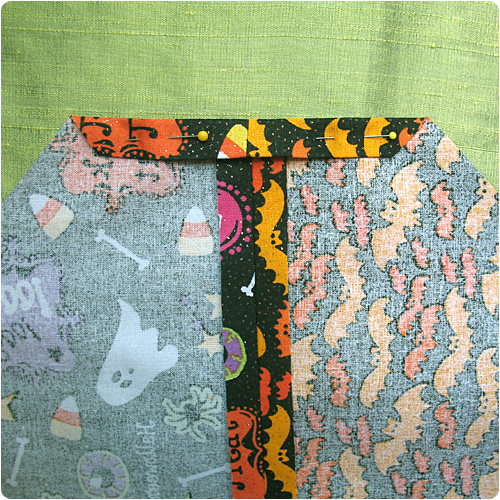
Step 6: Turn right side out and iron. Top stitch along the top and bottom edges.
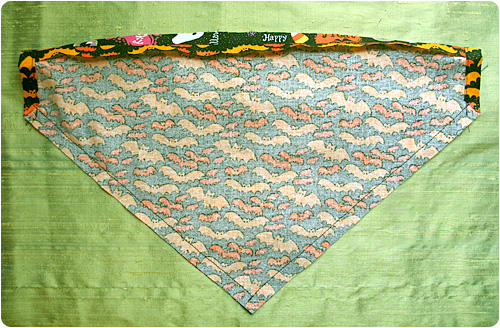
Slide your pup’s collar through the open ends and wear! :)
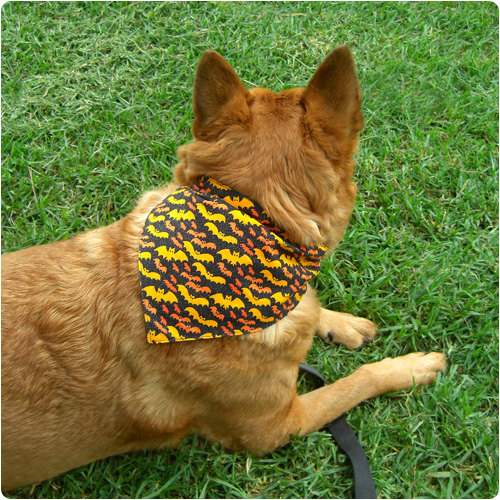
Happy Halloween!!

Cool. I’ll have to make a few of these for my sister’s dogs. She loves dressing them up a bit.
I love these bandanas, I am glad to have a pattern to make my own! This is as much “dressing up” of my pup I will do but they are so cute on her! :)
My groomer gave my dog one of these for Christmas. I bought another one. Plan on maaking some for everyday and all the holidays.
HOOOOOOOOOOOLA
Hola saluditos!!! gracias pr la bandana esta hermosa, que mas haces para las mascotas pliss ami me encanta hacerles ripita amis perritos.
Greetings! I was looking for some general reference measurements for dog and cat bandanas and got to your site. I’m volunteering at a adoption booth for an upcoming pet expo and thought that these would make great thank you gifts for people who donate to the cause. Thank you!
I just finished making one for my chihuahua. Very cute and fun. wish I could show you a pic.
I cut out all the pieces as instructed on the pattern. Not quite sure why all those had to be cut out. From the pictures, looks like you have two solid pieces instead of 4. Guess I’m just confused. Couldn’t understand at what step the end triangles were sewn to the larger piece.
TFS!! I can’t wait to make for my fur baby.
i love your website!! great information keep it up
I am just learning to sew (at 59!!!) and my first project was to make bandannas for my two English Springers. My twin sister is an accomplished seamstress and is not only teaching me to sew, but created the pattern for the bandannas. The pattern is slightly different from yours, with the most important differences being (1) a buttonhole in the center of the collar (sewed button holes separately on each half of the scarf) because my dogs wear martingale collars that have separate rings for tags and leash; the collar lead ring threads out through the buttonhole the attach to the leash. The (2) difference is one many people might like to adopt: I double-stitched two small buttonholes side by side at the top of the bandanna, just below where the collar slips through, and slid a key ring on to the tab between the buttonholes. I attach each dog’s “night light” to the key ring so they’re visible when playing outside after dark. To switch bandanna sides, simply push the key ring through to the opposite side.