Arrowhead Slouchy Beanie Free Crochet Pattern

It’s been so long since I’ve posted a new hat pattern, which is crazy because for as long as I’ve known how to crochet, hats have absolutely been my thing! I love to make them, I love to wear them! Today I’d like to introduce you to the Arrowhead Slouchy Beanie!
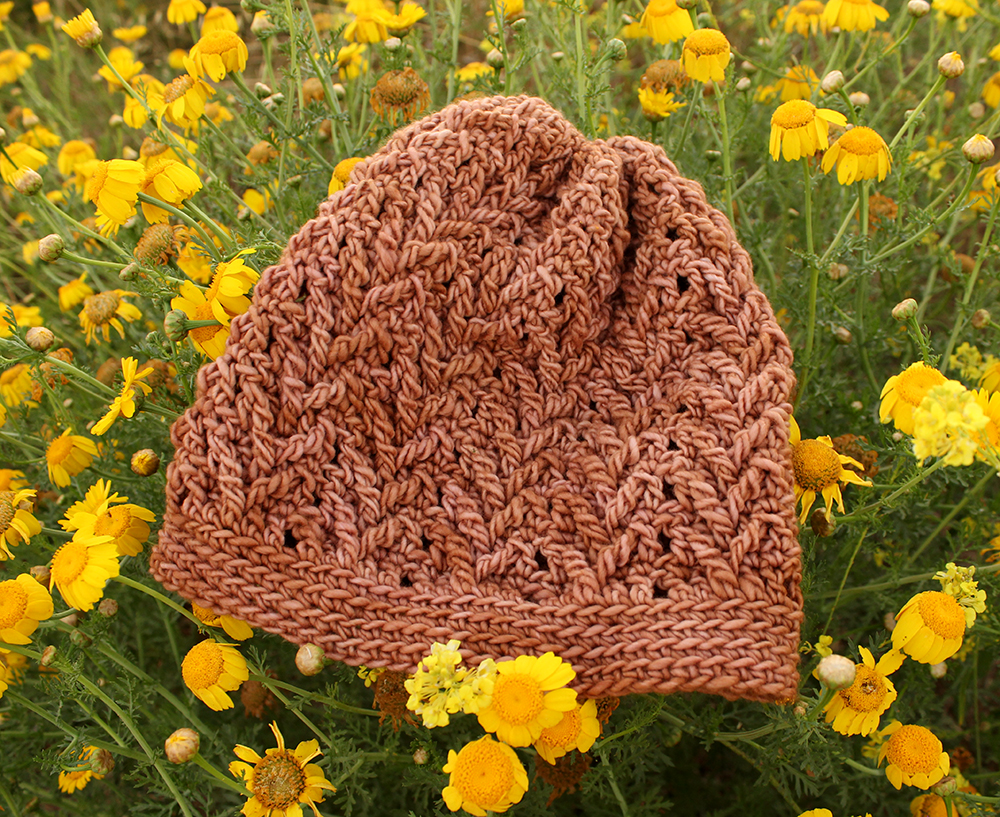
This pattern has quickly become my new favorite! Seriously, I’ve already made it in five colors! Don’t you just love all that texture?! It’s my new go-to hat and I hope it will become yours too! :)
This pattern uses mostly double crochets and post stitches to create a really fun texture! The stitch pattern is fairly easy to learn (familiarity with front post stitches will definitely help) and I’ve even included a step-by-step photo tutorial in the pattern to help you out.
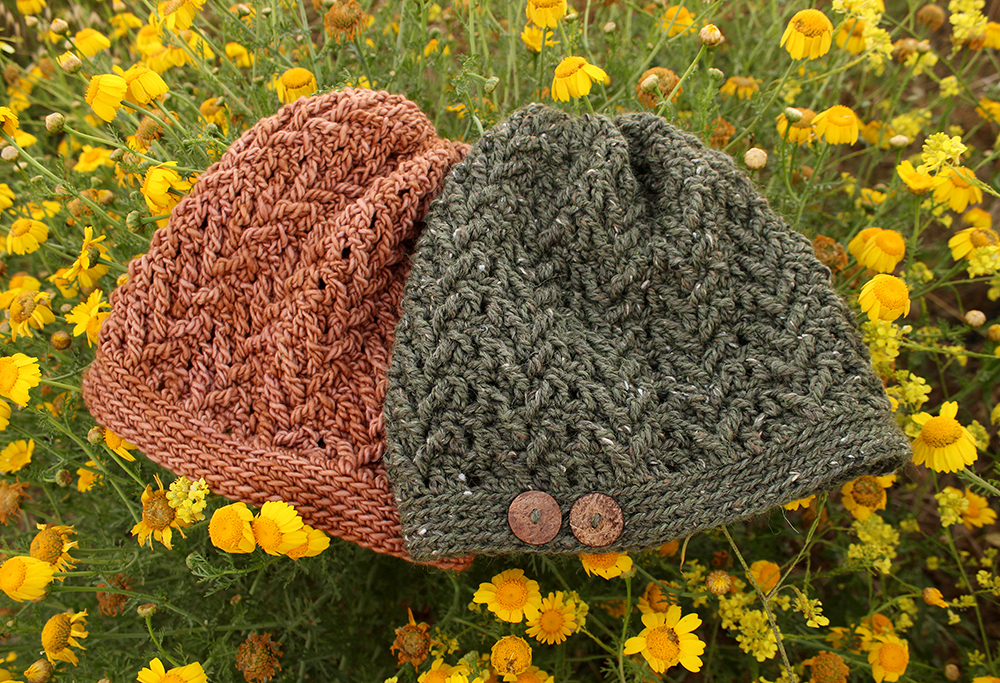
Personally, I have loved making this hat with Malabrigo Worsted (shown here in the color, Applewood). It’s a single ply wool which does an amazing job of showing off the textured stitches. Really though, any solid or semi-solid colored worsted weight yarn should work out well with this pattern!
I also made one using Knit Picks City Tweed (shown here in the color, Toad) and I love how it turned out as well! The stitch texture isn’t quite as obvious but the tweed bits are a fun touch too.
Also, can I just say how excited I am about the location of this photoshoot?! Every spring I see these yellow flowers everywhere and I’ve been wanting to shoot with them for at least the past two years but didn’t have anything ready to be photographed while they were around. I’m so happy it finally worked out!
Disclosure: This post contains affiliate links. If you click and make a purchase, I will receive a small commission, at no extra cost to you. This, along with the ads shown on this blog, help to ensure that I’m able to continue posting free patterns and tutorials for you to enjoy. Thank you for your support!

Why You’ll Love This Hat
- Amazing texture – This hat features a truly unique, raised stitch texture that would impress anyone, crocheter or not!
- You’ll love to wear it – This cozy hat will quickly become one of your favorites! You won’t be able to resist making it in multiple colors!
- Opportunity to learn new stitches – If you’ve already mastered front post stitches, this pattern will give you a chance to try something new with them.
- One skein, one day – Who doesn’t love a one skein project that you can whip up in just a few hours?
Yarn
#4 worsted weight yarn: Approximately 190 yards of Malabrigo Worsted in #018 Applewood or Knit Picks City Tweed in #CI17 Toad
Yarn Substitute Ideas
- Malabrigo Rios – Very similar to Malabrigo Worsted but a great option if you prefer superwash wool, and there are also different colors available.
- Cascade 220 – Prefer a solid colored wool? Cascade 220 offers so many to choose from!
- Lion Brand Basic Stitch & Red Heart Soft – If you’d like to keep it budget friendly, these acrylic yarns are easy to find at your local craft store and affordable.
Download The Pattern
You can find the FREE pattern by scrolling down. A print-friendly, ad-free PDF of this pattern is also available for a small fee. If you enjoy my patterns, please consider purchasing the PDF – your support is greatly appreciated and will help me keep the new patterns coming! :)
Supplies
- US Size I/9 (5.5mm) crochet hook or size needed to obtain gauge
- yarn needle
- scissors
- buttons (optional, for decoration)
- faux fur pom pom (optional)

Difficulty
Intermediate
Gauge
12 dc & 6 rows = 4”
Finished Measurements
19” around edge, 11” from top to edge
Abbreviations
- ch(s) – chain(s)
- sc – single crochet
- dc – double crochet
- dc3tog – double crochet 3 together
- st(s) – stitch(es)
- yo – yarn over
- sl st – slip stitch
- BLO – back loop only
Special Stitches
Right Post Stitch (RT post st): Yo, insert hook in sc, yo and pull up a loop, yo and pull through 2 loops, yo twice, skip next sc, insert hook around next dc 2 rows below, yo and pull up a loop, [yo and pull through 2 loops] twice, yo and pull through all 3 loops on hook.
Left Post Stitch (LF post st): Yo twice, insert hook around same st as RT post st 2 rows below, yo and pull up a loop, [yo and pull through 2 loops] twice, yo, insert hook in sc, yo and pull up a loop, yo and pull through 2 loops, yo and pull through all 3 loops on hook.
Scroll to the bottom of this post for photo tutorials to help with these stitches.

Terms of Use
You are welcome to sell any items you make using this pattern, in small quantities. Mass production is prohibited. When selling online, please credit Julie King / Gleeful Things by linking to www.gleefulthings.com or tagging @gleefulthings. You may NOT sell or distribute the pattern itself in any form, alter it to claim it as your own, post it online, or create a video demonstrating the pattern.
Notes
- Pattern is worked in joined rounds, starting at the bottom edge and working to the top.
- Hat is worked as a tube and the top will be cinched shut at the end.
- Ch 1 and ch 2 at beginning of rounds does not count as a st.
Instructions
Ch 66, sl st to join.
Round 1: Ch 1 (does not count as a st now and through out), 1 sc in each ch around, sl st to 1st sc to join – 66 sc.
Round 2-4: Ch 1, 1 BLO sc in each st around, sl st to 1st sc to join – 66 sc.
Round 5: Ch 3 (counts as 1 dc), 1 BLO dc in each of the next 4 sts, ch 1, skip 1 st, *1 BLO dc in each of the next 5 sts, ch 1, skip 1 st; repeat from * around, sl st to join to top of 3rd ch – 55 dc + 11 ch 1 spaces.
Round 6: Ch 1, *1 sc in each of the next 5 sts, ch 1, skip ch 1 space; repeat from * around, sl st to join to 1st sc – 55 sc + 11 ch 1 spaces.
Round 7: Ch 2 (does not count as a st now and through out), *RT post st in next sc, 1 dc in each of the next 3 sts, LF post st in next sc, ch 1, skip ch 1 space; repeat from * across, sl st to join to 1st RT post st – 11 RT post sts + 33 dc + 11 LF post sts + 11 ch 1 spaces.
Round 8-23: Repeat round 6 & 7 eight times.
Round 24: Repeat round 6.
Round 25: Ch 2, *RT post st in next sc, dc3tog, LF post st in next sc, ch 1, skip ch 1 space; repeat from * across, sl st to join to 1st RT post st – 11 RT post sts + 11 dc3tog + 11 LF post sts + 11 ch 1 spaces.
Round 26: Ch 1, *1 sc in each of the next 3 sts, skip ch 1 space; repeat from * around, sl st to join to 1st sc – 33 sc.
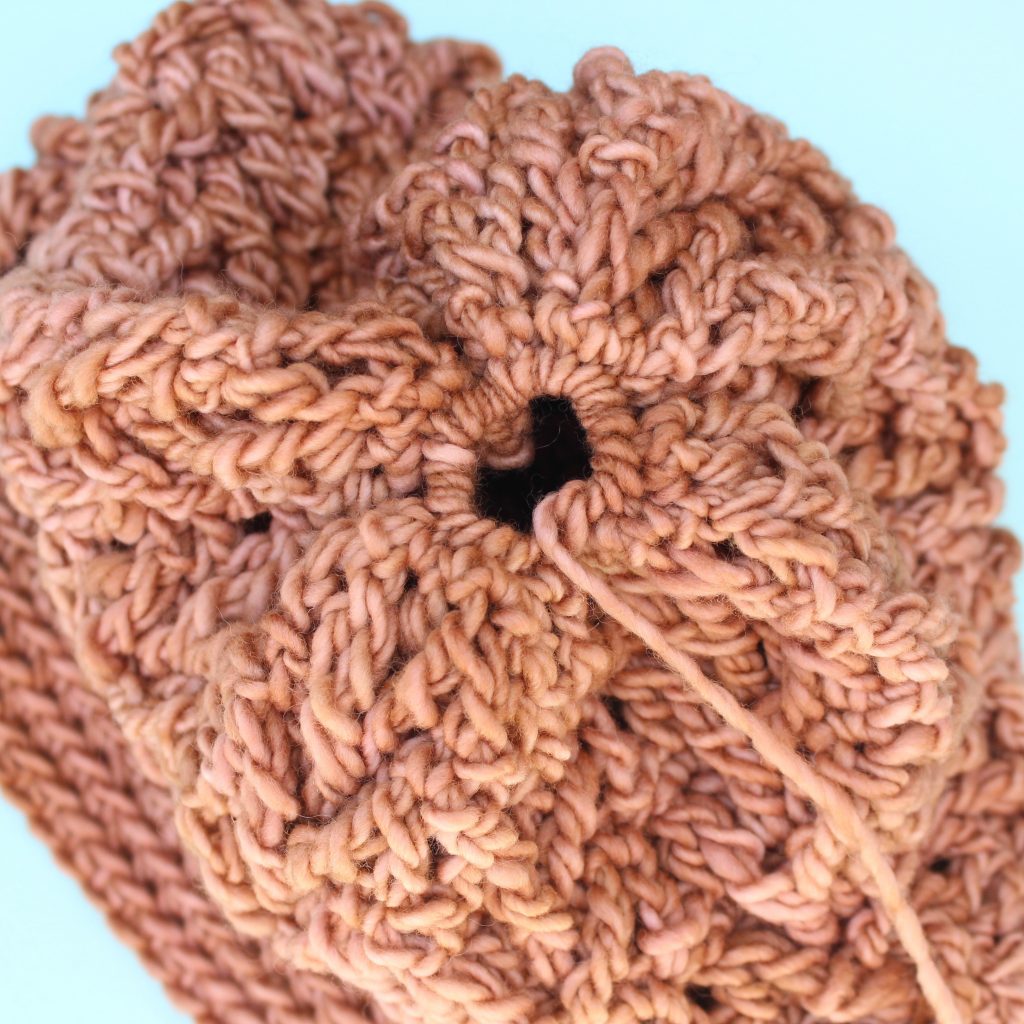
Finishing
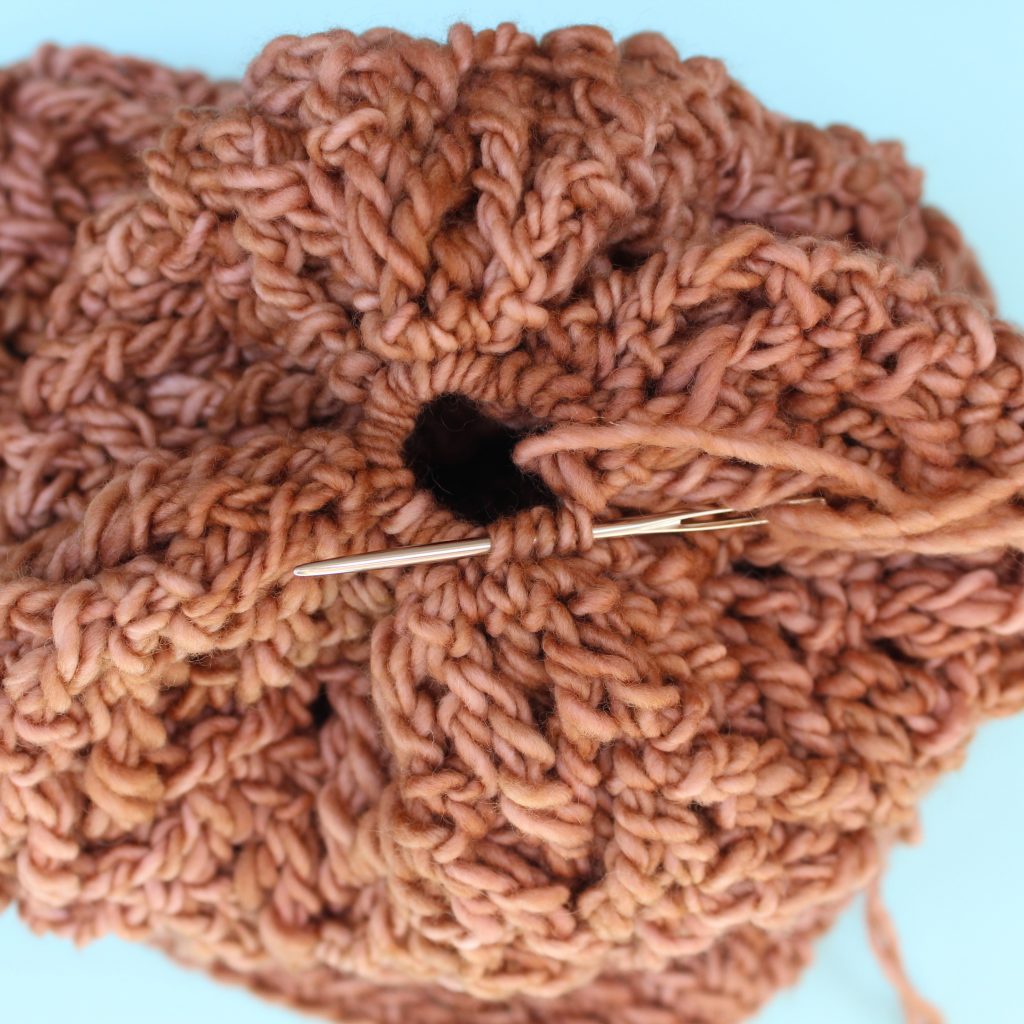
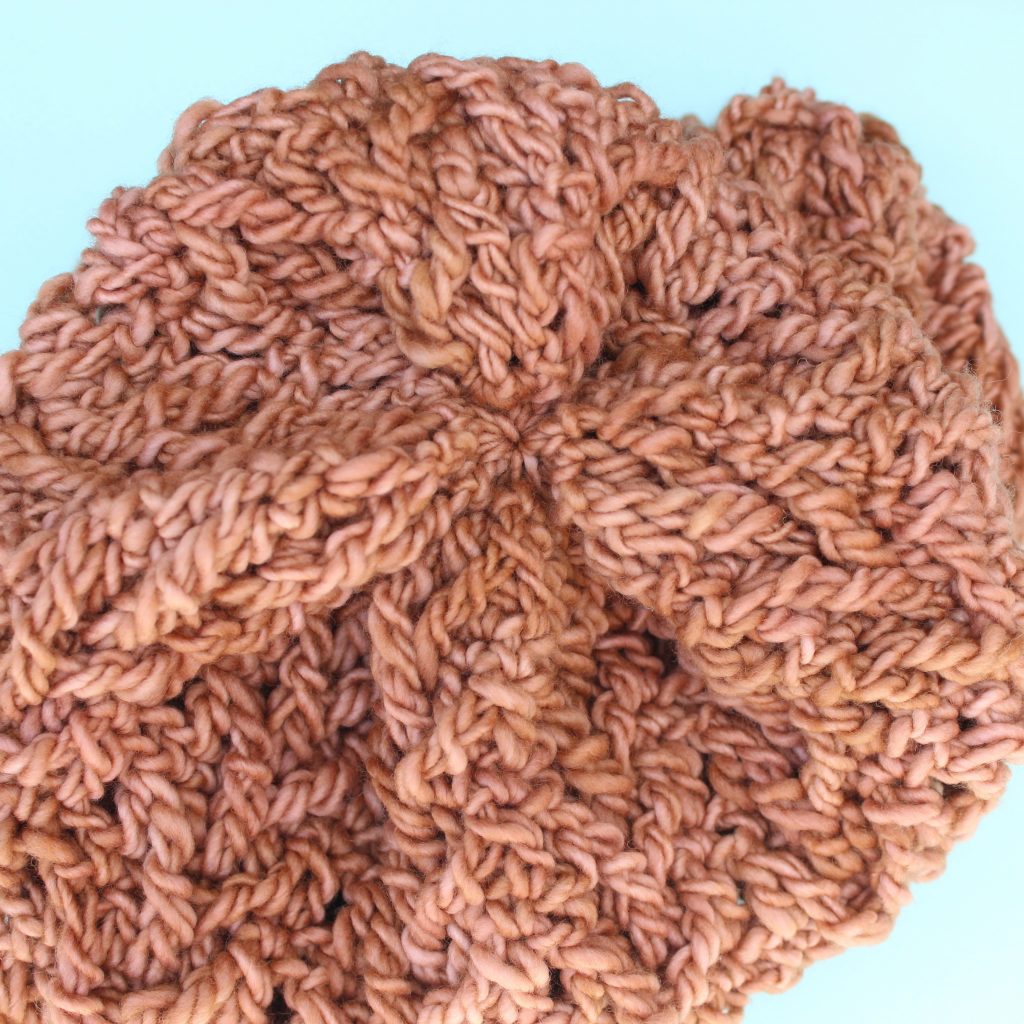
Cut yarn leaving a long tail and pull it up through the stitch. Using your yarn needle and the tail, stitch around round 26. Pull tight to cinch shut.
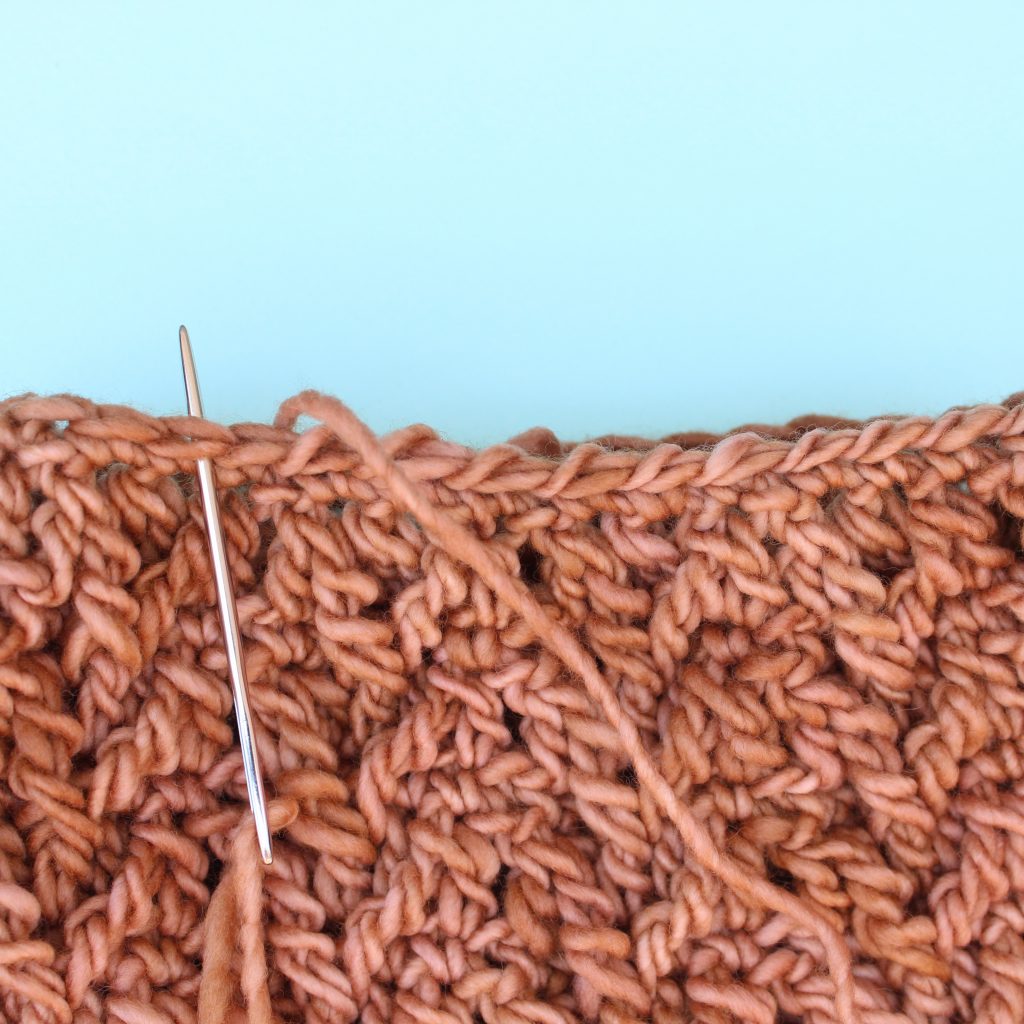
If that does not cinch the hole completely shut, continue weaving the yarn around under the stitches and pull until the hole is closed. Fasten off.
Use yarn needle and a scrap of yarn to attach buttons to edge of hat if desired.
Attach a faux fur pom pom to the top of hat if desired.
Special Stitches Photo Tutorial
Right Post Stitch (RT post st):


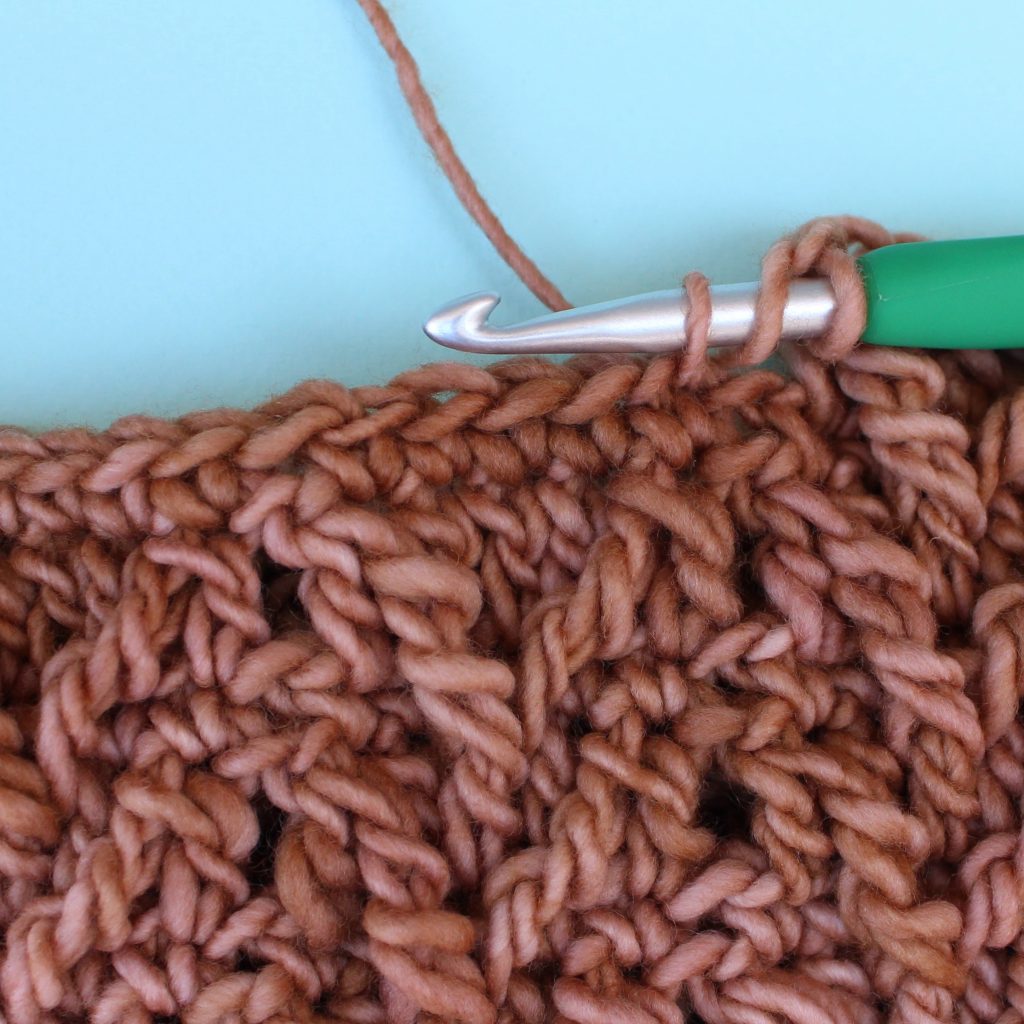
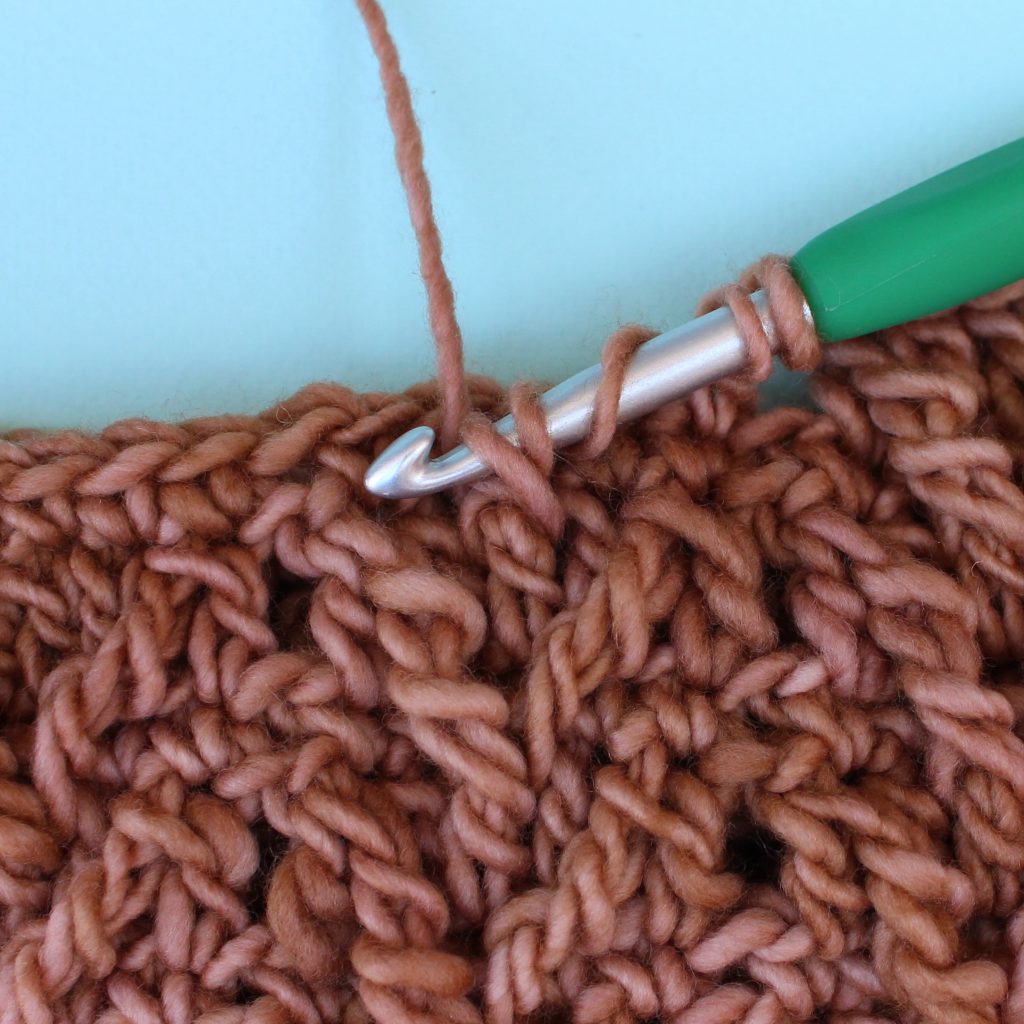
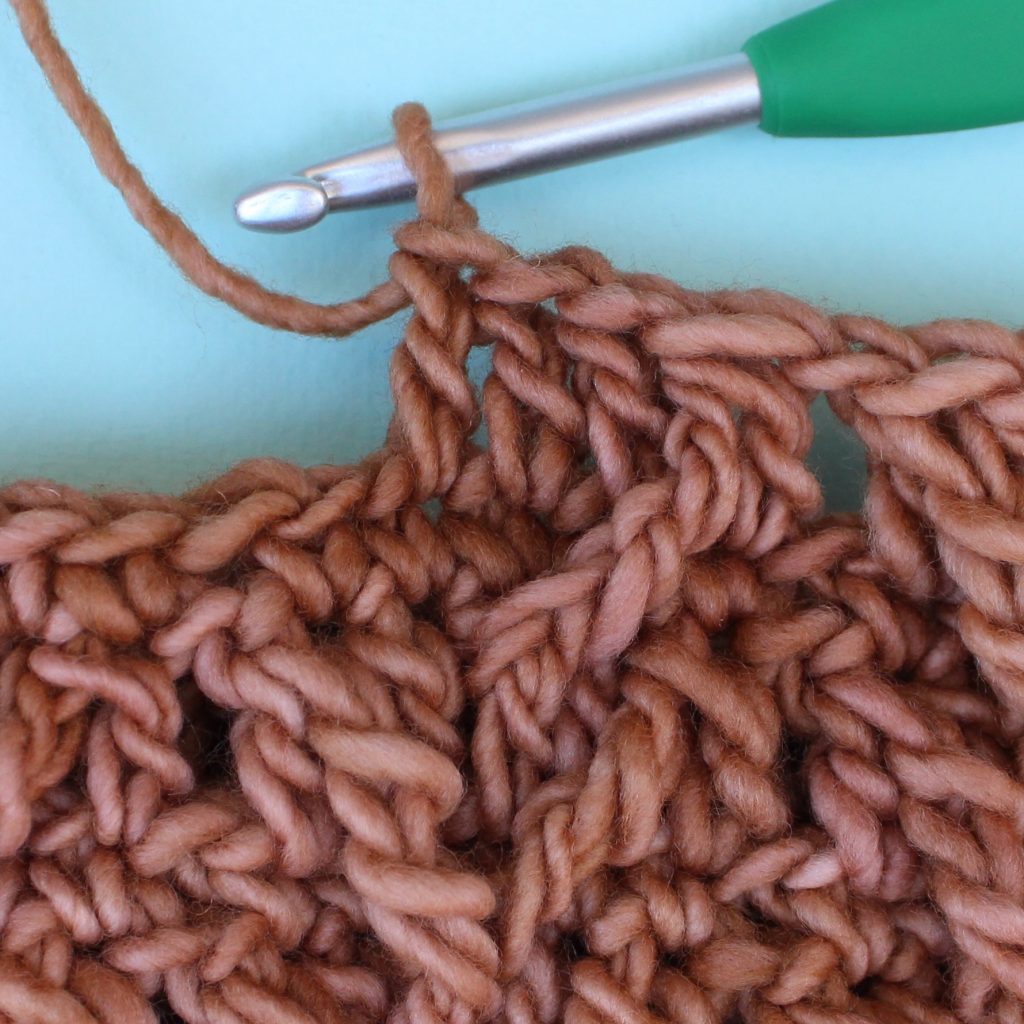
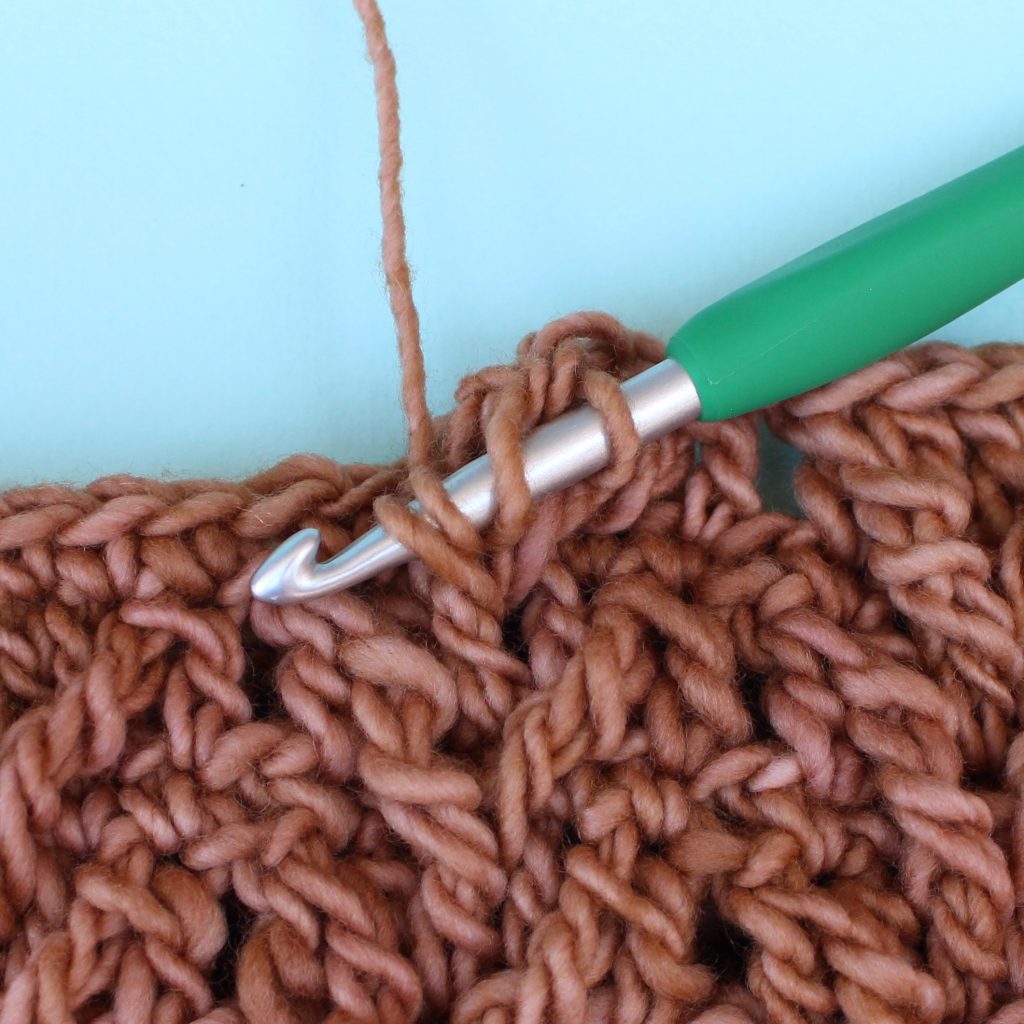
Yo, insert hook in first sc after ch space, yo and pull up a loop
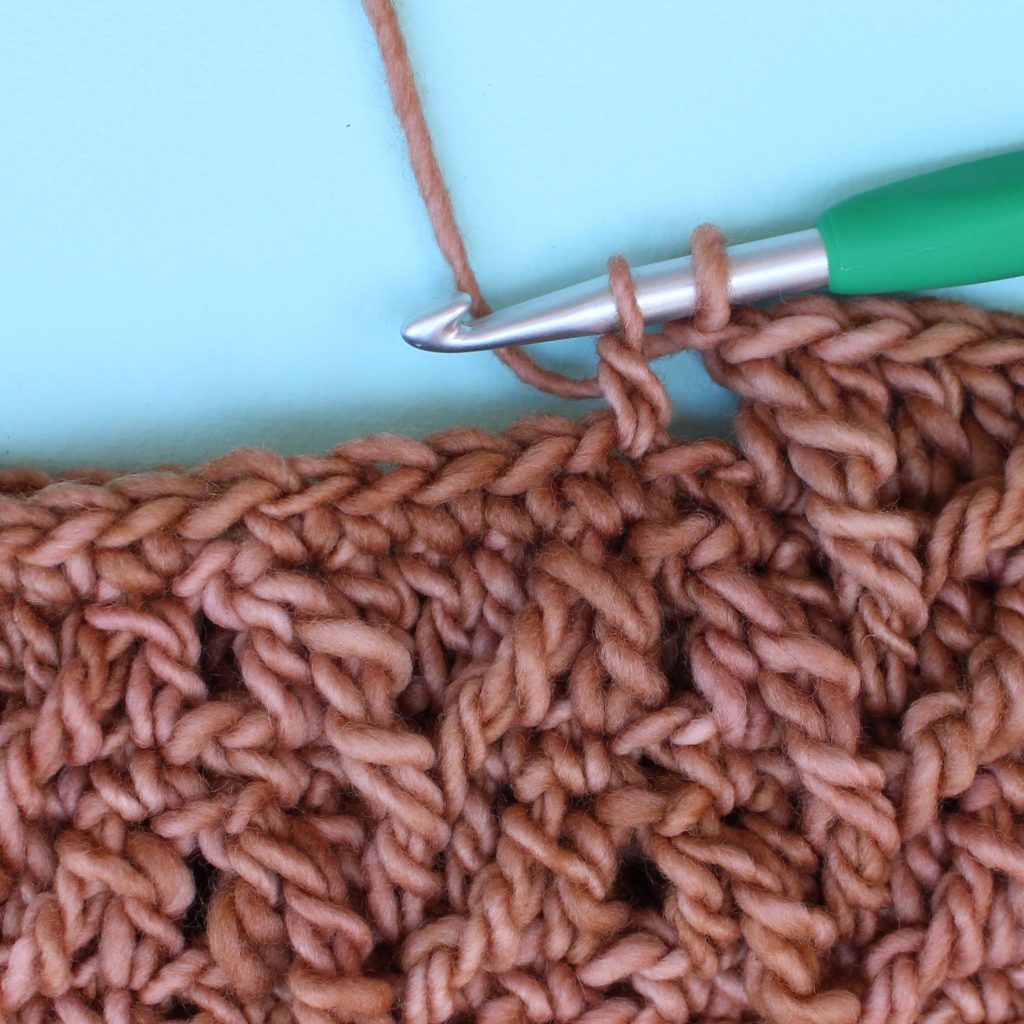
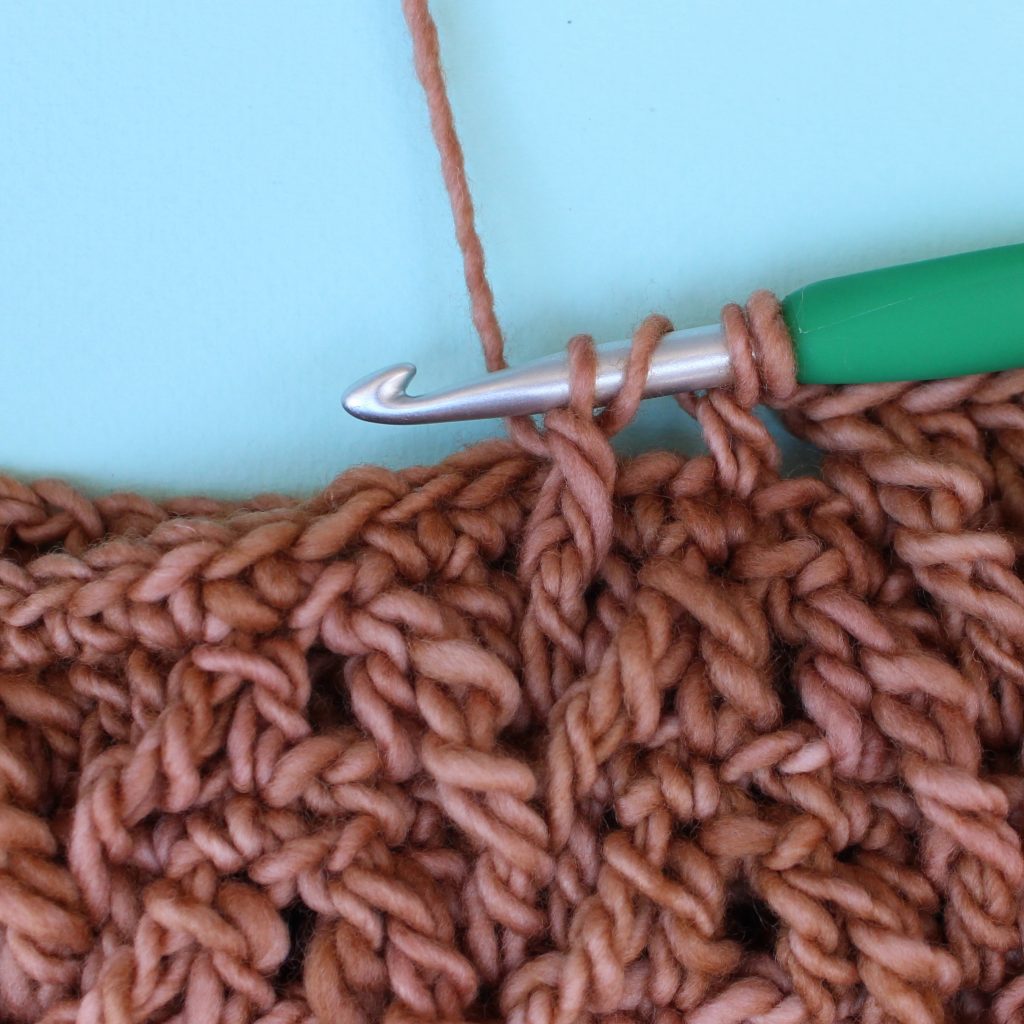
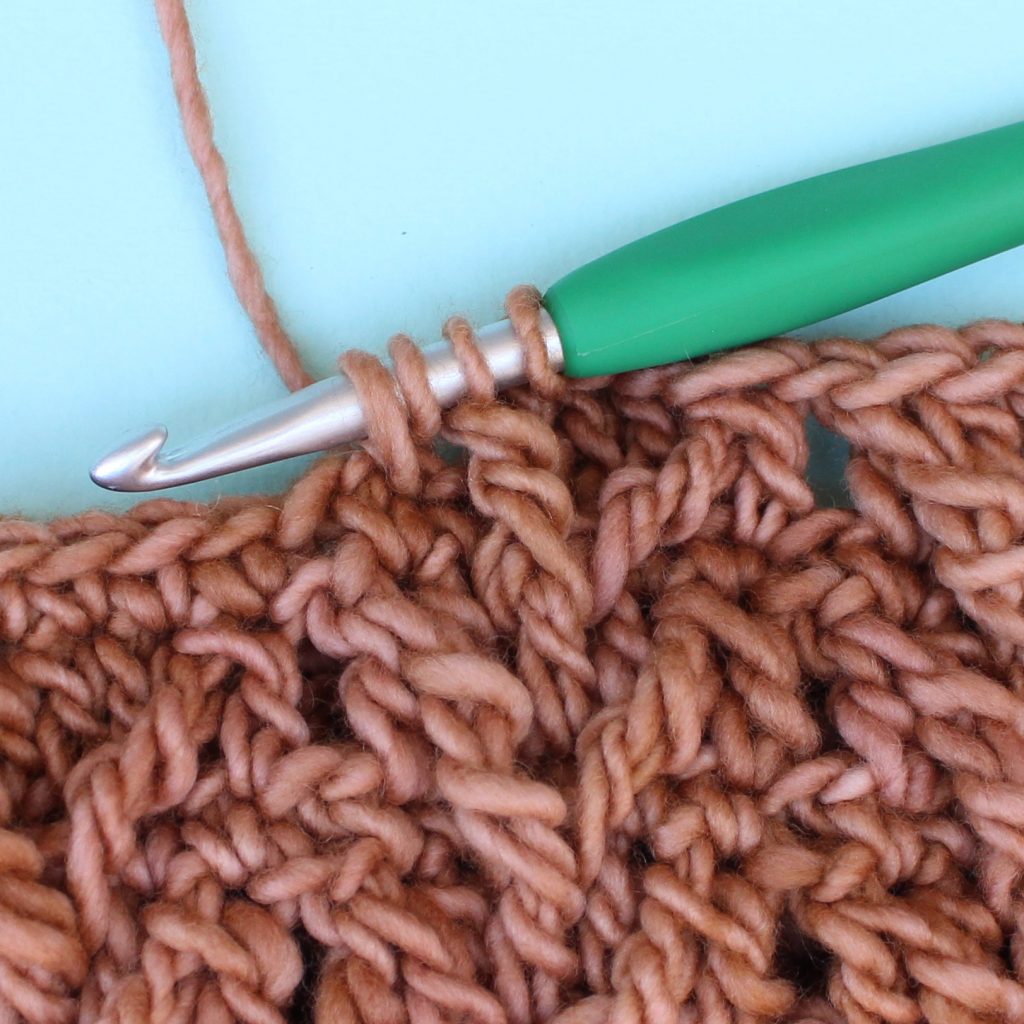
yo and pull through 2 loops, yo twice, skip next sc, insert hook around next dc 2 rows below
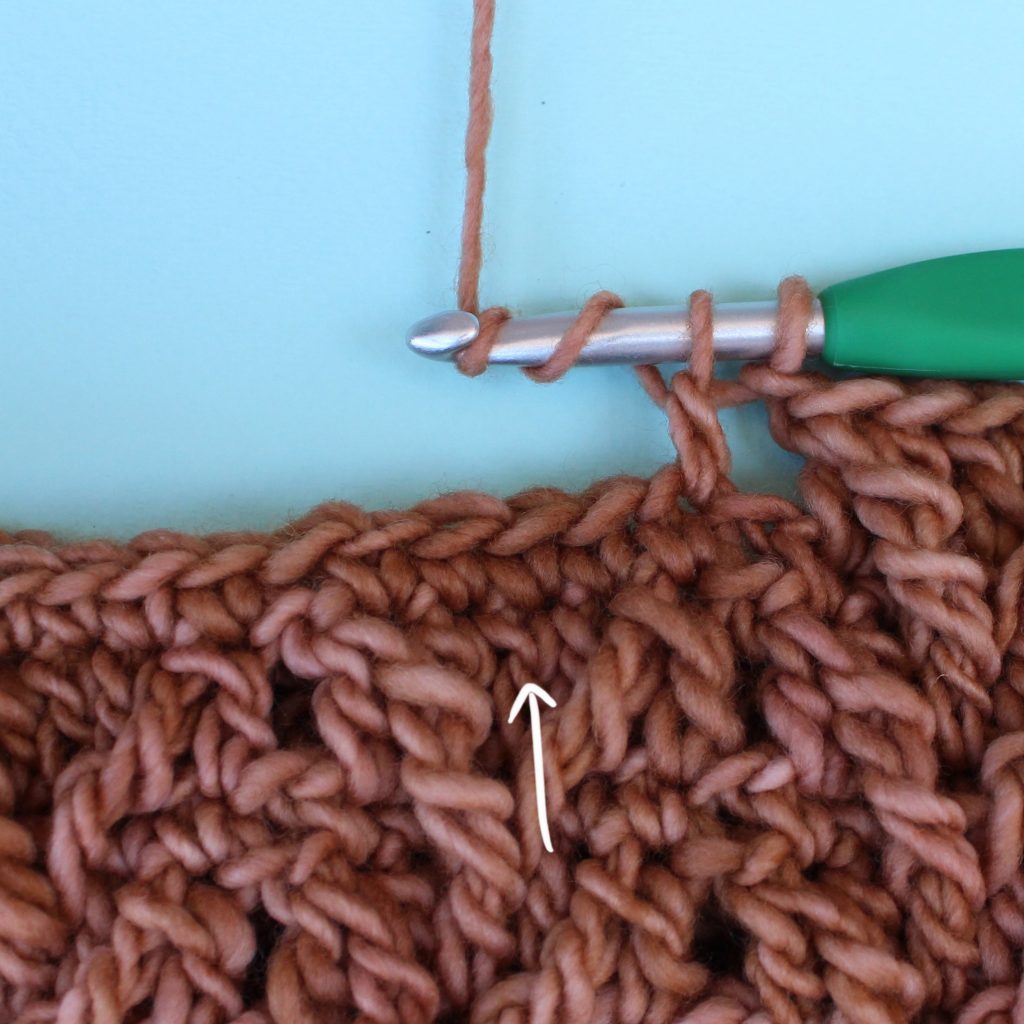
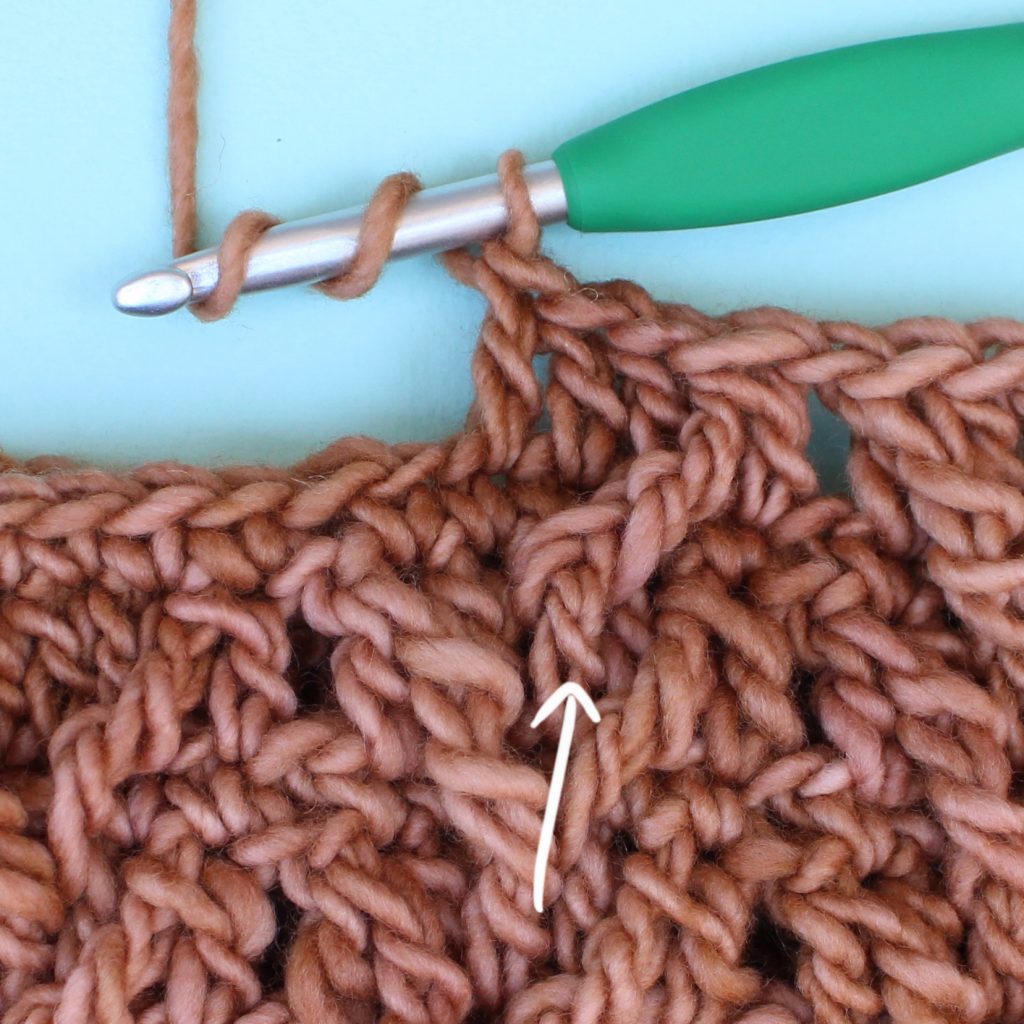
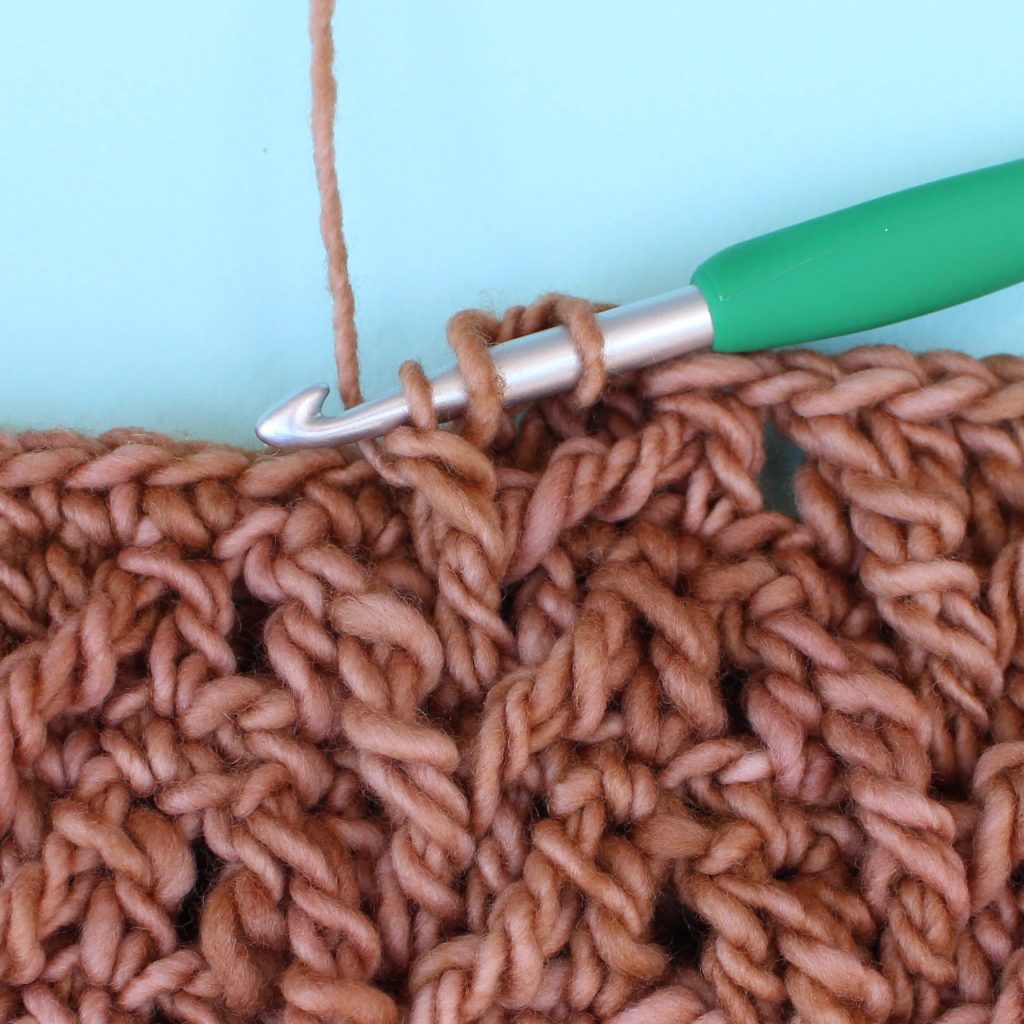
yo and pull up a loop
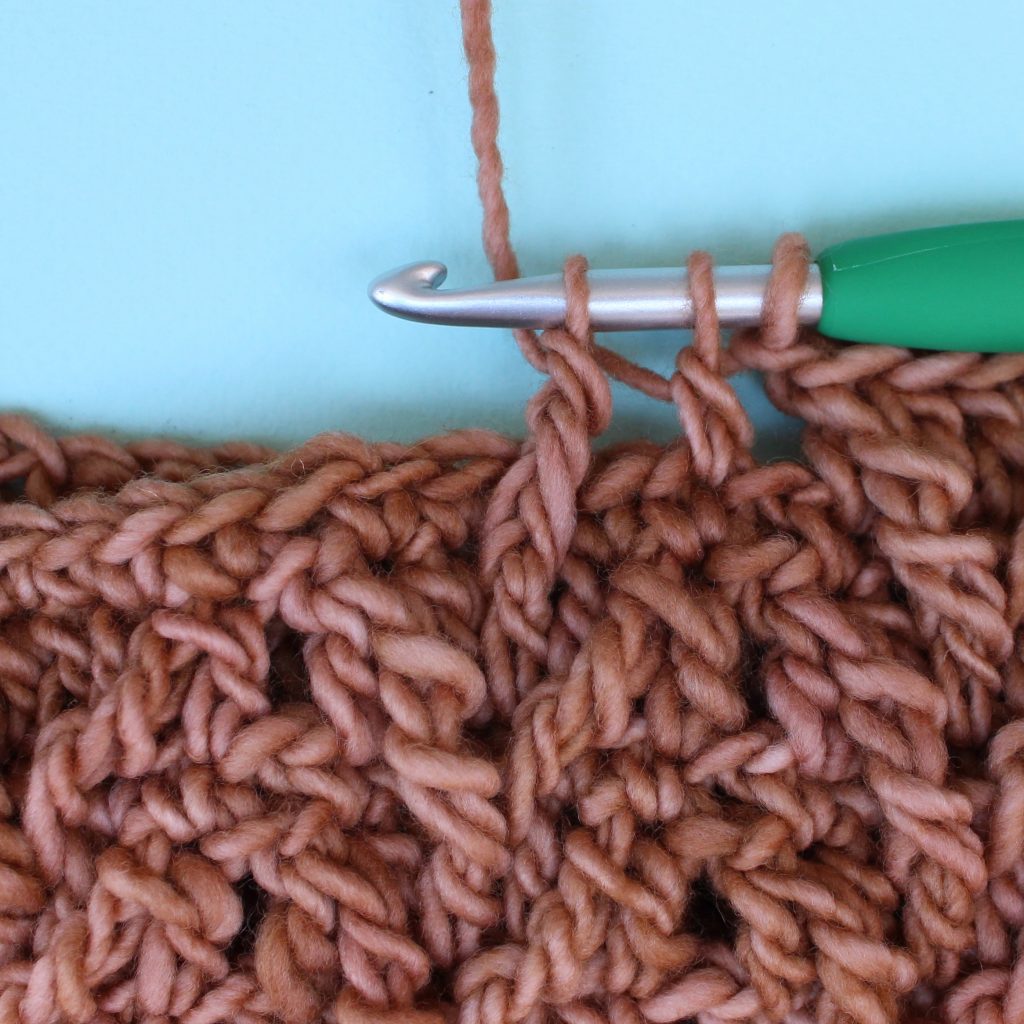
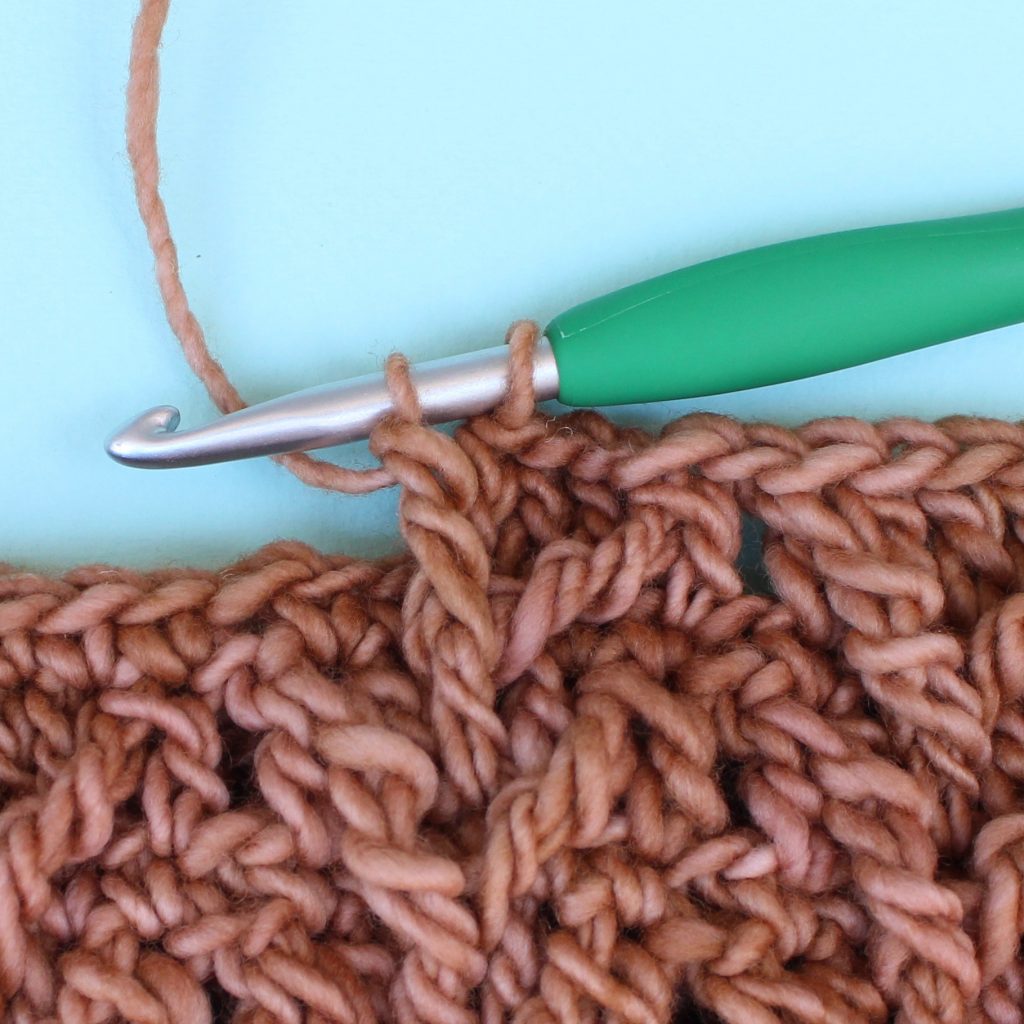
[yo and pull through 2 loops] twice, yo and pull through all 3 loops on hook.
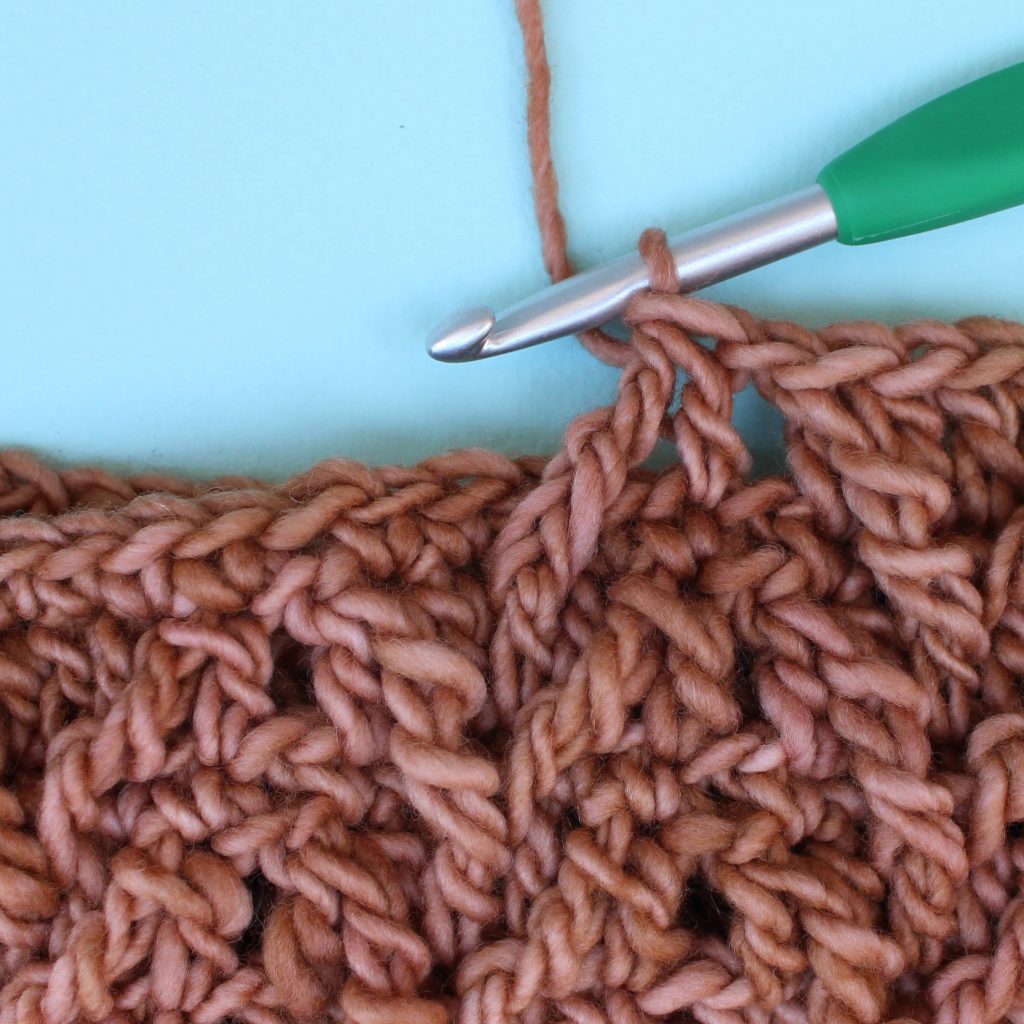
After the right post stitch, you’ll make 1 dc in each of the next 3 sts.
Left Post Stitch (LF post st):
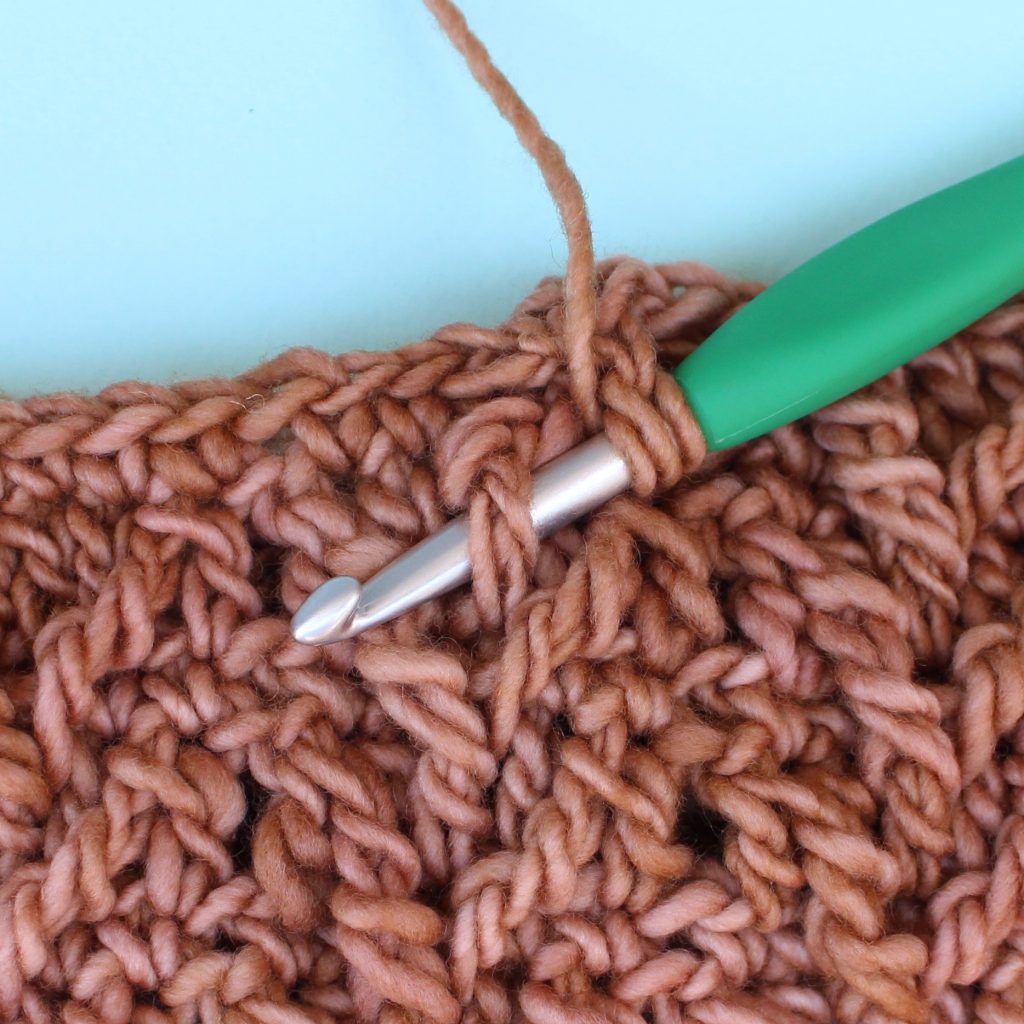
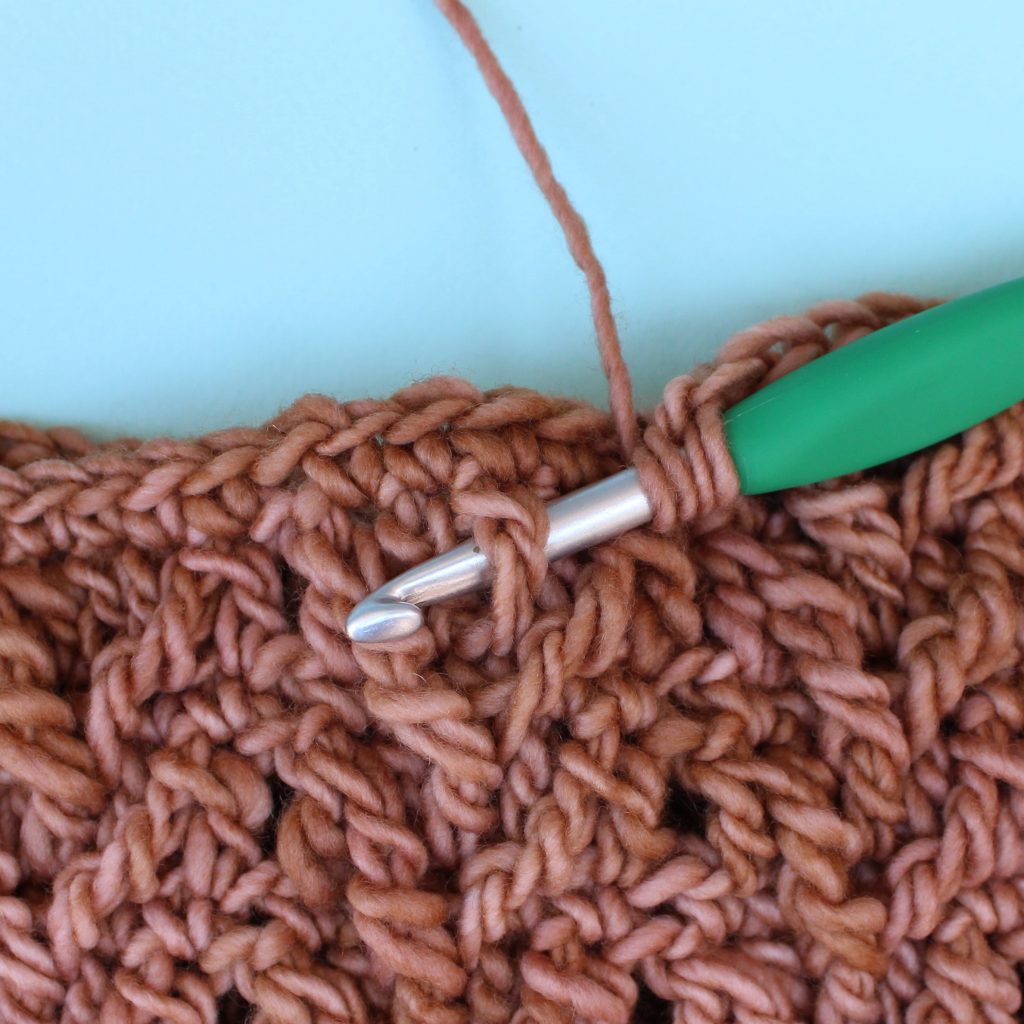
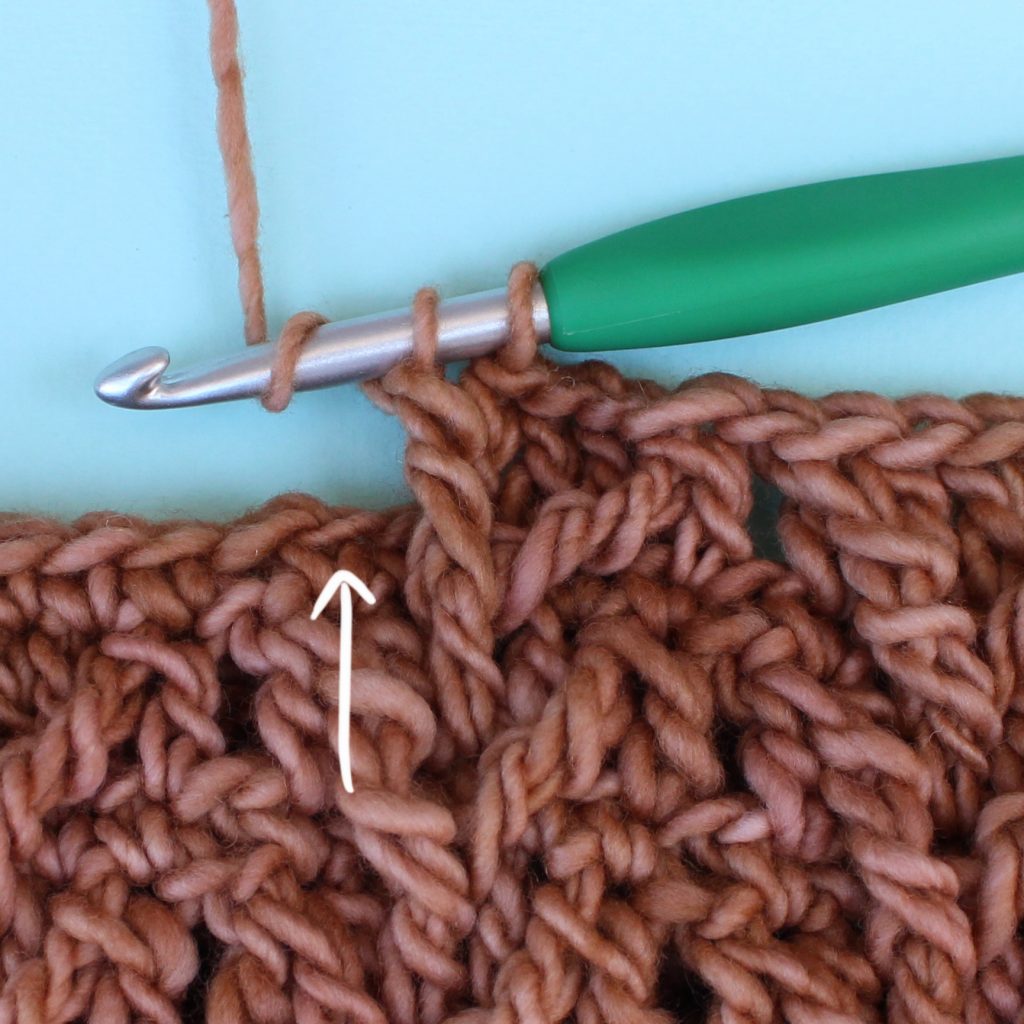
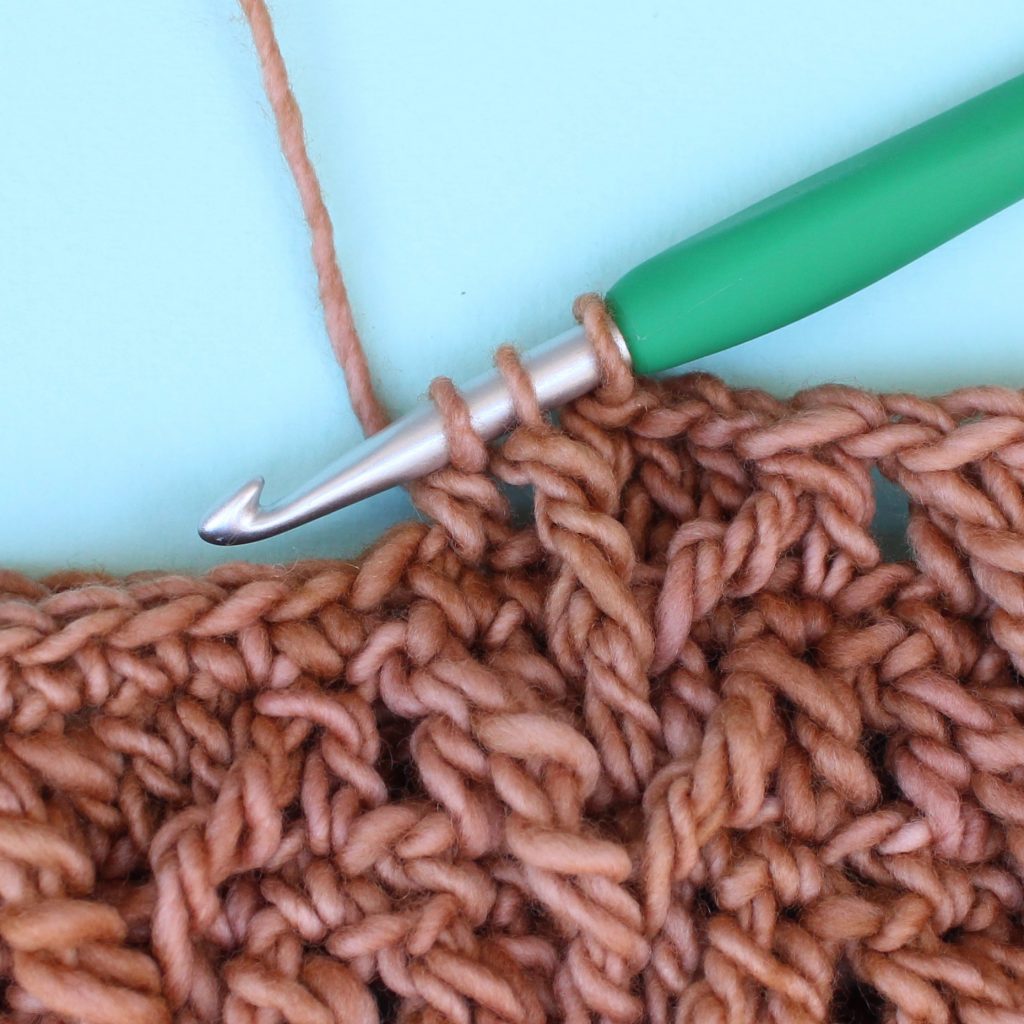
Yo twice, insert hook around same st as RT post st 2 rows below
yo and pull up a loop, [yo and pull through 2 loops] twice

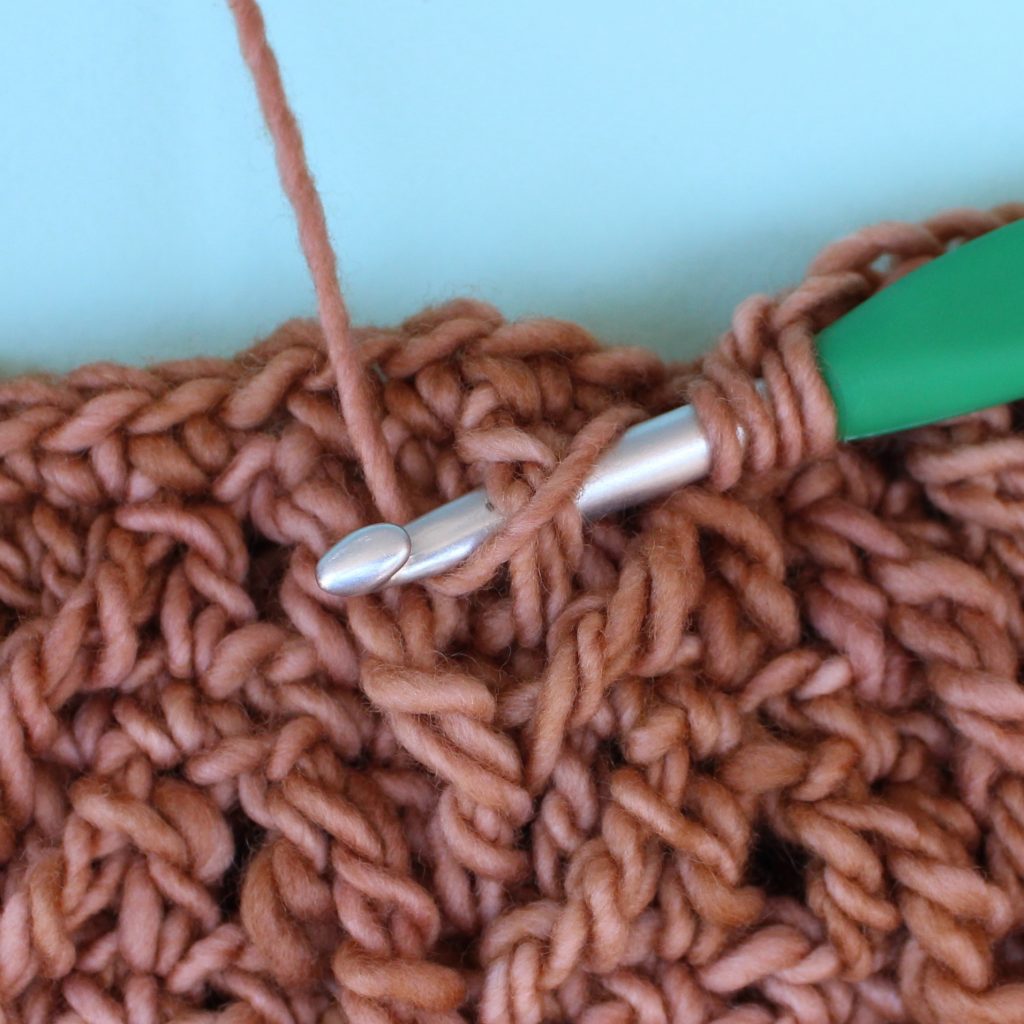
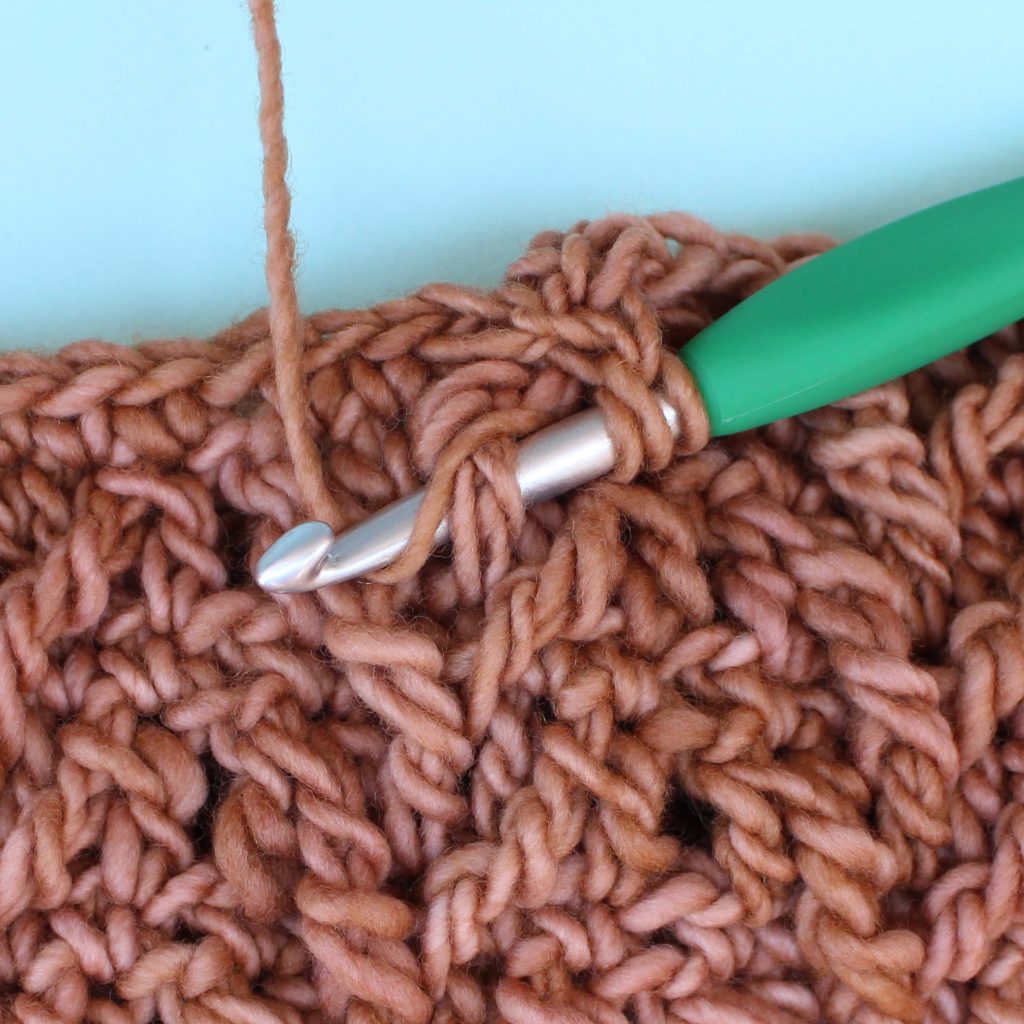
yo, insert hook in next sc
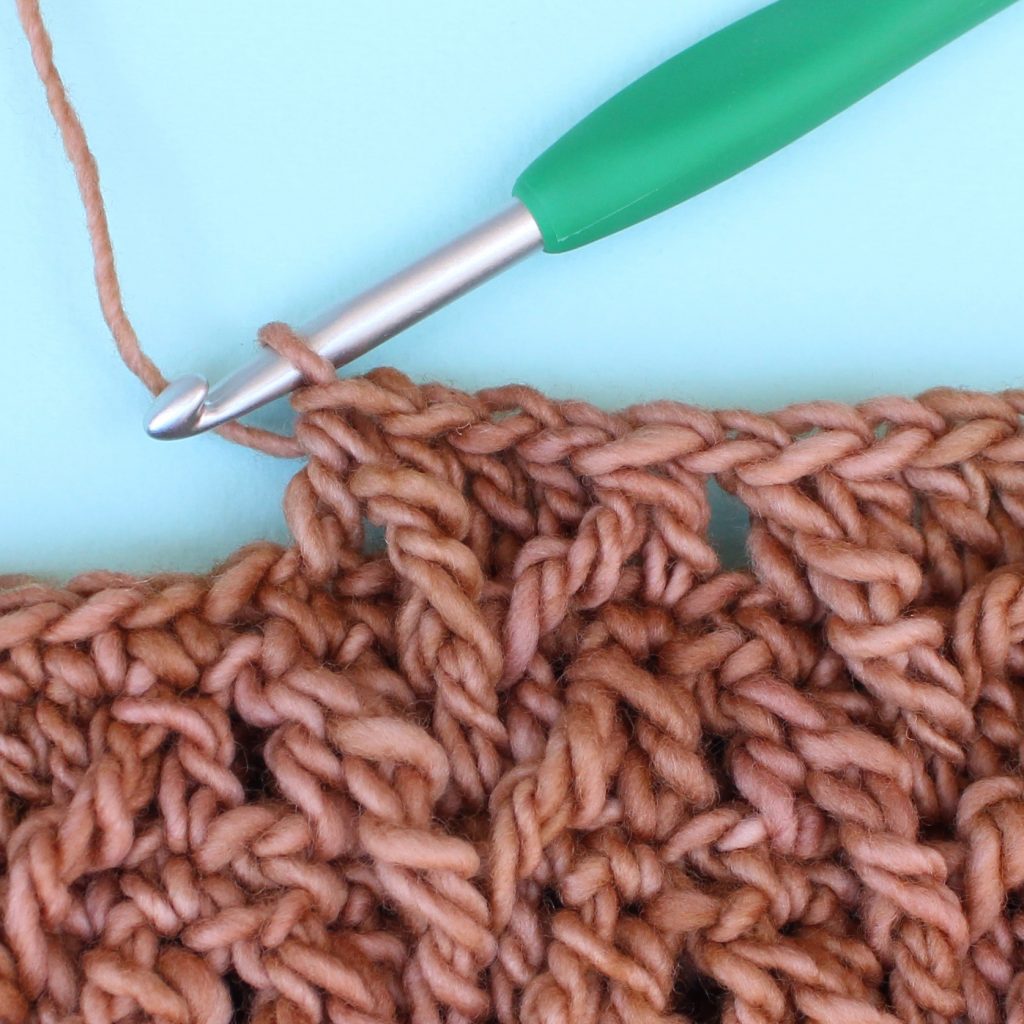
yo and pull up a loop, yo and pull through 2 loops, yo and pull through all 3 loops on hook
How to Customize it
- Buttons – Add a couple of buttons to the edge of your hat to give it a little something extra! I love using these coconut shell buttons.
- Furry Pom Pom – A faux fur pom pom is a fun way to accessorize any hat and this one will look perfectly finished with a pom pom on top!
Share Your Project!
I hope you’ve enjoyed this pattern and I would love to see what you made! Please share your photos on social media and tag me @gleefulthings or use hashtag #gleefulthings. Don’t forget to add your project on Ravelry too! :)