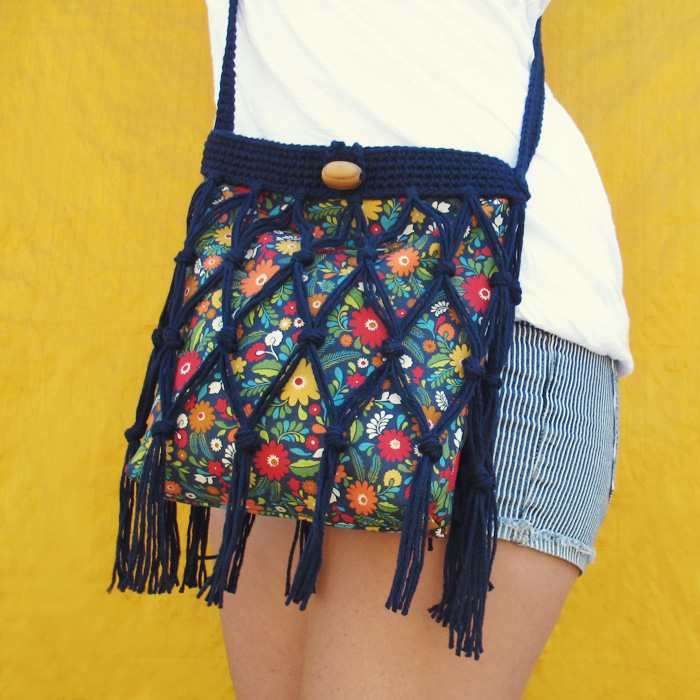
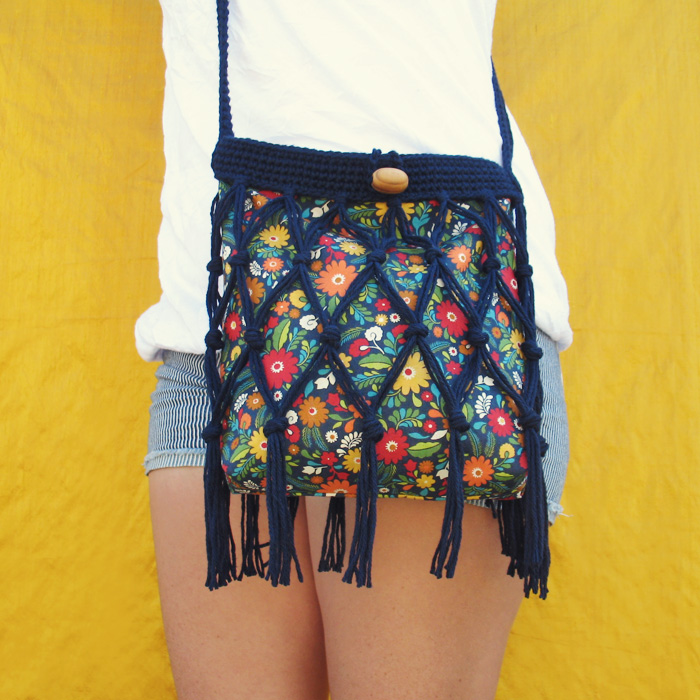
Floral Fringe Bag Free Crochet & Sewing Pattern
Did you know that March is National Craft Month?! Jo-Ann Fabric and Craft Stores invited me to create a project tutorial to share with you for the occasion! They gave me four themes to choose from (floral, nautical, geometric and vivid orchid) and I went with the floral theme because it’s perfect for Spring! Jo-Ann makes spring crafting easy during National Craft Month with a spring crafting inspiration website. Check that website out if you want to see what other crafty bloggers have done with the themes!
Anyway, lately I’ve had a lot of ideas floating around in my head that involve incorporating fabric into crochet projects. So I came up with this idea for a bag that is perfect for anyone who likes to crochet and sew! And it really only requires pretty basic knowledge of both!
Finished Size: About 10 inches wide x 11 inches tall (plus fringe). Strap can be made any length.

– Cotton fabric (about half a yard will do – I used this one)
– Worsted weight yarn (I used Bernat Handicrafter Delux in Navy)
– Size G (4.5 mm) crochet hook (or size needed to obtain gauge)
– Yarn needle
– Basic sewing supplies (this can be sewn by machine or hand)
– Ruler
– 1 large wood bead (a button would work too)

sc – single crochet
ch – chain
sl st – slip stitch
rnd – round
ea – each
FO – finish off

Gauge: 4 sc = 1 inch. Top piece should measure approximately 20 inches around. Gauge IS important. If your gauge is off, the top piece will be too big or too small to fit around the fabric.
Top piece
ch 84. sl st to join.
rnd 1: ch 1 (counts as 1 sc). 1 sc in ea ch. sl st to join. (84)
rnd 2-4: ch 1 (counts as 1 sc). 1 sc in ea st. sl st to join. (84)
rnd 5: ch 1 (counts as 1 sc). 1 sc in ea of the next 21 sts. ch 16 (this will be your loop for the button/bead). sl st to 1st ch. 1 sc in ea of the remaining sts. invisible join and FO (84)
Strap
*Leave enough yarn in the beginning to attach the strap to the top piece*
ch to desired length. (mine is 39 inches)
rnd 1: 2 sc in 2nd ch from hook. 1 sc in ea ch except last – 4 sc in last ch.
*now you will be working along the other side of the ch, coming back to where you started*
1 sc in ea ch except last – 2 sc in last ch. Invisible join & FO leaving enough yarn to attach the strap to the top piece.
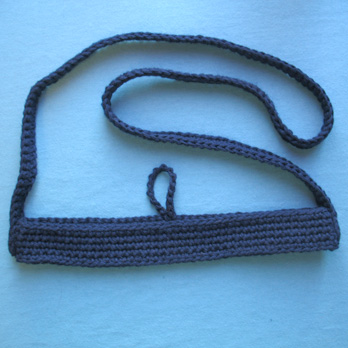
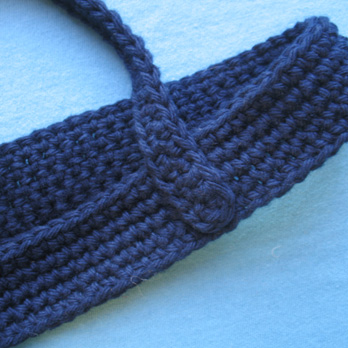
Use the yarn that you left at the beginning and ends of the strap to attach it to the sides of the top piece as shown above.

Step one: Cut 4 pieces that are each 12 inches tall x 11 inches wide. Cut a 1 inch square out of the two bottom corners on each piece.
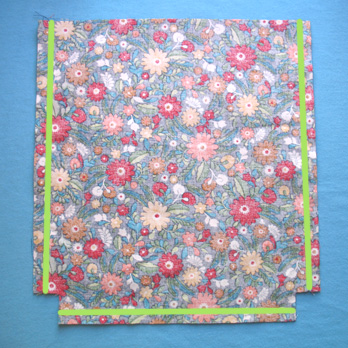
Step two: Pin two pieces together with wrong sides together. Do with this all four pieces (so you’ll have two sets of two pieces pinned together). Sew along the sides and bottom (green lines in the photo) using 1/2″ seam allowances.
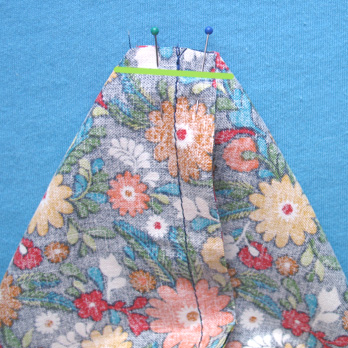
Step three: Flatten the bottom corners (the 1 inch square) so that the seams you just sewed touch each other. Sew across using 1/2″ seam allowances. Do this to all of the bottom corners.

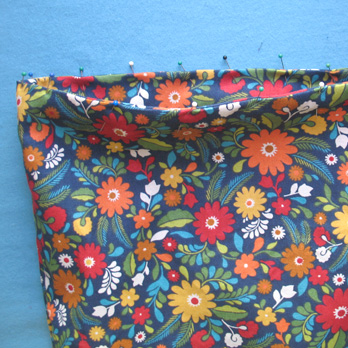
Step four: Turn one of the pieces right side out and put it inside the other piece (so that right sides are touching). Pin along the top and sew using 1/2″ seam allowances. Be sure to leave a small hole so that you can turn it right side out.
Step five: Turn right side out and pin along the top. Top stitch close to the edge all the way around. This will sew the hole shut that you left for turning.

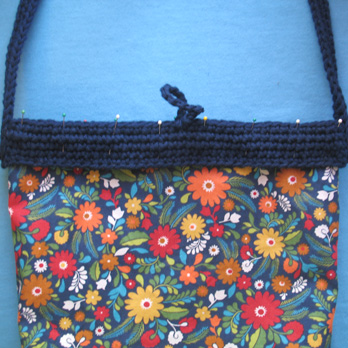
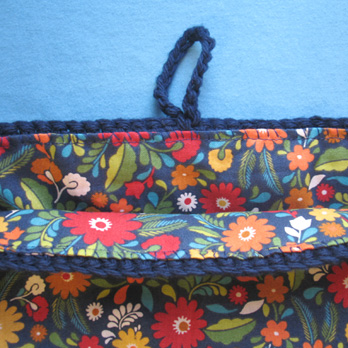
Pin the fabric to the inside of the top crochet piece and sew along the edge. I also make a few stitched toward the bottom of the top piece to hold it down. You’re probably going to want to do this sewing by hand (I never have much luck putting crocheted pieces through the sewing machine!).
Next, sew your bead or button onto the top piece on the opposite side of the loop.

Step one: Cut 56 pieces of yarn that are approximately 40 inches long.
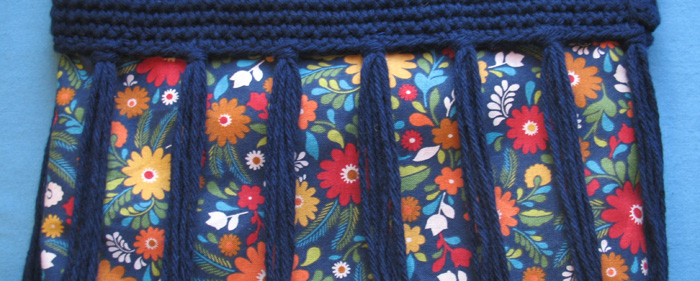
Step two: In every 6th stitch, attach 4 pieces of yarn (the pieces will be folded in half so you will have groups of 8 strands hanging down). I have a quick tutorial here on how to attach fringe.
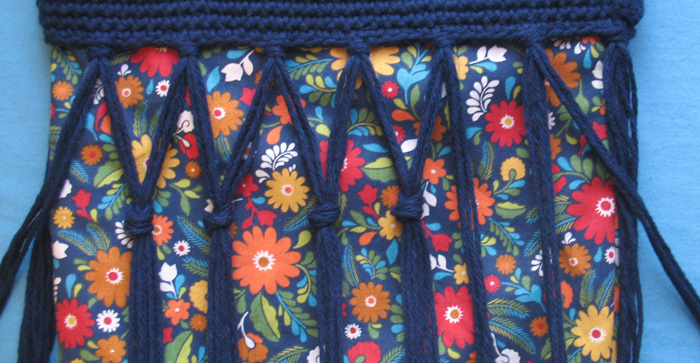
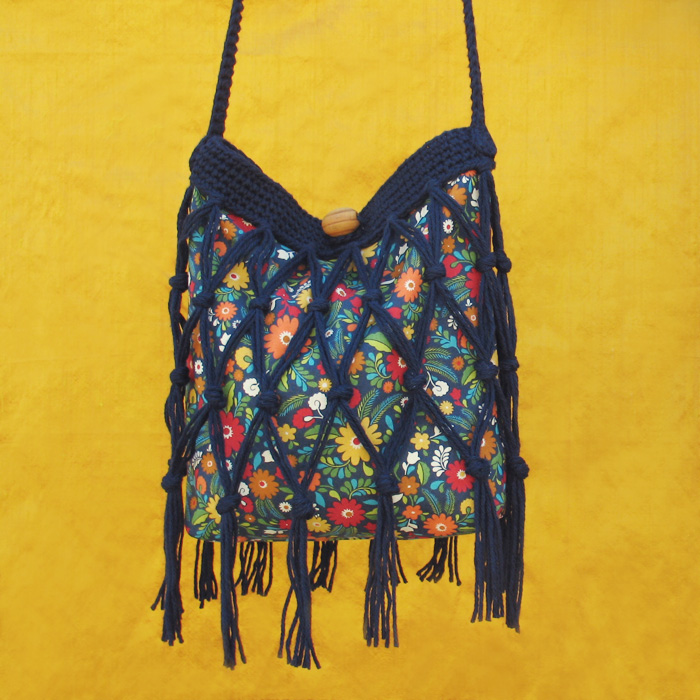
Step three: Separate 4 pieces of yarn from each group and knot them to 4 strands from the next group as shown above. Do this all the way around the bag.
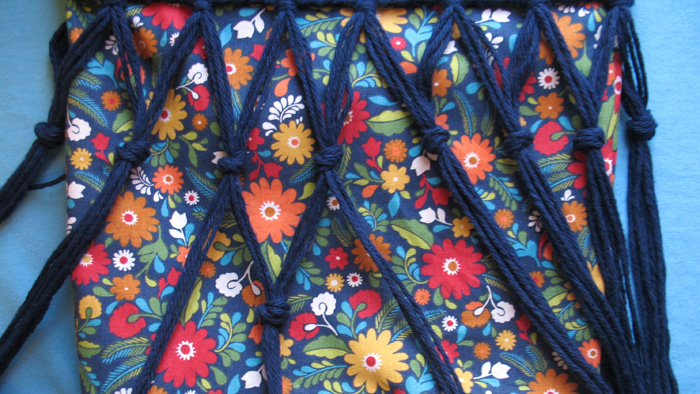
Step four: Repeat the same process, making another row of knots a few inches below the last ones.
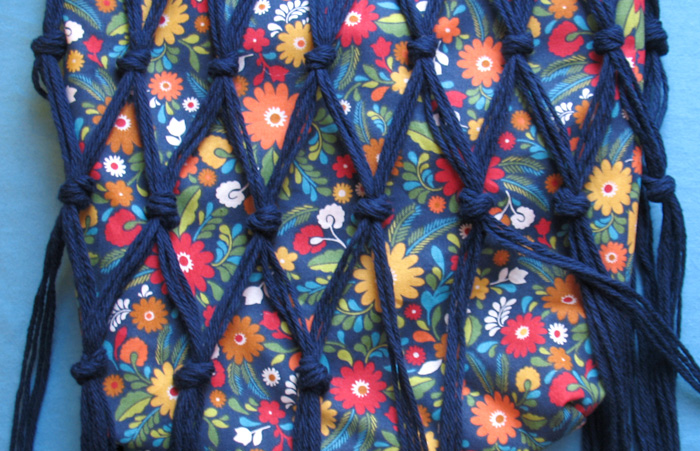
Step five: One more time! You’ll have a total of 3 rows of knots when you’re done.
Step six: Trim all of the remaining yarn to the same length. I left about 4 inches hanging below the last row of knots.

If you use this free pattern, please consider supporting me by purchasing a pattern from my shop. Your support will help ensure that I’m able to continue making new patterns to share. Thanks for considering! :)

You are welcome and encouraged to sell any items you make using this pattern! All I ask in return is that when selling online, please credit Julie King / Gleeful Things & provide a link to www.gleefulthings.com.
You may NOT sell the pattern, distribute it in any form, repost it online, or alter it to claim it as your own (this includes charts & translations to other languages). Copyright © 2014 Julie King / Gleeful Things. All Rights Reserved.
Disclosure: This is a sponsored post. These supplies were provided to me free of charge by Jo-Ann, however, I designed the project myself and all opinions here are my own.

I LOVE THIS SO MUCH ♥ !!! I’m crazy about anything fringy, right now. Thank you SO much for posting this pattern. =D
I absolutely love this bag,,,,,it is definitely on my near future to-do list as I am currently working on several orders,,,,love it!
Thank you thousand times!!! I love this instruction. It´s the best and easiest to follow I have ever seen. Thank you…!
Wonderful pattern and terrific style! I have a 20 something daughter and niece who will both love making this.
Thanks for sharing!
My best to you,
Sher
I’d like to thank you for the efforts you have put in penning this website.
I’m hoping to check out the same high-grade blog posts by you in the future as well.
In truth, your creative writing abilities has inspired me to get my very own website now ;)
Cute! Thanks for sharing.