Tutorial: How To Add Your Projects On Ravelry
I’ve had some people tell me that they don’t know how to add their projects on Ravelry, so I’m going to show you how! It’s pretty simple and only takes a few minutes. When you add a project to Ravelry, it will be linked to both the pattern and the yarn you used. Have you ever bought a yarn just because you thought it was pretty but then didn’t know what to do with it? I like to go onto Ravelry, look up the yarn, and see what other people have done with it for inspiration! Plus it’s fun to see what other people have made using the same patterns you have! Not to mention, designers (meeee!) love to see what people have made with their patterns! So if you feel like sharing your projects, here’s how! :)
When you log in to Ravelry, click the “my notebook” tab at the top. This is where all of your projects are stored.

Click on the “add project” button and you’ll be taken to this screen:

You can name your project anything you want (my names are always suuuper creative! :P). “name of pattern” should be the actual name listed on the pattern or in the book, etc. This will help Ravelry link it to the pattern. If you were using a pattern that you bought from someone on Ravlery, one of mine for example, you would choose “website or download” and type “Gleeful Things” as the pattern source. When you click continue, it will take you to this screen:
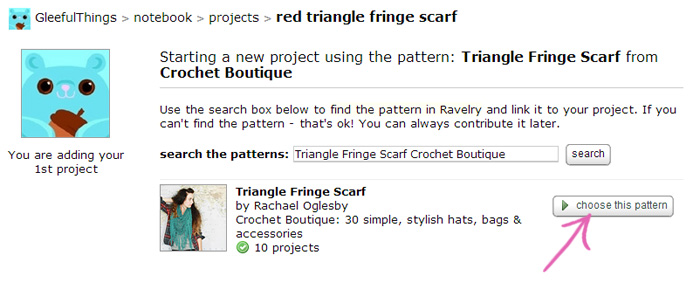
If the pattern it finds is correct, click “choose this pattern” to go on to the next step.
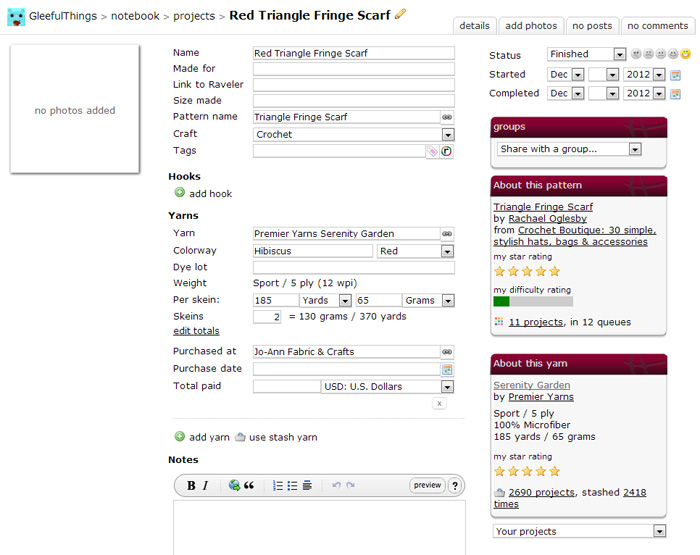
On this screen, you can fill out as much or as little information as you want. I like to at least add the yarn that I used. I already wrote a blog post about my scarf so I put a link to that post in the notes section. You can also rate the pattern and the yarn by clicking the stars. Click continue when you’re done and the next step will be to add your photos.
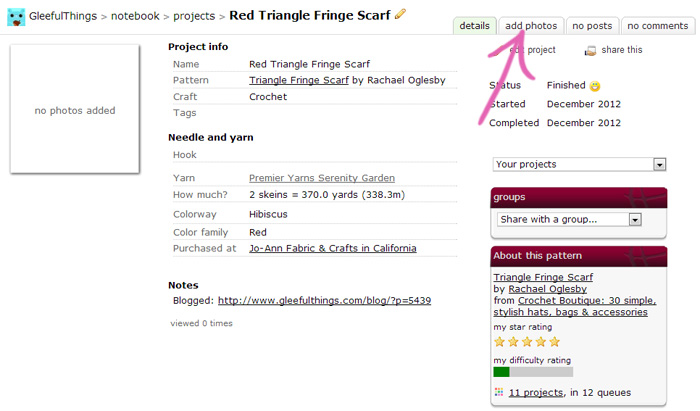
Click the “add photos” tab at the top and it will take you to this screen:
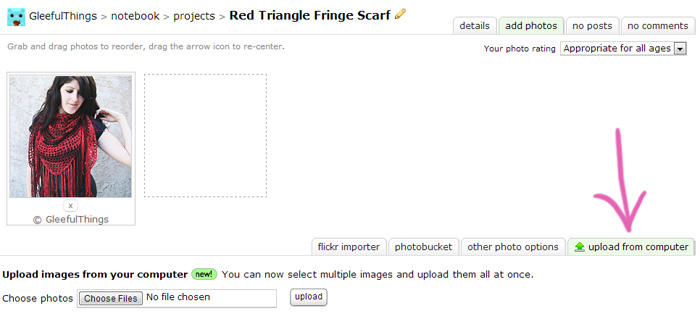
Click the “upload from computer” tab and then click “choose files”. Find the pictures on your computer and click “upload”. The photos will appear above and if you have more than one, you can drag them around to rearrange the order they’re in if you want.
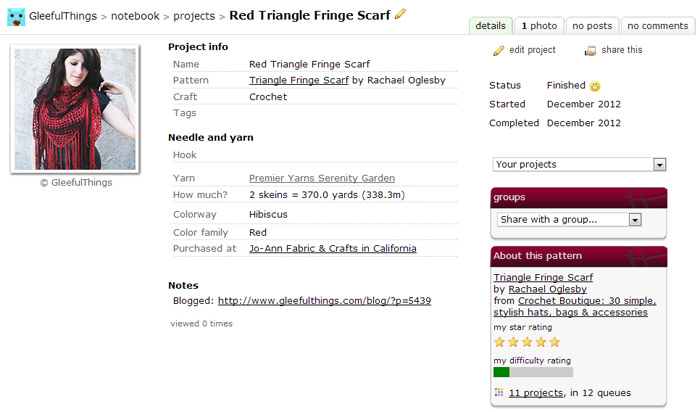
And this is what my finished project page looks like! Now it’s linked to the pattern and the yarn. If you were to click where it says “11 projects” under the “about this pattern” section, you’ll be able to see what other people have made using the same pattern! Let me know in the comments, if you have any questions.
Is there anything else you’d like to know how to do on Ravelry? I’d be happy to make more tutorials! :)
Thanks so much for this Julie! I’ve had a ravelry account for months, but I only used it to look up patterns. I’m not great with technology, so I just assumed adding projects would be too complicated for me. Thanks to your tutorial, I now have 3 finished projects on there, with many more to come! :)