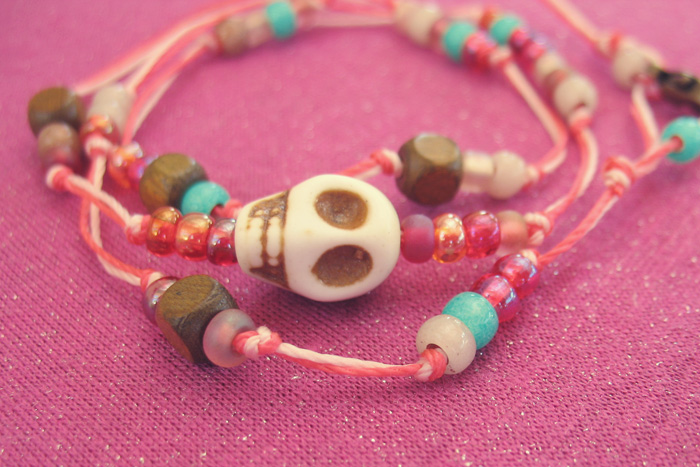
DIY: Beaded Skull Wrap Bracelet Tutorial
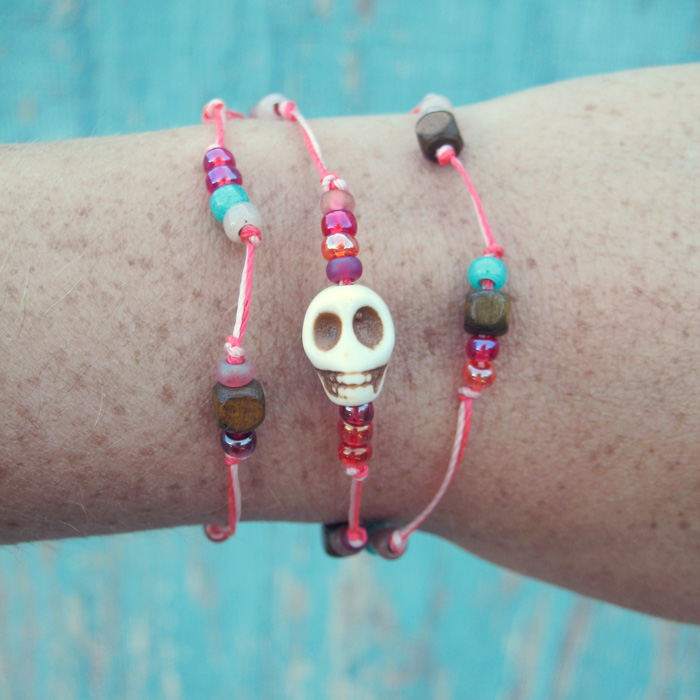
I’ve been eyeing these skull beads on Etsy forever now! I finally picked up some and put together this wrap style bracelet using a really simple technique and a some basic supplies that I already had. It’s kinda similar to my dainty metal beaded bracelet tutorial, just longer and more sets of beads. Wanna make one? Here’s a tutorial! :)
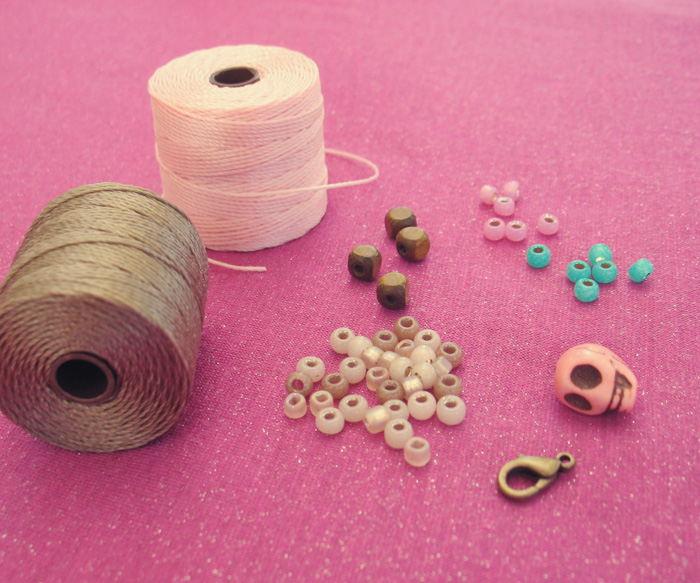
Supplies:
♥ Colorful cord. I’m using Superlon bead cord #18, but embroidery floss or crochet thread would work for this too!
♥ Skull bead (you can find them cheap on Ebay or Etsy).
♥ A variety of little beads. I used size 6 seed beads and small wood squares.
♥ Lobster claw clasp
♥ Glue & Scissors
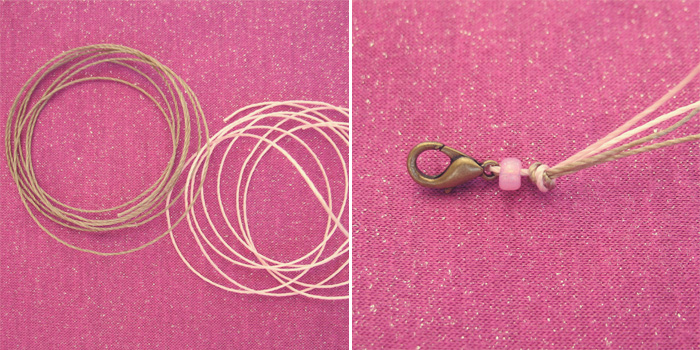
Step 1: Cut 2 pieces of cord – decide how long you want it to be + add several inches, you’ll need the extra for tying knots.
Step 2. Put the clasp and a bead on one end of the two cords a tie a knot behind it.
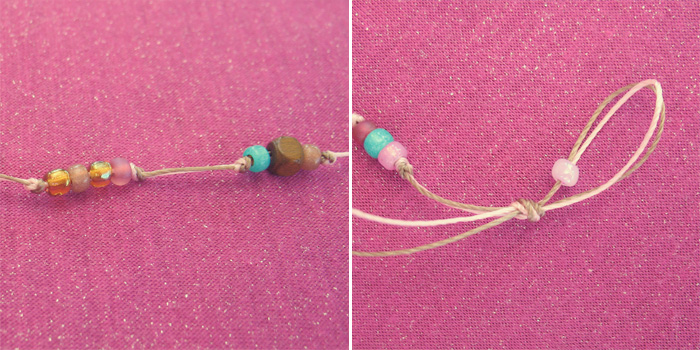
Step 3: Tie a knot (both cords together) about an inch or so away from the clasp. Add a few beads and tie another knot immediately after. Repeat this process down the whole bracelet. I kept my spacing and beads totally random. Make sure to try it on as you’re making it to ensure that the skull bead will end up in the front.
Step 4: Make a loop at the other end of the cords, add a bead, and tie a knot to hold the loop.
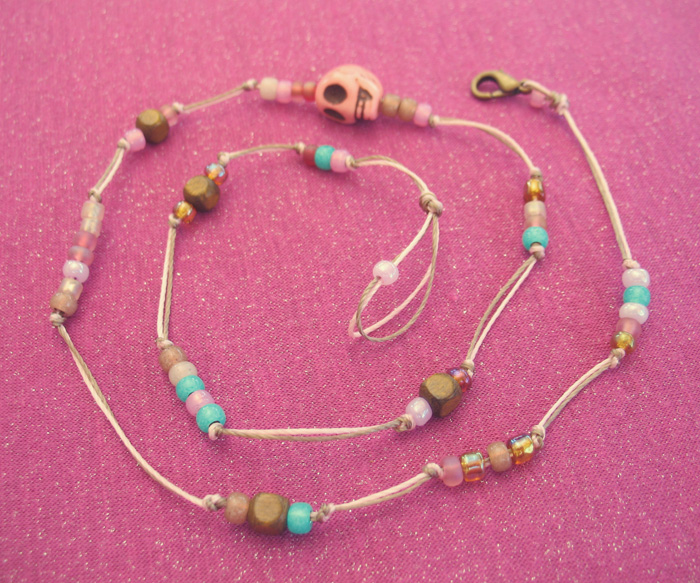
Step 5: Trim the extra cord off the ends and put a tiny bit of glue on your knots.
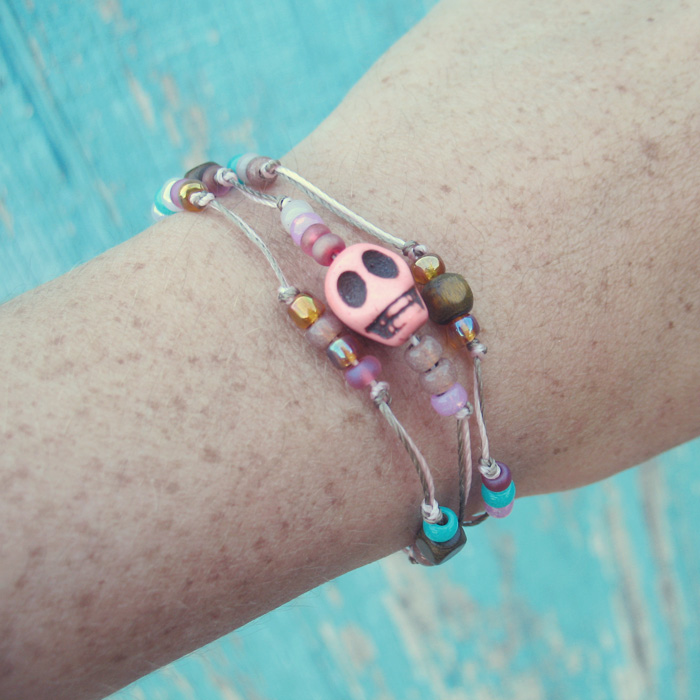
I love love LOVE these! The colorful thread and the skull really make it interesting. :)
Thank you! I love adding little pops of color like this to my outfits. :)