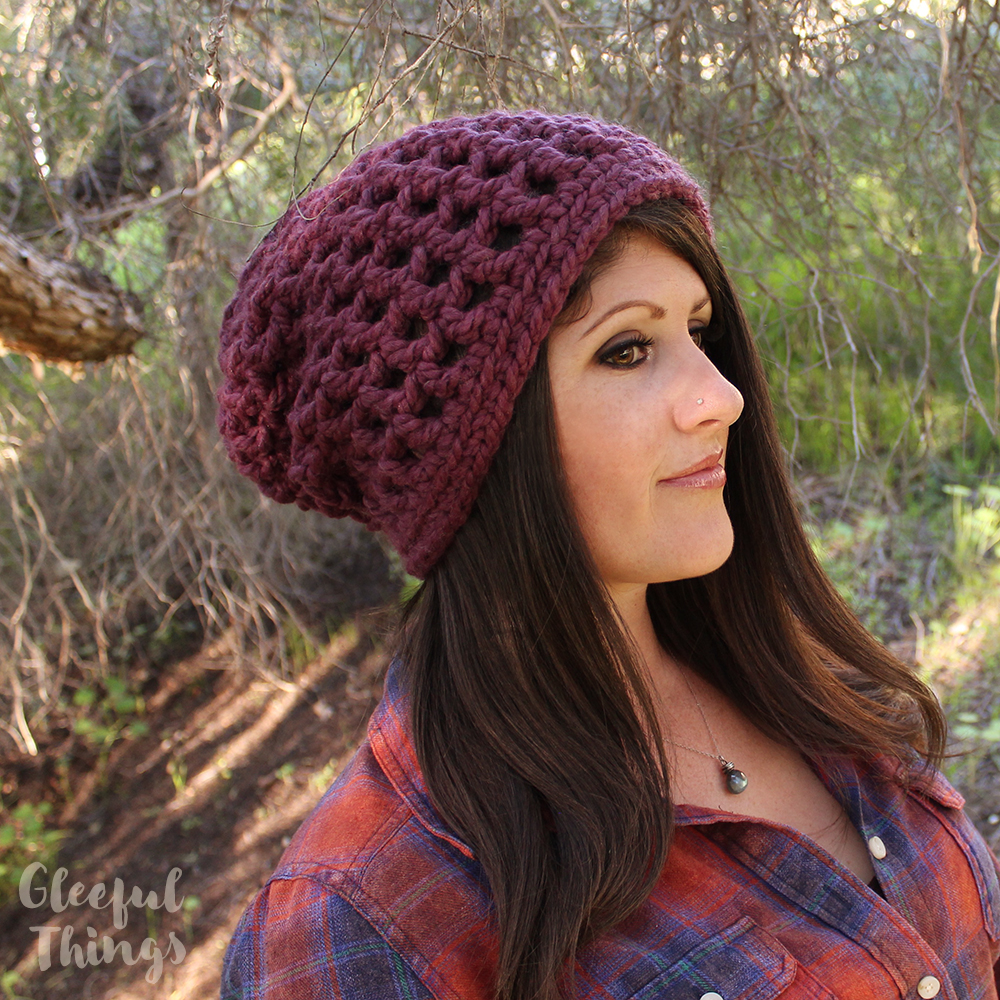
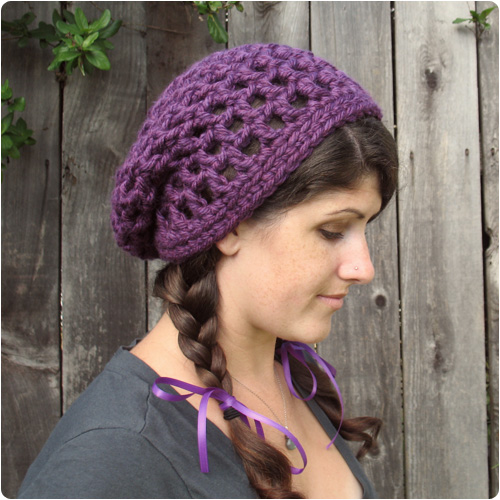
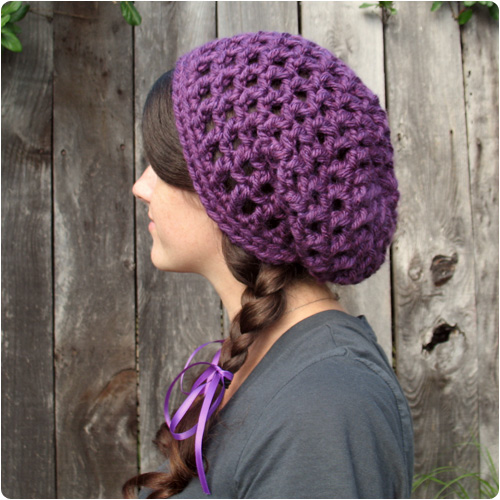
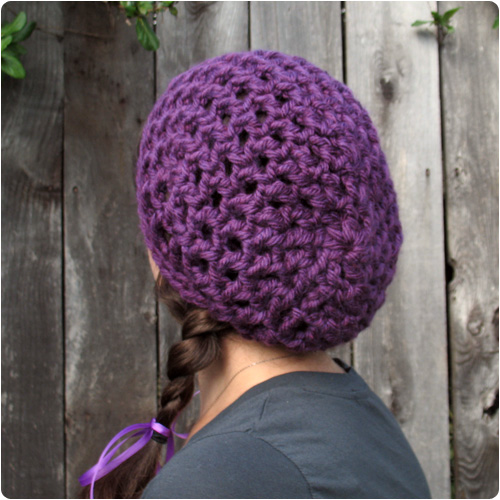
Waffle Cone Slouchy Hat Free Crochet Pattern
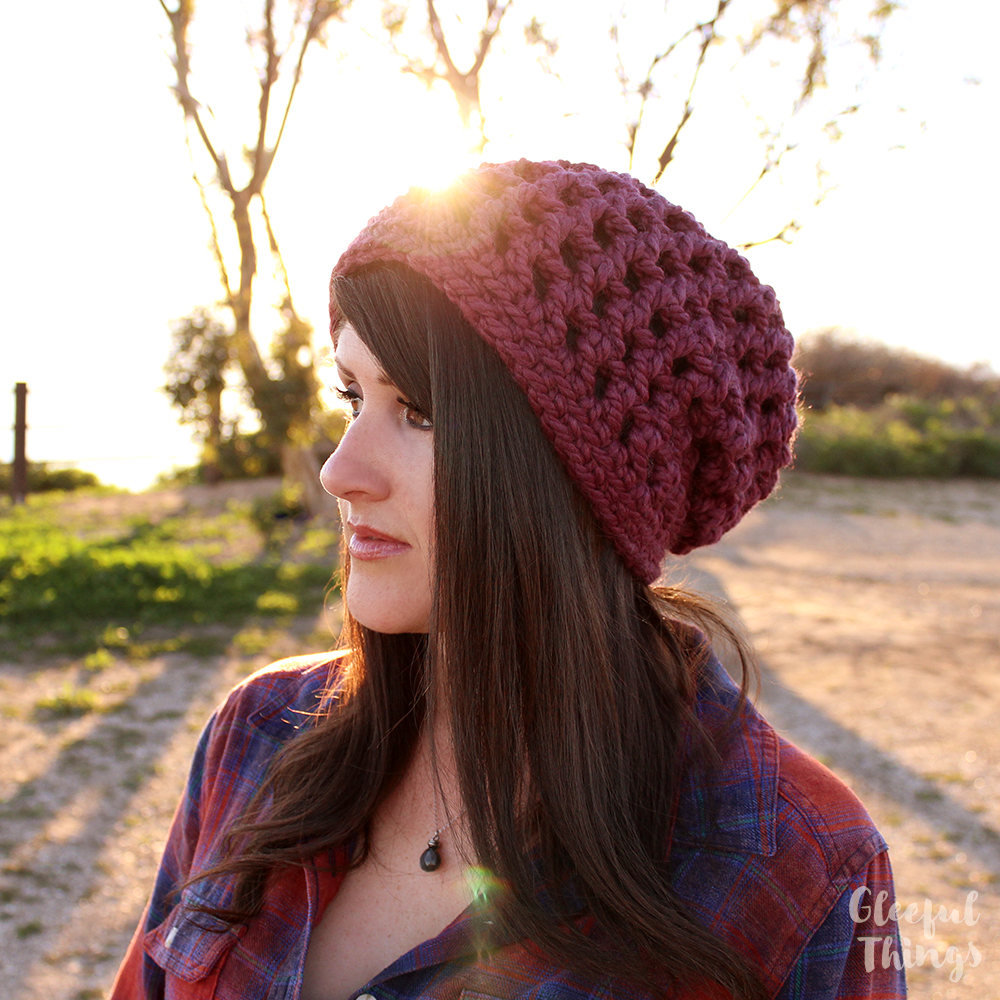
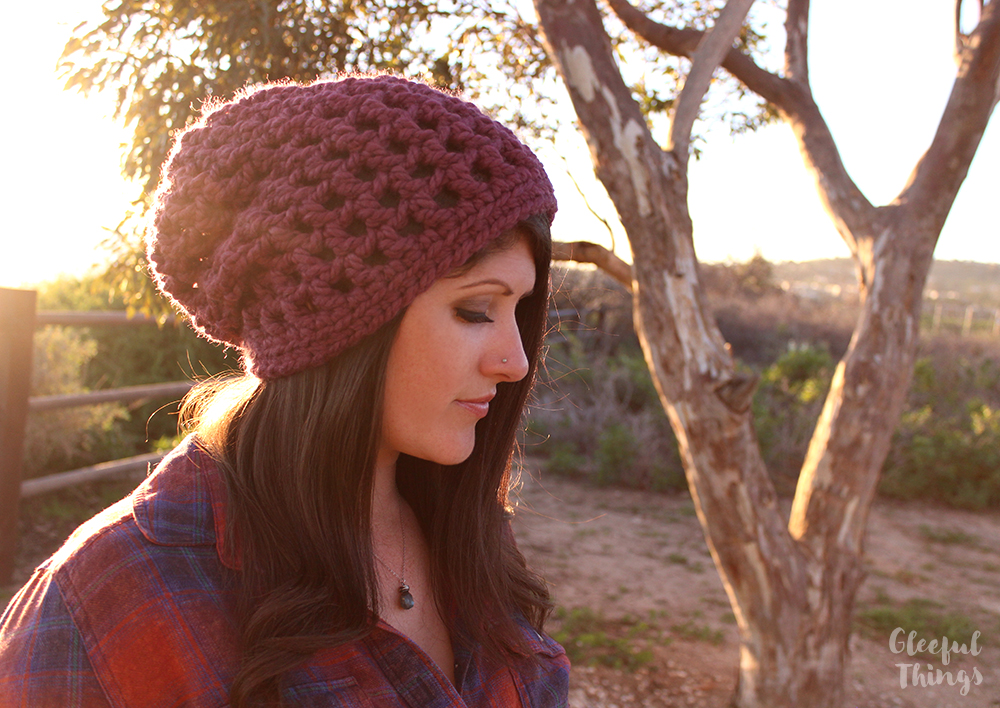
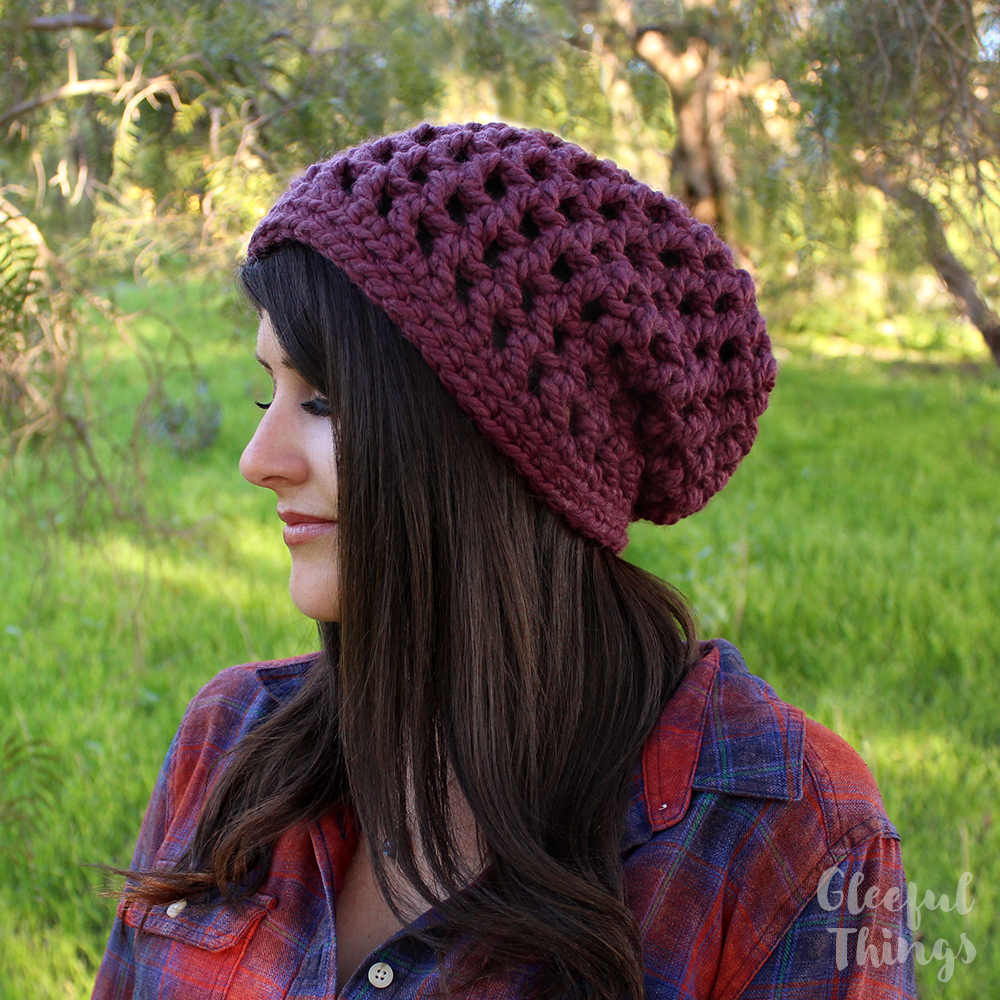
This is a very basic, mesh hat pattern! It’s a bit different than my other slouchy hats. This one is actually a skully hat that gets it’s slouchiness from being extra long. I think you’ll love making it! It’s super quick and I designed it to take only one skein of Lion Brand Wool Ease Thick & Quick!
Edit (3/9/2017): This pattern has been completely rewritten and there is now a video available to show you how to make this hat! Check it out on YouTube!
Yarn
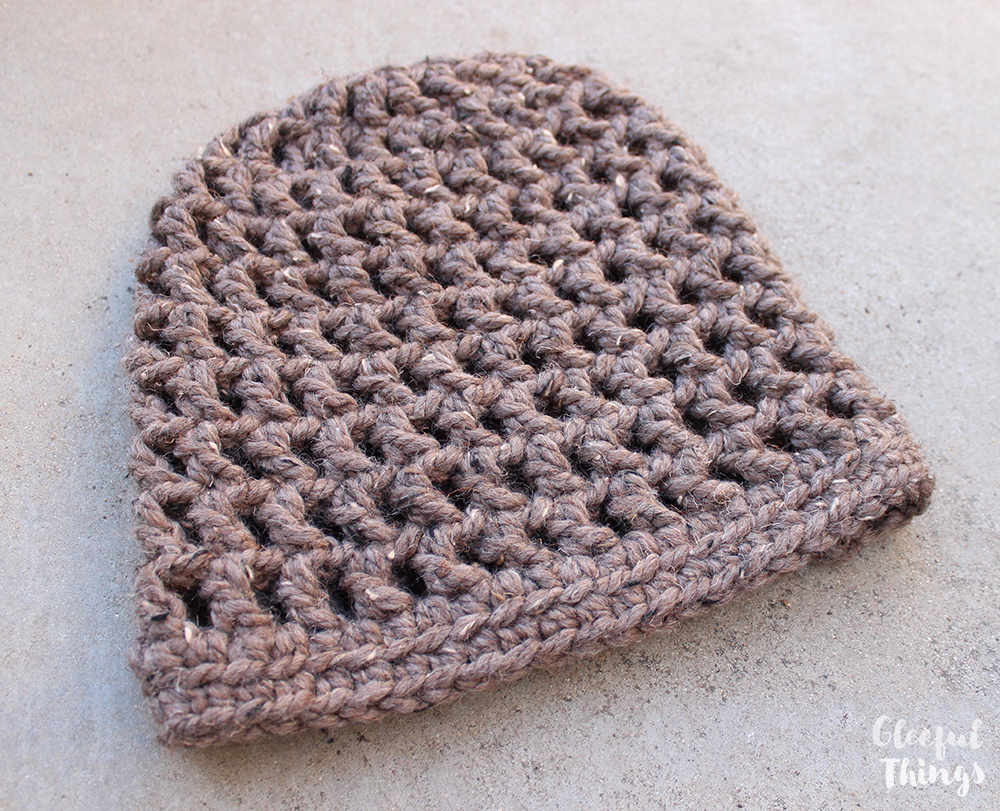
Lion Brand Wool Ease Thick & Quick, #6 super bulky weight yarn: Approximately 80 yards of #146 Fig (purple) or #124 Barley (tan)
Materials
US Size N/13 (9mm) crochet hook or size needed to obtain gauge, yarn needle, scissors, tape measure
Difficulty
Easy
Size
22” around edge, 11” from top to edge.
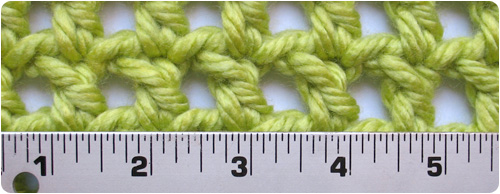
Gauge
Work rounds 1-2, resulting circle should measure 5 inches across. 1 dc + 1 ch should = just under 1”.
Abbreviations
ch(s) – chain(s), sc – single crochet, dc – double crochet, st(s) – stitch(es), sl st – slip stitch, BLO – back loop only
Notes
1. Pattern is worked in joined rounds.
2. Ch 4 at beginning of rounds 1-11 will count as 1 dc + 1 ch.
3. Ch 1 at beginning of rounds 12 & 13 will count as 1 sc.
Download the Pattern
A convenient, print friendly version of this pattern is available for purchase if you’d like.
>> Click here to get the PDF on CRAFTSY <<
>> Click here to get the PDF on ETSY <<
>> Click here to get the PDF on RAVELRY <<
Video Instructions
Watch the video tutorial below or on YouTube and let me show you how to make this hat!
Instructions
Round 1: Ch 4 (counts as 1 dc + 1 ch now & throughout), [1 dc in 4th ch from hook, ch 1] 7 times, sl st to 3rd ch to join – 8 dc + 8 ch 1 spaces.
Round 2: Ch 4, 1 dc in same st, ch 1, *1 dc in next st, ch 1, 1 dc in same st, ch 1; repeat from * around, sl st to 3rd ch to join – 16 dc + 16 ch 1 spaces.
Round 3: Ch 4, 1 dc in next st, ch 1, 1 dc in same st, ch 1, *1 dc in next st, ch 1, 1 dc in next st, ch 1, 1 dc in same st, ch 1; repeat from * around, sl st to 3rd ch to join – 24 dc + 24 ch 1 spaces.
Rounds 4 -11: Ch 4, *1 dc in next st, ch 1; repeat from * around, sl st to 3rd ch to join – 24 dc + 24 ch 1 spaces.
Round 12: Ch 1 (counts as 1 sc now & throughout), 1 sc in next ch space, *1 sc in next st, 1 sc in next ch space; repeat from * around, sl st to ch 1 to join – 48 sc.
Round 13: Ch 1, 1 sc in BLO in each st around, invisible join to ch 1 and fasten off – 48 sc.
Show Your Support
If you use this free pattern, please consider supporting me by purchasing a pattern from my shop. Your support will help ensure that I’m able to continue making new patterns to share. Thanks for considering! :)
Terms of Use
You are welcome and encouraged to sell any items you make using this pattern! All I ask in return is that when selling online, please credit Julie King / Gleeful Things & provide a link to www.gleefulthings.com.
You may NOT sell the pattern, distribute it in any form, repost it online, or alter it to claim it as your own. Copyright © 2011 Julie King / Gleeful Things. All Rights Reserved.


may i make this pattern and give the finished project to the homeless? also what is the gage? thanks for letting me try new things i never tried.
Hello,
I’ve been trying to find a slouchy hat pattern that I like and that can be worn year-round. I love this pattern. The yarn that I want to use is bulky and pretty much the same size as the yarn you used for the the Gumdrop Hat. I was wondering what I would have to do differently in order to make this hat using the smaller sized yarn.
Thank you,
Sarah Jane
This hat is so awesome, I am so excited to make it! I’m going to get yarn and start as soon as I get off work, thank you soooo much for this pattern. You Rock!!!!
Hi I am newish to crocheting and am really struggling with this pattern. I’ve been puzzling over it for an hour or more now, very frustrated I am not able to understand. Are you able to help me?
I struggled with round 1, until I found your step by step photographed instructions – fantastic. Worked a treat. But now try and try as I might I can not figure out round 2. Could you put up a step by step photo guide for as many of the rounds as possible? To help guide me and others not so familiar with the pattern?
Ever so grateful
Debbie,
I see you’re \having problems with Round 2. It sometimes helps me to see the pattern un-abbreviated. Then below the instructions, I gave you some guesses/tips I might have as a fellow crocheter. (if it’s in those funky brackets, I added it to the pattern, the instructions made more sense to me that way.):
round 2: chain 4. 1 double crochet in same space {as} chain 1. [1 double crochet, chain 1 twice in next dc] repeat around. slip stitch to join. (16 double crochets)
I myself am a little lost on the part in brackets. ;-) My suggestion would be to ignore the brackets and see if you get the pattern kind of close. What it might mean is chaining in the middle of the stitch:
yarn over, insert into stitch, yo, pull out of stitch and through two loops, yo, pull through one loop, yo, pull through two loops, yo, pull through one loop, yo, pull through two loops.
But this might make the stitch WAY bigger than the rest. It’s my best guess though. Hope this helps. If an experinced person could help us beginners (yes, I am a beginner w/ anything outside one-color scarves.) that’d be VERY appreciated. Thanks!
I moved the closing bracket and added an asterisk. This is how we’re used to seeing this kind of instruction. I also changed some periods to commas. There should only be one period at the end of the instruction.
round 2: chain 4, 1 double crochet in same space {as} chain 1, *[1 double crochet, chain 1] twice in next dc, repeat from *around. slip stitch to join. (16 double crochets)
oops, somehow sent this before I was ready!
I moved the closing bracket and added an asterisk. This is how we’re used to seeing this kind of instruction. I also changed some periods to commas. There should only be one period at the end of the instruction.
round 2: chain 4, 1 double crochet in same space {as} chain 1, *[1 double crochet, chain 1] twice in next dc, repeat from *around, slip stitch to join. (16 double crochets)
I hope this helps.
Very nice hat! I’ve made up a few I’m planning to document. I’m interested in how you “copywrote” it. (is that a word? lol) I would appreciate any advice about that. Thanks!
Hi I was just wondering how I can adjust the pattern to use a 5.00 mm needle and 8ply Australian wool ? I made it using this pattern and the wool and needle I have and it looks hilarious. At first I was thinking that the pattern was out but then realized that I have different wool and needle size. Any suggestions would be grand as I love this hat.
I just made this pattern, my first attempt at reading a crochet pattern, and my first hat! It’s fantastic. A quick little project, and I love the result! Thank you so much, your tutorial on reading crochet patterns really helped, too!
Hey okay so I have tried making this hat twice already and the first time I got confused so I took it apart and remade it. The second time it came out right BUT I ran out of yarn! Am I doing something wrong? I’m counting the rows out right and I am using the same hook size you said as well as the yarn and I’m on the last step(#13) and I run out of yarn. It seems like its a little more than the 80 yards of yarn.
You probably just crochet loose.
I also crochet loose and go down a hook from the one suggested. I made this using a “K” hook and it turned out perfect. I had about 12 inches of yarn left.
I understand perfectly why you would copyright and restrict the pattern that you designed, but why will you not allow anything made from it to be sold. I don’t understand.
Why should someone else profit off her pattern?
I hate that too. I’d rather them charge a couple dollars for it than restrict its use. I find that when someone sees one of my hats they then want to buy one for someone…when there’s this prohibition attached, it’s bothersome. I would rather buy the pattern for a few dollars and give credit to the designer…which is what I do with any I do sell.
Just MY thoughts. I don’t write patterns…YET. Maybe I would feel differently if I had a bunch of them out there?
I wonder if LionBrand Homespun would be bulky enough? It is a bulky yarn but not quite as much as the ones you’ve used here. I have a whole bunch of Homespun to use-any suggestions on how I can modify the pattern to accommodate? Thank you for the lovely pattern!
Perhaps if you use both the homespun with a worsted weight yarn together it will then be bulky enough. I was going to try two strands of worsted weight to make a bulky weight yarn. You could try coordination colors or different colors for a completely different look.
That sounds like it would be pretty! I’d love to see if you try it! :)
Thisis really cool!! I LOVE IT!! I’m making it for a friend! I told her its gonna be a surprise beanie then I panicked cuz I couldn’t find a pattern until I saw this. This is awesome!!
Can you send me a photo of how this pattern looks at just 11rounds? It would really help me. Please?
I love your patterns. I’m making this for my granddaughter. I wish I was financially able to buy your patterns too. Thanks! This is a blessing.
I am having trouble doing this pattern. I have been crocheting for a while and can understand patterns but once i get to the 4th -11th round, my hat is looking like a cylinder type shape. can you put pictures of what it should look like during the 4th-11th rounds so that I know I am doing it correctly?Thanks so much!!!
Mine looked the same. Just work on. It’ll come out perfect, once you put it on your head. ;-)
I have tried making this hat twice now and keep getting a hat that is too small and not long enough. Used a 9mm hook and bulky yarn. What could I do to make this one work for me? Larger hook?
Wonderful…. very easy to make… it took me only 1 hour to finish this beautiful hat! I LOVE it!!!
I <3 this pattern, super easy to make. I think I can master using regular Red Heart by doubling it up now that I followed the pattern to a TEE. Missed the gage, so I made the rest a bit bigger, ended up having to make the last 2 rows really tight so it wouldn't slip off – here's the finished work, and thanks again Julie! [im]http://assets3.pinimg.com/upload/111816003219245831_A0uRmjay.jpg[/im]
Hi! I just wanted to let you know that I mentioned this pattern in a post on my blog<3
I am making the hat right now. Is it supposed to look all ruffly while you’re making it? I’m on round 5 and it looks like a head of lettuce or something.
this pattern really does need bulky yarn, if you don’t use bulky yarn it’ll end up waaay to small and very stiff..
IT LOOKS AWESOME!!!!!!!!!!1
I will definitely be trying this soon. I really like the design. I’m always very pleased that it’s with chunky yarn, it seems there are many more hats with worsted weight!
Can u send me new patterns im tryin to do something fo ma friends
How awesome.I would like to make this hat, but don’t have the time. I run my 2 businesses,work part time & crocheting some scarves for charity right now. So,don’t have the time. Oh well, will keep the pattern & maybe someone out there will make me one. I live in San Diego & planning to move back 2 Wash. State. That’s where I’m from, an Native American making the full circle on a journey’s end. Thanks Linda
I’ll make you one Linda. What color do you want?
Hi, I’m new and I am stuck on how to do round two? What does 1dc, ch 1 twice in next dc mean?
i am sorry but i now realize what round two saying
Hi, I’m new and I am stuck on how to do round two? What does 1dc, ch 1 twice in next dc mean?
sorry about the second entry I click the submit button twice by mistake.
Tickety Boo !! How cool are you !!
I love this hat and so easy to do, thanks a bunch for sharing…
Have a lovely day.
You don’t need time to make this hat! It’s SOOO quick.
Just a tip for the next person because I had alltypes of problems with it, make the chains on your last round before the singles a little looser. I had a hell of a time getting through them!
For some reason I’m still stuck on rnd 2 :'( I’m not understanding the bracket area. Someone please help me!! Ty Ty
I have 2 teenage granddaughters and when I showed them this hat on Pinterest,they loved it! I haven’t crocheted in 15 years, but just had to get some yarn and try this. It is so easy and turned out so cute, I’m eager to make some more! Will try adding a color stripe on the next one. Thanks for offering this pattern for free,and hooking me on crocheting again!
thank you for the pattern for the slouchy hat. like to make things easy. thanks
I need some serious help i mess it up right about the 3rd round i dont know if im just reading it wrong i really, it says its simple and yet im getting so frustrated :(
I HAVE LOOKED AT SO MANY SITES AND SO MANY BOOKS TO FIND CUTE CROCHET HAT. THIS IS VERY CUTE. THANK YOU
What does “ch. 1 twice in next dc” mean???
I have a reply above where I tweaked the instruction for round 2, but in a nutshell that means you make a double crochet in the next stitch, then do one chain, then in that very same stitch you do it again (another double crochet, chain 1).
i just finish this pattern is beautiful thank you for sharing this pattern i love crocheting
I made this today, with Hometown USA yarn and a 9 needle, but for some reason mine doesn’t seem to slouch right, it’s kind of stiff. Did I do something wrong? Or stitch it too tight?
Great pattern! I had some left over yarn and was looking for a slouchy beanie that didn’t take a lot of yarn. Its quick and easy and I whipped it up in no time. Im hooked.
Robin
You need to remove yourself from ALL FREE CROCHET. You are obviously not free.
I love this pattern.. may make 1 tonight for my granddaughter. thank you
How do I make this hat large enough to fit a man with lots of hair (braids). Love your tutorials & I will purchase some things from your site. Thanks in advance.
very nice …I can’t wait to make this for my daughter and daughter-in-law for Christmas …thank you so much! I’ve bookmarked you now :-)
Hi
I love your patterns but I am not good at following them as I’m quite new to crochet.
Do you ever do tutorials as I would love to crochet the waffle scone slouched hat.
Thank you
Patricia Kelly
Hi, i’m currently stuck on round three could you explain it.
Oh my gosh, this is amazing! I was looking for something quick to do for holidays and I did this in twenty minutes. Thank you so much for posting, you’re a life saver!
Just finished the slouchy hat and I just love it. Pattern was easy to follow and my hat looks just like the picture. Thank you for this fabulous project!
I have a question on round 3. I must be reading the pattern wrong…but from what I can understand there should be 16 dc spaces created from round 2 to use in the 3rd round. However, when I write out the pattern I need more than sixteen….what do I do? Please tell me where I am misunderstanding the pattern. This is what I take it to mean for Round 3; Ch. 4 (counts as 1), 1 dc in NEXT stitch (counts as 1 [which I’ll abreviate as “1”]), 1 dc in next stitch, ch. 1 then 1 dc in SAME stitch, ch. 1 (2), **1 dc (1), 1 dc & ch.1 in next stitch (1), 1 dc (1), 1 dc in next stitch, ch. 1 then 1 dc in SAME stitch, ch. 1 (2).** To get to 24 stitches you’d repeat the part in asterisks 4 times. However, this needs 19 spaces to do so in….and only 16 were created in Round 2. What am I doing/interpreting wrong??? PLEASE HELP!
Sorry, but may I know what do you mean by [chain 1 twice in next dc] round 2 ? Is it an increase or it means I just chain 2 above the current dc? It will be better if u can show the pictures. Thanks!