Rustic Lace Basket Free Crochet Pattern
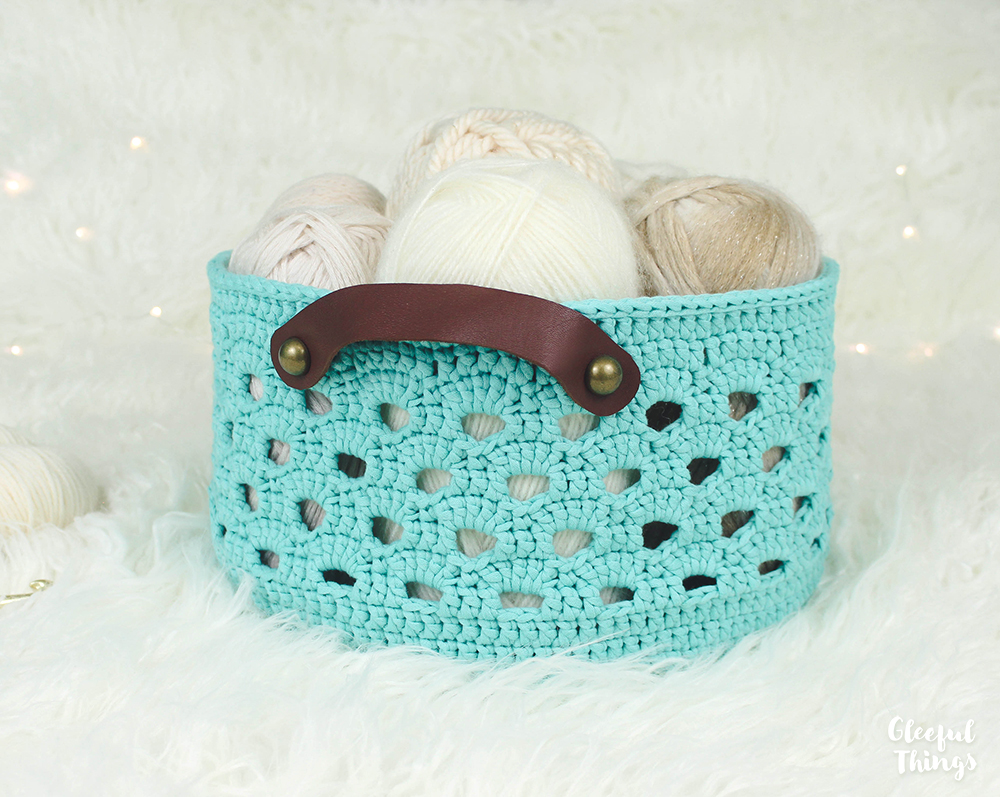
Can you ever really have too many baskets to store yarn in? I don’t think so! And it’s a plus if the basket just happens to be super cute and you made it yourself, right?! ;) The Rustic Lace Basket will be just that!
This open stitch pattern reminds me of an eyelet type of lace and pairs perfectly with leather handles, which I’ll show you how to make. There’s even a video you can follow. If you’d rather not use leather, the pattern also includes instructions for crocheted handles. So you can customize it, however you like!
Disclosure: This post contains affiliate links. If you click and make a purchase, I will receive a small commission, at no extra cost to you. This, along with the ads shown on this blog, help to ensure that I’m able to continue posting free patterns and tutorials for you to enjoy. Thank you for your support!
Why You’ll Love This Basket
- Multiple uses – I love to store yarn in baskets but there are really so many uses for them! I’ve seen people use them in their closets to store socks or scarves, store washcloths in the bathroom, or even use them to create a gift basket full of goodies!
- Lots of yarn options – Since it’s not critical that your basket turn out the same size as mine, you can always experiment with other yarns and other yarn weights even!
- Instant gratification – This is one of those projects that you could easily whip up in a day and you’ll have fun doing it!
- Easy stitches – You might think you’d need to be an experienced crocheter to create a lacey stitch like this, but this pattern uses mostly double crochets, single crochets, and chains. Even a confident beginner could make this basket!
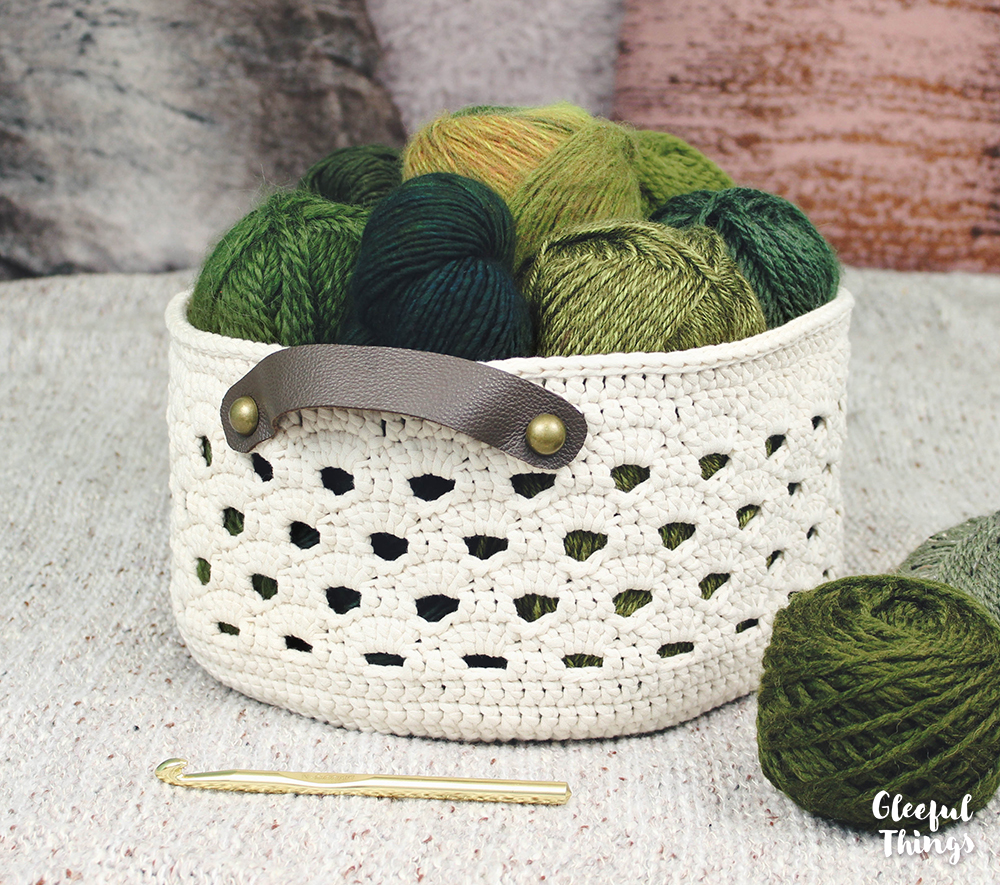
I designed this basket using Bernat Maker Home Dec yarn, which, if you haven’t tried yet, you really should! It’s like a thin tube of t-shirt like fabric. I loved the texture of it for this basket, but if you’re wanting to use something from your stash, you can easily substitute another #5 bulky weight yarn or, try it in a different weight of yarn to create a smaller or larger basket.
Yarn
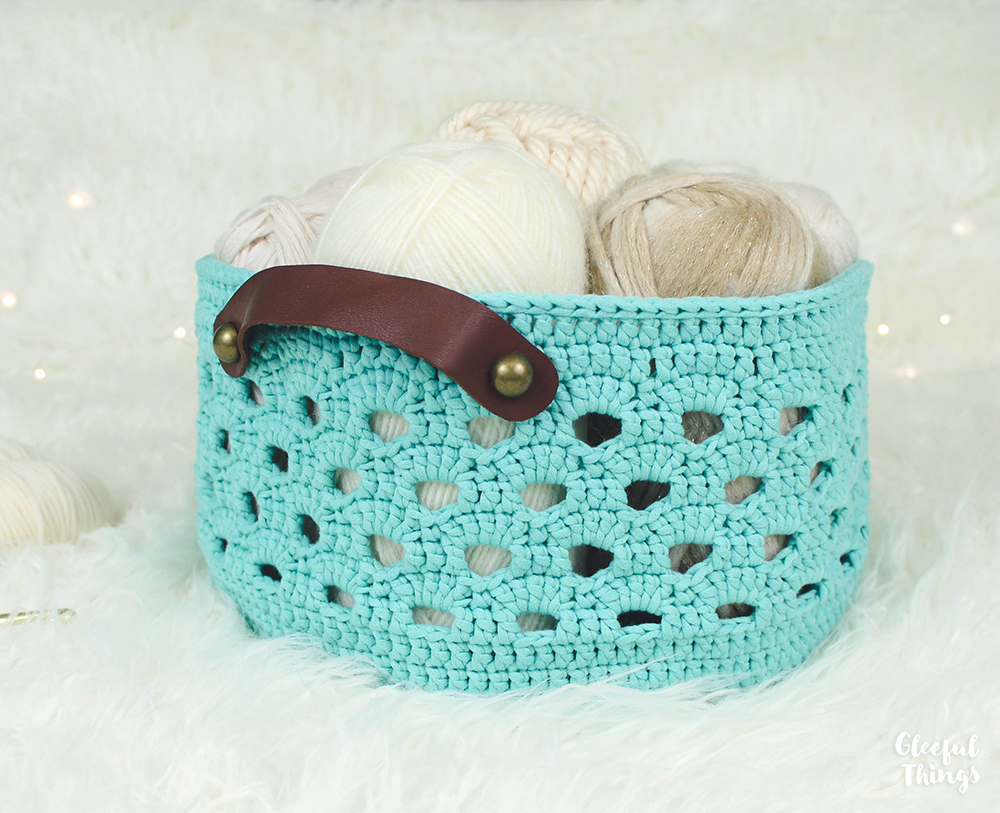
#5 bulky weight yarn, approximately 295 yards of Bernat Maker Home Dec in Aqua or Cream
Yarn Substitute Ideas
- Lion Brand Hue & Me – A pretty basic #5 bulky weight yarn with multiple plys that will give a different look than the yarn I used, but it’s easy to find and offers a pretty color selection.
- Big Twist Hush or Bernat Forever Fleece – These are both #5 bulky weight yarns as well but with a fuzzy texture and are also very soft!
- Lion Brand Mac-Re-Me – With more of a rope-like texture, I personally love this yarn for baskets! It’s a #6 super bulky weight yarn so your basket will turn out larger than mine.
- Lily Sugar ‘n Cream – If you want a smaller basket, this #4 worsted weight yarn is 100% cotton, which will create a sturdy basket. It’s easy to find and very affordable too!
Download The Pattern
You can find the FREE pattern by scrolling down. A print-friendly, ad-free PDF of this pattern is also available for a small fee. If you enjoy my patterns, please consider purchasing the PDF – your support is greatly appreciated and will help me keep the new patterns coming! :)
Supplies
- US Size H/8 (5mm) crochet hook or size needed to obtain gauge
- yarn needle
- scissors
- leather scraps (optional – for handles)
- (4) 3/4” studs or rivets (optional – for handles)
Difficulty
Easy
Gauge
15 dc and 8 rows = 4”
Gauge is not critical for this project but you do want to keep your stitches tight so that your basket is not floppy.
Finished Measurements
Diameter: 10”, Height: 6”
How to Adjust The Size of Your Basket
The easiest way to adjust the size of this basket is to use a smaller or larger yarn. If you want a slightly smaller basket, try using a #4 worsted weight yarn. If you’d like a larger basket, try using a #6 super bulky yarn. Don’t forget to also adjust your hook size to be appropriate for the yarn you’re using. You want to choose a hook that will allow you to create tight stitches as this will make your basket sturdy.
It’s also very easy to make your basket taller by simply doing more repeats of rounds 16 & 17.

Abbreviations
- ch(s) – chain(s)
- sc – single crochet
- dc – double crochet
- st(s) – stitch(es)
- sl st – slip stitch
Terms of Use
You are welcome to sell any items you make using this pattern, in small quantities. Mass production is prohibited. When selling online, please credit Julie King / Gleeful Things by linking to www.gleefulthings.com or tagging @gleefulthings. You may NOT sell or distribute the pattern itself in any form, alter it to claim it as your own, post it online, or create a video demonstrating the pattern.
Notes
- Pattern is worked from bottom up, in joined rounds.
- Ch 3 at beginning of rounds always counts as 1 dc.
- Ch 1 or sl sts at beginning of rounds do not count as sts.
Instructions
Make a magic ring.
Round 1: Ch 3 (counts as 1 dc now & throughout), 11 dc in ring, sl st to top of ch 3 to join – 12 dc.
Round 2: Ch 3, 1 dc in same st, 2 dc in each st around, sl st to top of ch 3 to join – 24 dc.
Round 3: Ch 3, 2 dc in next st, *1 dc in next st, 2 dc in next st; repeat from * around, sl st to top of ch 3 to join – 36 dc.
Round 4: Ch 3, 1 dc in next st, 2 dc in next st, *1 dc in each of the next 2 sts, 2 dc in next st; repeat from * around, sl st to top of ch 3 to join – 48 dc.
Round 5: Ch 3, 1 dc in each of the next 2 sts, 2 dc in next st, *1 dc in each of the next 3 sts, 2 dc in next st; repeat from * around, sl st to top of ch 3 to join – 60 dc.
Round 6: Ch 3, 1 dc in each of the next 3 sts, 2 dc in next st, *1 dc in each of the next 4 sts, 2 dc in next st; repeat from * around, sl st to top of ch 3 to join – 72 dc.
Round 7: Ch 3, 1 dc in each of the next 4 sts, 2 dc in next st, *1 dc in each of the next 5 sts, 2 dc in next st; repeat from * around, sl st to top of ch 3 to join – 84 dc.
Round 8: Ch 3, 1 dc in each of the next 5 sts, 2 dc in next st, *1 dc in each of the next 6 sts, 2 dc in next st; repeat from * around, sl st to top of ch 3 to join – 96 dc.
Round 9: Ch 3, 1 dc in each of the next 6 sts, 2 dc in next st, *1 dc in each of the next 7 sts, 2 dc in next st; repeat from * around, sl st to top of ch 3 to join – 108 dc.
Round 10: Ch 3, 1 dc in each of the next 7 sts, 2 dc in next st, *1 dc in each of the next 8 sts, 2 dc in next st; repeat from * around, sl st to top of ch 3 to join – 120 dc.
Round 11-13: Ch 3, 1 dc in each st around, sl st to top of ch 3 to join – 120 dc.
Round 14: Ch 3, 1 dc in each of the next 2 sts, ch 2, skip 2 sts, *1 dc in each of the next 3 sts, ch 2, skip 2 sts; repeat from * around, sl st to top of ch 3 to join – 72 dc + 24 ch 2 spaces.
Round 15: Ch 1 (does not count as a st now & through out), 1 sc in next st, 5 dc in next ch 2 space, *skip 1 dc, 1 sc in next st, 5 dc in next ch 2 space; repeat from * around, sl st to 1st sc to join – 24 sc + 120 dc.
Round 16: Sl st in each of the next 2 sts, ch 3 (counts as 1 dc), 1 dc in each of the next 2 sts, ch 2, skip [1 dc, 1 sc, 1 dc], *1 dc in each of the next 3 sts, ch 2, skip [1 dc, 1 sc, 1 dc]; repeat from * around, sl st to top of ch 3 to join – 72 dc + 24 ch 2 spaces.
Round 17: Ch 1, 1 sc in next st, 5 dc in next ch 2 space, *skip 1 dc, 1 sc in next st, 5 dc in next ch 2 space; repeat from * around, sl st to 1st sc to join – 24 sc + 120 dc.
Round 18-21: Repeat rounds 16 & 17 twice.
Round 22: Sl st into next st, ch 3 (counts as 1 dc), 1 dc in each of the next 4 sts, skip 1 sc, *1 dc in each of the next 5 sts, skip 1 sc; repeat from * around, sl st to top of ch 3 to join – 120 dc.
Round 23: Ch 3, 1 dc in each st around, sl st to top of ch 3 to join – 120 dc.
Round 24: 1 sl st in each st around, invisible join to 1st sl st and fasten off – 120 sl st.
Crochet Handles
Round 1: Ch 26, 5 sc in 2nd ch from hook, 1 sc in each of the next 23 chs, 5 sc in next ch, (working along the other side of the chain now) 1 sc in each of the next 23 chs, invisible join to the 1st sc and fasten off – 56 sc.
Use your yarn needle and a piece of yarn to attach each handle to opposite sides of the basket.
Leather Handles
Cut 2 pieces of leather that are each 7 inches long & 1 inch wide. Round the ends if desired. Use one stud or rivet on each end of each handle to attach the handles to opposite sides of the basket.
Share Your Project!
I hope you’ve enjoyed this pattern and I would love to see what you made! Please share your photos on social media and tag me @gleefulthings or use hashtag #gleefulthings. Don’t forget to add your project on Ravelry too! :)